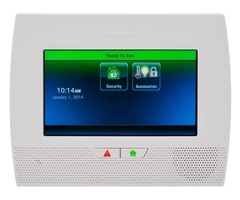
Adding a Siren to My Lynx Touch Panel Using the Lynx-WEXT
Related Products

Related Categories
Description
In this video, Joe shows users how to add a hardwired siren to a Honeywell LYNX Touch Panel using the LYNX-WEXT Kit from Alarm Grid. The LYNX-WEXT Kit ...
Transcript
Hi, DIYers. Joe from Alarm Grid. And today I want to show you how to hook up a wired external siren to your LYNX system. Now today we're going to be working with the L7000. And we have it wired up to our power supply, a wired relay, and a strobe to show you what it looks like. First, let's go over the wiring connections that you're going to have to make at your relay power supply and strobe because it's a little complicated and the instructions can be kind of confusing. So if we take a look, we have a Honeywell power supply right here. And as you can see, I have this wire going to a Honeywell transformer. And that's connected to our AC input on our power supply. Now from the power supplier, there's a couple of things that are going to happen. On the right-hand side we have our DC minus and our DC plus. The DC plus-- we actually have a jumper going from this all the way open to the normally open input or terminal on the bottom of our relay. This terminal also has to be jumped all the way over to our positive terminal trigger or a positive terminal up here on the top. And then we had to have another jumper that goes all the way down to this plus trigger terminal on the bottom. That's one of the more complicated connections of this setup. Just know you'll see this in the manual that we have posted on our website. Just know that the positive DC output on our power supply goes to the bottom normally open on the relay. That's going to jump all the way up to the positive plus terminal on the top. And that's going to go down to the trigger plus terminal down here on the bottom. Now, we have a strobe here, which is going to work just like a siren. Except it's going to be much easier on the ears. And as you can see, the hot or the positive from the strobe is making a single connection right here on the common terminal on the bottom of our relay. That's the only place it has to go to. The negative connection from the strobe-- that actually has a bunch of things that are happening. This guy is go into our negative minus terminal on the bottom of our relay right here. And this terminal is also actually connecting to our negative DC on our power supply. So as you can see, the power supply DC output-- the minus goes the negative minus and the plus goes to the normally open. That's really all the connections from this one. Our strobe-- we have our positive going into the common. And then the negative going to the negative minus. We have two jumpers from our trigger plus terminal to our positive plus terminal and from our normally open bottom terminal to the positive plus terminal on the top. Now, you might wondering what this other wire is or where this is coming from. This is actually coming from our panel itself. This is coming from the ground and the trigger terminal on our LYNX system. The ground terminal on the LYNX system-- that's also going to meet up. And it's going to connect to this negative minus terminal on the bottom as you can see. And the other wire from the trigger is going to go to the trigger minus terminal on the top. Now you're going to want to use this electronic sensitive relay for use for an external siren with the LYNX system as it is required. Now, if we take a look up at our LYNX panel to see what these connections look like-- let's go ahead and open it up. So I'm going to pop it open. you're going to see that I have taken these wires that we connected down there. We have the black one connected right to the power ground or right to the main ground on our terminal block. And we have the red one connected to what's labeled as trig. That's our trigger. With this setup and this wired like it is, it should function just fine. The next thing that we have to do to get it to function is set up a rule to make sure that the siren or the strobe does activate when it does go into alarm. Let's go ahead and close our system. I have also disconnected the siren from the system just so it doesn't blow my ears out. Keep this in mind. If you are setting this up by pulling the siren jumper or mod plug, rather, on your system, you can silence the siren. And it makes it easier for testing so you don't have to hear this thing scream in your face every time you set the alarm off. So now on our system, let's go ahead and click Tools. We'll enter the installer code, 4112. And then right here we're going to see your Rules button. So if I click that, now we're in the Rules menu. From here, I'm going to click Add New. I'm going to name it, let's say, external fire. Done. The type is going to be a Trigger Output. The action that we want is Permanent On. Now, to make this work the way we want, Start System Operation. I'm going to click this. I'm going to say Any Fire Alarm. Stop System Operation. I'm going to like this. I'm going to do Bell Timeout. Now, what's cool about the Bell Timeout is this will work when the bell times out or when you disarm the system. So it does two things. So I'm going to click Bell Timeout. I'm going to click Save. Now, this should be all set to activate our strobe when the system goes into a fire alarm. If you wanted to also-- which you probably will-- work with the burg alarm 2, you're going to want to make another rule for that. So just to show you what that looks like. If I do Add New, Name, we'll do external burg. Type, Trigger Output. Action, Permanent On. Start System Operation, we'll do Any Burglary Alarm. Stop System Operation. Bell Timeout. So now when I click Save, we have them both setup. So now when I go back to the main menu and trigger a panic alarm just to make it easy for us, we should see this strobe go off. So I'm going to click Back, Back. I'm going to just clear this trouble message we have here. So now we're ready to arm. Oh, also when you are wiring up all of your connections with your strobe and your power supply and relay, make sure you leave it unplugged just to make sure you don't show anything out or give yourself a shock, which I have done. So I'm going to go plug it in real quick. As you can see, we got lights on our power supply, which tells us that it is powered up. As long as I've done my wiring connections properly, we should see the strobe go off when I initiate an alarm on the fire or the burg. On my system, I'm going to hold down the panic button. And I'm going to click fire. And as you can see, the strobe is going off. If this was a siren, it would be making noise right now. I'm going to disarm the alarm just to stop this from flashing. And as you can see, it turns off when I disarm. And that will work with the Bell Timeout or with the Disarm. If you do have any questions about setting up a wired external siren on your LYNX system, about the relay, power supply, or any alarm questions in general, feel free to head over to a website www.alarmgrid.com. Give us a call at 888-818-7728 or send us an email to support@alarmgrid.com. Did you enjoy the video? Feel free to subscribe. And if you want to be notified when we post future videos, hit the notification button below and we'll send you an update when we do so. Thanks for watching. And have a great day.
- Uploaded