IQ Panel 2 Plus: Assigning User Codes to Partitions
Related Products


Related Categories
- Wireless Touchscreen Alarm Panels
- Small Business Security Systems
- Monitored Home Security Systems
- DIY Wireless Security Systems
- Apartment Security Systems
Description
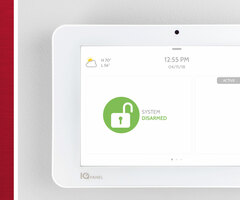
In this video, Michael from Alarm Grid shows users how to assign user codes to different partitions on the Qolsys IQ Panel 2 Plus. User codes can only be assigned to different partitions if the system has partitions enabled from within Installer Settings. Each user code can be assigned to one or more partitions depending on how much access the associated user should have. It's important to note that the Master Code is hard-coded to have access to every system partition.
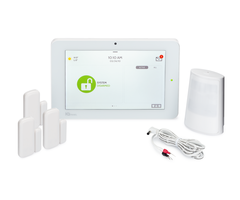
Partitioning is basically the practice of sectioning-off an alarm system so that certain zones are armed, while other zones remain in a disarmed state. It can be much more convenient than individually bypassing specific zones that you want the system to ignore. Instead, you just set up different partitions and control them individually. Up to four (4) partitions are available on the Qolsys IQ Panel 2 Plus.
Once you have enabled partitions on the system, you will assign various zones to different partitions. When the partition associated with a zone is armed, then that zone will become armed as well. Zones assigned to different partitions will remain in a disarmed state, as long as the associated partition for any given zone remains disarmed. When it's time to disarm a partition, you can only do so using a code that has been assigned access to that partition. If you try to disarm a partition with a code that does not have access, then it will not work.
Partitioning is great for situations where certain users should have access to part of the system, but not necessarily the entire system. It is common for use in multi-family homes, for secure areas, and businesses. Make sure to test your system after setting up partitions to ensure that everything works correctly.
https://www.alarmgrid.com/faq/how-do-i-assign-user-codes-to-partitions-on-the-iq-panel-2-plus
http://alrm.gd/get-monitored
Transcript
Hi, DYIers, this is Michael from AlarmGrid. And today, I'm going to be showing you how to assign user codes to different partitions on the Qolsys IQ Panel 2, or Qolsys IQ Panel 2 Plus. Once you're on a high enough firmware version, the IQ 2 supports the partitions. If you're wondering what partitions are, it's, basically, a way to section off your alarm system. So you assign different zones to different partitions. So you can arm one section of your system, while leaving a different part disarmed. Just for an example, like, just a hypothetical scenario, say you have a home, and you have an office with some secure documents. And you don't want your kids going in there, or maybe you have a suspicious house guest over, and you don't want them going into the office, so you can keep your office armed while the rest of your house is disarmed. So if they go to try and access the office, then they would need to provide a code, or an alarm would occur. So that's just one example. They're popular in businesses where you might have an employee that can have access to the main part of the building, but then there is a more secure part that you'll have on a different partition. So lots of possibilities. There are up to four partitions on the IQ 2. You don't have to use all of them. And we're not going to use all of them today. But I'm just going to give you a demonstration of how they work. And I'm going to show you how you would assign codes to them. So let's get into it. We have our IQ 2 here. And right now, partitions are not enabled. I want to show you what happens when you enable partitions. It's going to change the way that you use your system. You don't really have a way to work around this. But you'll see what I mean once I enable them. But to enable them, we start from the main screen of the IQ 2. We press the small gray bar at the top. We're going to choose Settings. We're going to choose Advanced Settings. And then we're going to enter in our installer code, which ours is at the default of 1111. We're going to choose Installation. And we're going to choose Installer Settings. And then we're going to go down a little bit, just keep going, and there you see partitions. And it says, partitions are currently disabled. So we're going check the box next to it. And it's going to ask us, are you sure you want to enable partitions? And I'm going to click OK. And once I do, it's going to kind of do, not a reboot, but it's going to take us back to the main screen. But we're going to have to provide a code before we can get in. And you're going to see that in a second here. And it's just kind of refreshing itself. And you see now, you see, we have a keypad that's come up before we can even access the system. So if we want to get in we have to provide a valid code. In our case, we're going to provide the installer code again, 1111. Welcome, Installer. And we're entering into the IQ 2. And you see now it says, Partition 1 disarmed. So I'm just going to click on this real quick, and you see there's only one partition. Why is there only one partition? Well, that's because, in order to show an additional partition, you have to have at least one zone on that partition. Partition 1 is an exception. That partition is always enabled, because it has to have something. But you won't get Partitions 2, 3, or 4, unless you have at least one sensor enrolled. So we have a sensor here today, this happens to be the 345 megahertz IQ Panel 2 Plus. So we're going to enroll a Honeywell 5800MINI to partition 2, and show you how that works. So we press the small gray bar at the top of the screen. We're going to choose Settings. We're going to use Advanced Settings. And this time we didn't have to enter a code, because we entered it at the start, so it already knows that we're the installer. So we're going to choose Installation, and we're going to choose Devices, Security Sensors, and we're going to Auto Learn the sensor. And we have our sensor down here, we're just going to fault it. And there, it requested it to be added. So that's good. We're going to press OK. And then we have our settings here. We've done zone programming in a different video before, so I'm not going to spend too much time on it. But I will point out that you have the partition right here, the partition name, and you can set it to Partition 1, 2, 3, or 4. And we're going to choose Partition 2 today. And we're going to keep everything else the way it is. We're just going to Add New. And now we have a sensor on Partition 2. And you're going to see that, when I go to the home screen, you're going to see I now have the option to arm both partitions at once, or I can do one at a time. So that's how I can arm partitions. But what we were looking for here is how to add user codes to partitions. So we're going to get into that now. So what we need to do, we need to get to the User Management screen. And we can do this using, again, the installer code, which we're already logged into. So we're going to go into User Management. And we're going to make a new User Code, and we're going to demonstrate a little bit of it. So we're going to choose Settings. We're going to choose Advanced Settings. And we're going to choose User Management. And so this is where you can see which partitions are assigned to each user code. I just want to point out the master is assigned to all the partitions hard-coded. You can't take away a partition from the master code. And it's even assigned the ones that aren't active on the system, Partitions 3 and 4, as well. But if you make a new user code, then you'll be able to assign it any partition you want to, or any partition you don't want to. You can customize it as needed. You will see that the installer code also has access to the partitions, but, remember, that you can't disarm, or arm, if you're using secure arming, with the installer code. So really that's just for accessing settings. So really, no, you're not going to be able to disarm with your installer code even though it has partition access. But let's go and make a new user code. We'll add a user. And we'll call this user Dave, for some reason. We'll call him Dave. And we'll make a code here. We'll do 4444. And we'll do it, again, to confirm it. Press the green bar. And we'll make Dave a regular user. We'll give him unlimited access in terms of the expiration date. Dave doesn't have a last name. We'll keep that blank. And you're going to see partition access over here. That's what we're focusing on. So any partition you want the user, any one we want Dave to have, we're going to click it to give him access. But let's only give him a Partition 2, so we can demonstrate this a little bit. So he won't have access to Partition 1, but he will have access to Partition 2. So we're going to add the user, and let's go to the home screen. So we have Dave added to our system now. One thing I do want to show you when you have partitions enabled, it's a quick and easy way to switch between partitions. You can just slide up on the system, you can see Partition 1 and Partition 2, back to Partition 1. And you can note the little dots on the left-hand side of the screen, right there. We have two dots, because there are two partitions enabled. If you had three partitions, then there would be three dots, four partitions, four dots. So that's what those dots on the side mean. And that's how you can switch between partitions, just sliding up or down like that. So before we show you how the user codes actually work on different partitions, we just quickly wanted to show you how to switch between different user codes, once you have partitions enabled. Right now, we're logged in as the installer. It doesn't really matter who we are logging in as right now. I'm just showing you how to switch codes. If we press the side button on the panel, we get the blank black screen. We press it again, it's going to ask us for a code when we want to go into it. So we're going to be choosing our user now based on the code that we enter. So let's try it with Dave first, 4444. And it says, welcome, Dave, to let us know that we're logged in as Dave. So let's try this again. And then let's try doing it with our installer code. And it'll say, welcome, installer, just like that. So now we're logged in as the installer. And I'll just do one more just for demonstration purposes. Let's try going in as the master. And you can pass the side button, or you can do the touch screen, either one is fine to access the system. Let's try our master code, which is called the admin code. So it'll say, welcome, admin. And that's how you switch between different user codes on the IQ Panel 2 Plus. So we're going to try arming. We'll just do-- well, it looks like-- it looks like Partition 2 is armed, stay, right now, so we're going to change that by faulting our partition to sensor. And we're going to disarm with Dave. There, you see that. See that, Dave was able to disarm the system. So now let's try arming our Partition 1. Let's try arming Stay Partition 1. And so now Partition 1 is armed Stay. And we have a different sensor enrolled with the system. That's on Partition 1. So let's activate that, and now we have to disarm. So let's try with Dave's code. And, oh, no, Dave doesn't have access to Partition 1. Looks like we'll have to try a different code. Wow, we're really running out of time here. I better hurry up, and enter the master code, because that one has access to every partition. So you see that Dave couldn't disarm the IQ2, because he didn't have access to Partition 1, but he could disarm Partition 2. That's great. So that's how you go about assigning user codes to different partitions on the Qolsys IQ Panel 2, or IQ Panel 2 Plus. It's just a matter of going into User Management, and then selecting the partition or partitions that you want. If you want to assign multiple partitions, you want to sign all the partitions, you can do that. And remember that partitions only appear if you have at least one zone on them. And if you're looking for a code that can do all the partitions, use your master code, which is that-- we have ours at the default, 1234, but change yours, because someone will guess that. And they'll break in, and that'll be a bad time for you. So if you have any questions about the Qolsys IQ Panel 2 or IQ Panel 2 Plus, or about alarm monitoring services, send an email to support@alarmgrid.com. If you found this video helpful, make sure to give it a thumbs up below to like the video. And remember to subscribe to our channel for updates on future videos. We hope you enjoyed the video. Thank you.
- Uploaded