FireFighter FF345: Program to L7000 & L5210
Related Products

Related Categories
Description
A follow up to our video on setup and install of the FireFighter FF345 system; this video will show you how to program the control panel to recognize the FF345 unit in the alarm system. Pointed out is the fact that the FF345 is not an actual smoke detector.
It is simply an excellent way to integrate your current smoke detectors with your alarm system to alert you in case of an emergency. The microphone on the Firefighter FF345 will listen for the smoke detector frequency and if detected will alert the control panel. Once that happens using the Total Control software you will receive text alerts or emails.
Additionally, you will receive alerts through the siren on the panel locally, as well as central station monitoring. The video recaps the information for you.
When programming the unit to the control panel, the system will see it as a door contact. The video ensures you understand that it does not act as a door contact, but instead it uses the same loop for monitoring.
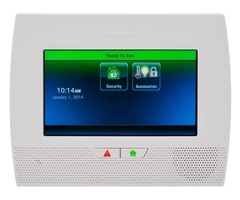
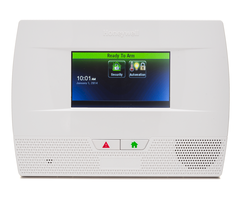
The instructional video walks you through the entire process of setting up the L7000 control panel to connect with the FireFighter FF345 unit. The process is the same for the L5210 control panel and either one can be used.
In the security menu, you will find the tools menu under “more” and enter your installer code. The video explains what to do if you have forgotten your installer number by rebooting the system and using the built-in back door installer method.
You should select the zone and edit it. You need to enter the serial number listed on the back of the unit or use the tamper switch on the inside of the FF345 unit to automatically learn the device into the system. The video covers the second method in detail.
Once the unit is learned in, the video will show you how to set up the proper loop and zone numbers. It is a vital step to ensure the device monitors and reports correctly. Follow the step-by-step instructions for these procedures.
Finally, you need to assign a zone and device type to the alert so that in the event it is triggered your alerts will display the correct information. This tutorial will explain every function and every step needed to program the device properly.
Once all the alert fields are set to your required standards that the video takes you through the set up is complete. After saving the new information, your FireFighter FF345 unit is ready to be installed in its place and monitor your home for alerts.
Our other videos cover the out-of-the-box setup, including installing the battery and testing the unit. Watch those to ensure that you understand every aspect of your Encore FireFighter FF345 unit.
Transcript
Hi, DIYers. This is Frank at Alarm Grid. We're back in the video lab, working on our Encore Firefighter FF345. It's a audio device designed to integrate your existing high voltage, 110 volt, smoke detectors. So again, this is just a listening device, not an actual smoke detector. Not designed for life safety, but is a great way to integrate remote alerts via text and email using Total Connect, as well as phone calls and dispatching the fire department for central station monitoring of your existing high voltage interconnected smoke detectors.
So we're going to jump right into programming here. At the home screen-- the same rules will apply to the L5210, which is the smaller screen panel, same programming as that. We'll work on the bigger screen here just for video purposes. And this is the FF345 here. Now this device is seen by the Honeywell LYNX panels as basically a 5816, which a door contact. Not that it is a door contact, but it's seen programming-wise as the same. It uses the same loop number. So it's going to use loop number 2, as if you were using a 5816 with a magnet.
So that's how you would program this into the panel. When this device is triggered-- in other words, when a smoke detector goes off-- and it's within 3 to 6 inches of this unit, it's going to trip, send loop 2 to the panel using the serial number on the unit. And then that will trigger a fire alarm on the panel, because we're going to set it that way on the system here.
So let's go into Security, more tools. We have our installer code on default, which is 4112. You may have it on something else. Just use that to get into programming here. Program-- if you can't get into programming, you're not sure of your installer code, you can reboot and get in the back door. We have the video Getting Back Into Programming on the L7000 or L5200 on our channel as well. You can check that out if you need to.
We'll hop right into zones. And we'll take the first available new zone, highlight it, and then click Edit. So the first thing we'll do is go into the serial number field. Now there's two ways to do this, you can either manually enter the serial number, or you can-- which is listed right here in the back of the unit on a white sticker in very small letters-- or you can learn it in.
Just so I can show you how to do it, we'll learn it in. So there's a little tab on the top of this thing. You can even just use it with your finger. When it's opened up, you'll see here, there's the battery that we've already installed in the previous video. We have also have this tamper switch here. And that's how we're going to learn in the unit.
So we can use hit clear to clear out any existing serial numbers there. We're going to press the tamper button.
[BEEP]
And you're going to hear a single beep. The second will trigger another beep. And you actually want to do a press and hold here.
[BEEP]
[BEEP]
So press and hold that second time. And you'll actually see it came through as loop 4.
Now this is a common issue. Because we have a tamper cover off, and we're learning it in with a tamper button, it's going to come through as loop 4 because that is the loop assigned to the tamper. Now again, the smoke part of this, the transmission that's going to be sent when a smoke detector is triggered, is loop 2.
So after we do this we can press this one more time. Press and hold, release it.
[BEEP]
[BEEP]
[BEEP]
And that will lock it in. Sometimes you have to do a few clicks there if it doesn't catch it. And then we want to go right into the loop number and set this to 2. That's a very important step if you auto enroll it. If you manually enroll it, it's also an important step. You want to get it off of loop 1 over to loop 2.
Then we want to go into the zone description. We can label this probably just main, main smoke detectors. We can click done. The device type, we're going to put a smoke detector.
Now when the panel reads out these zone names, it includes the device type. So you don't have to put smoke, or heat, or fire, or anything in there. It already is going to read out smoke detector at the end as the suffix, so we can put main smoke detector. Or if you have it in a specific room, and you're just monitoring one smoke detector, you can label that room here as well.
Now the next thing is response type. So there's two different response types you can choose from. It will either be the fire no verification, which would be the first time it trips it will immediately send that fire alarm to the panel. And the siren will go off and will report to the central station.
The other response type is fire with verification. This is a way that you can number one, reduce false alarms. Number two, it's a way that if you had this on an interconnected system that maybe had a smoke detector in the kitchen that frequently goes off from cooking or burning anything in the kitchen, maybe overdoing the toast or whatever it may be, this is a way that you can prevent the first trip of a smoke detector from sending a fire alarm.
In this case, fire with verification, it verifies the first one by clearing it and waiting to see if smoke is detected again. If it is, and this device is tripped again, then it will trip the second time. The fire alarm will go off. Siren will go off locally, and the central station will be notified.
So usually I recommend fire no verification, but if you do have a smoke detector near the kitchen or an area where you commonly have false alarms, definitely set it to fire with verification. So we'll leave it on that for now. We have alarm report, yes. We always want to report things, unless you just wanted to have a local fire alarm system and no reporting to the central station.
Maybe if you live in an area where your fire department requires registration, or licensing that you do not have, you may want to turn that reporting off. But generally, you want to leave that on so that we can notify the central station if there's ever a fire alarm.
So the last thing here is supervision. Supervision is something that you always want to do on RF devices. It's a way for the system to know if the firefighter comes offline and is not communicating with the panel, then it's a way for the system to know, hey, I don't see this anymore. What's going on? There's an issue here.
So that's always good to have as supervise. We would then save. We can back all the way out of programming. Always hit yes to allowing the installer back in. And then you can install this unit and test.
The way you do that is just press and hold the test button on your smokes. And you should get a fire alarm in the panel. After that you would disarm. The first disarm is an alarm cancel, and will send that to the central station notifying them that it's not a real alarm.
Then you can hit the Home key after that. They'll still be alarm mode after the first disarm. You hit the Home button. And then enter your four digit code, master user code, generally, or any other sub-users. And that will clear out the system and set it back to ready to arm, and have that green bar on the screen.
So that's how you set up the Encore Firefighter FF345 110 volt smoke detector integration module. And if you have any other questions regarding this unit, or any other smoke detectors for the Honeywell LYNX panels, you can email us at support@alarmgrid.com. And please subscribe to our channel.
- Uploaded