Honeywell 5834-4: Program to L5210
Related Products

Related Categories
Description
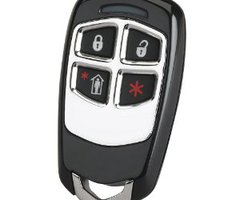
The Honeywell 5834 is a 4-button key fob generally used to remote arm and disarm your home security system. In this video we will show you detailed instructions on how to program the key fob to the Honeywell L5210 control panel.
The key fob has 4 buttons that can be programmed to 8 different functions, utilizing single and double key presses. Each button, or combination of two button simultaneous presses can be programmed in to the system. Follow the video to learn how.
As the video will discuss in detail, out of the box the key fob is ready to be installed. Each key press will require a 3-second press and hold. To test the battery out of the box, press any button for 3 seconds and you will see the LED light illuminate.
The flashing Led will vary between red and green. When it flashes red it means the key fob is in high security mode. Green flashing means low security mode. Honeywell has started shipping all key fobs defaulted with high security mode.
To program your key fob you need to enter the Tools menu from the home screen. The video will show you how to do this. Enter the installer code to access the Tools menu options. Press Programs and then Keys buttons from the menu screens.
Pressing the Add New button will populate the screen with the new device options. Follow the video to set each section for your key fob. The first is the device type. For the Honeywell 5834 this needs to read “4 button.”
The user section is where you will map the key fob to the user that will control it. If you are the master user, select master form the options. As the video explains there are other options for multiple user accounts or a guest account.
Once the account is set you will need to enter the serial number of the key fob. This number is found on a sticker on the back of the unit, or you can auto enroll the fob to the control panel. The video will show you how to auto enroll the device using two key presses on the key fob.
The panel will then show the default key maps: Arm, disarm, Arm stay and panic. These will match the icons on the key fob. While you can change these, it is recommended that you leave at least the first three as they are to avoid confusion.
Once you have mapped your buttons press the save button to lock in the details. Your key fob is now programmed to your control panel. Back out of programming to return to the home screen.
You can view our other videos to learn more about the key fob functions or the Honeywell L5210 control panel.
Transcript
Hi, DIY-ers. This is Frank at Alarm Grid, and today, we're in the Alarm Grid lab working on the LYNX Touch L5210 alarm system. This is the Honeywell self-contained wireless panel, and we're going to work specifically with the 5834-4 wireless key fob. This is a four-button key fob. It can be programmed up to eight zones using single and double button presses, and primarily is used on your keychain to arm and disarm the system, as well as a panic button if you choose to set that up, and you already have central station monitoring.
Actually, in fact, even if you don't have central station monitoring, you can still set up an audible alarm locally in the system with the panic button. The key fob can also be enrolled with the 5877 wireless garage door controller. So mapped to a specific button, you can use the key fob to open and close your garage door as well, and we'll have another video on that later. For today, we're going to show you how to program the 5834-4, as well as link it to the panel using high security mode.
Honeywell, as of about three or four months ago, started shipping all of these key fobs in what's called high security mode. Basically, what it does is it uses a rolling RF code, and it's encrypted. So it basically allows the key fob to protect itself from RF hacking and jamming and things like that. So they're being shipped that way, so you have to program the sensor, map it to a user, and also link it to the panel using the Go No Go test mode, and we'll show you all three phases of that in just a moment.
So first what we'll do is we'll pull the 5834 out of the box. It actually comes with the battery already installed, and in order to make sure, you can press and hold one of the buttons for three full seconds in order to use the key fob. Any buttons on the key fob require a three-second press and hold. So when you do that, you'll notice that you'll see, in this case, right now this one's in standard security mode, because this is an old key fob, but you'll see a red flashing light, which means it's in high security mode. If it's a green flashing light, it means you're in standard security mode, which is by nature less secure. We do recommend being in high security mode, so I'll show you how to do all that in just a moment.
What we're going to start by doing is entering programming. So on the Links panel, you'll hit the Home button beneath the Home screen. And that'll put you in the main menu. We add the Security section, followed by More, and then Tools, and you'll have a number pad pop up, where we can put in your installer code.
Now if your system's new, and you haven't changed your installer code, the default is 4112. So in this case, our panels is still on default, so we'll enter 4112. Enter Program, and then Keys. So the Keys is for the key fob. When you're in this section, we'll first hit Add New, and it'll populate all the sections we need to program.
So we'll start in the top left here and go to Key Type, and it's already on Four-Button, and we'll keep it there. The user is where we're going to map this key fob to. So if you're the master user, and this is a key fob for you, can set it to the master. If you have other users, maybe your wife, kids, any other users in the system, housekeeper, you can create their own user code for them, which we'll show you in a different video. And when that user code's created, you can select that user here in the User section. And then you can give them this key fob, and they can put it on their keychain.
So for today's purposes, we'll keep it on Master. I'm going to then enter the Serial Number field. You can either manually enter the serial number, which usually is listed on a sticker on the back of the unit, but we always prefer auto-enrolling so we can test the RF function on the unit. So once you come into the Serial Number field, it'll say enter serial number or activate sensor, so in order to activate this, again, we'll want to press and hold for three full seconds.
You'll hear a single beep on the keypad. We'll do it one more time. You'll hear it double beep on the keypad. It'll show you the serial number and the loop number. In this case, it's loop two, because I chose the Disarm key, which is not to that loop. We'll press and hold one more time, and we'll get a triple beep, and it'll enroll into the system. And it'll automatically put in the serial number and map to the appropriate zones.
Now by default, button key one, two, three, and four in the order of top left, top right, bottom left, bottom right is button key one, two, three, and four. Now the icons from the factory of Honeywell show the lock, the closed padlock, the open padlock, the person inside the home, and the asterisk for Arm Away, Disarm, Arm Stay, and a Panic button, or it can be used to open and close the garage door-- whatever you want it to do.
For today's purposes, we'll leave button key one, two, and three on default so they match these icons. And then four, we can select whatever we want. In some cases, you can set it to No Response. Let's say you have young kids, and you're worried about false alarms with the kids getting their hands on the Panic button and pressing it.
You can keep it on No Response if you like. That means this button will do nothing. You could also set button key four to 24-hour Audible, which is going to be an audible panic button. Any time you press this, it will trigger the panic alarm on the keypad. So we'll keep it on 24-hour Audible for now.
As you can see, there's some other selections here, 24-hour Silent being another one. The silent panic on this can be good in the case of a break-in, where you don't want to tip off the intruder, and you want to get the police there as soon as you can. So again, I prefer 24-hour Audible, mainly because it's something that may be in your pocket, and if it goes off, you want to know. So unless you're in a situation where you really want to have a silent panic alarm maybe separate from your primary audible panic, you want to keep this on Audible ideally. So we'll keep it on Audible for now and hit Save. We'll then back out of Programming.
- Uploaded