Honeywell 3GL & GSMVLP5-4G: Installing in the L5200
Related Products
Related Categories
Description
The GSMVLP5-4G is the unit that goes into Honeywell's wireless security systems in order for them to communicate via 4g cellular networks. It will work in either the L5100 or the L5200 (which is the newer Honeywell system). For the L7000 the 4GL communicator is necessary to have the system communicate over the AT&T 4G network.
Transcript
Hi, DIYers. Sterling from Alarm Grid here.
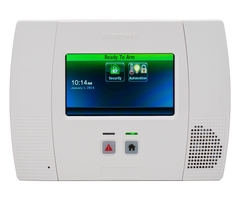
Today, we're going to have show you how to install a GSMVLP5-4G cellular alarm communicator into your L5200 wireless security system. The L5200 supports many different forms of communication; Internet, cellular, phone line, and Z-wave communications. We've shown you videos on how to install the L5100 Z-wave module, and the L5100 Wi-Fi or ILP5 module for Internet monitoring. Now we're going to show you how you can get cellular monitoring with your system.
The reason you would add this item is if you wanted Total Connect service, which allows you to arm and disarm this panel remotely from a computer or Smartphone. It also allows you to receive text and email notifications when the alarms go off, so it's a great option for knowing what's happening with your system. You would also use the GSM if you wanted cellular monitoring service, so that the central station would receive your signals from your panel through this device. It goes out over the AT&T wireless network, hits into the central station so that no phone line or Internet is needed on property to get monitoring with your Lynx Touch L5200 system.
You'll see that the GSM will come installed with a SIM card. You have to use the SIM card that it comes installed with. You cannot swap this SIM card out for a prepaid SIM or any of your existing SIM cards. When you sign up for service with an AlarmNet provider, they are activating the SIM card and you will normally pay a premium on your monthly service to get cellular monitoring. The reason we suggest doing so is that it is a more secure communication path, if you go with the ILP5 Internet Communicator or the AL5100-WIFI Communicator, both of those that will rely on your Internet service.
So where your security system has a battery backup, if you're only using the Internet for monitoring, then your router and your modem may not have a battery backup. If you have a power outage, the alarm will go off; the signals will go nowhere, because the Internet is unavailable.
Also, Internet cables are normally exposed on the outside the house, therefore, they're open to line cut issues. If the criminal cuts the line before they break and Internet is your only path, your alarms will not go out. Finally if your Internet service provider ever has a glitch, if you ever have to reboot your router, if they ever have to reboot things from their server, your alarms will not go out when the Internet service is unavailable. So that is why people opt to add the GSM as a backup sailor path. It's more secure. You pay a little bit more, but its better security.
So now that we've gone over what the GSM does, we're going to show you how to install it. The first thing you're going to need to do is open up your L5200 Control Panel. You press it down on the tab at the top. Start with one at a time. The front will separate from the back. You'll hear it go into cover tamper. You can press any button to silence it. You do the second tab to open up the panel.
The panel can be powered either from a connection to the screw terminals here, or by using the LT cable and simply plugging in the DC connector here. We use the LT cable to make it nice and easy with this desk mount. So we disconnect our power. The panel is still powered because there's a battery backup, so we disconnect the battery, and now the panel's power down. You always want to power the system down before you make any modular additions to the panel.
You'll notice on the inside here that we have our L5100-Z-wave module here on the left, and we have our L5100-WIFI module here on the right. You'll notice that we've included these in this video to show you that the GSM will still fit with both those modules. So while none of these come by default with the panel, the L5200 does support Wi-Fi, Z-wave, and GSM all together.
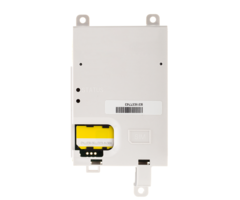
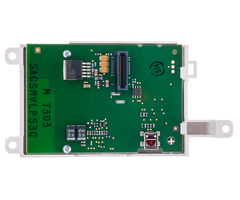
So to install the GSM, you'll notice that there is a horizontal port on the board right here. There is a matching horizontal port on the GSM. Because they're both female ports, you need a connector. That's what this little circuit board is. It comes with the GSM, OK. It says GSM and L5000 on the board. It's just a connector board. There's no up or down, you simply insert it into the slot. Now you have a male connection to match a female connection on your GSM. You line it up, and you push it down into place.
The GSM includes three little screws to hold it tight. We recommend that you screw the screws down nice and tight, especially if you're going to be doing the desk mount like we're showing here. That way if the panel is moved around, the GSM won't rattle in the unit and cause any issues. So we screw down the screw at the top, and then there are two for the bottom.
OK, GSM is installed that simple. You'll notice that on a sticker towards the bottom of the GSM, there's some information here. The MAC address that starts 00 Delta 0 2 Delta is the number will need to activate the device. We will also need to see CRC number, Charlie Roger Charlie. That is a four digit alphanumeric number. With both those numbers, we can activate the module with the AlarmNet server to give you access to your system. So you should make note of those numbers when you're in there. It's not critical. There is a way to get those numbers out the panel programming, but since you're doing the install, you might as well make note of those.
Now that it's installed, we're going to provide power from the wall, we're going to plug in our battery backup, and then we can close up the panel, OK. Now the panel goes through its normal boot sequence. It takes about a minute for it to come on. You'll notice it says "system stand-by" at the top in red. You can wait a minute, or you can press and hold the home key, which switches over ready to arm. Now the system is ready for you to activate your monitoring service, OK. So that is the GSMVLP5-4G installation.
If you have any questions about the communicator, or the cellular alarm monitoring, please send us an email at support@alarmgrid.com. And if you subscribe to our channel, you can see all the future videos that we show you about the Honeywell product.
- Uploaded
- Duration: