How to Set Up Scenes on the Honeywell L5100
Related Products
Related Categories
Description
FEATURED PRODUCT(S)
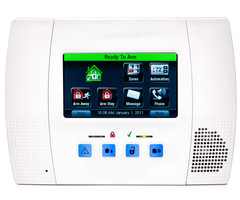
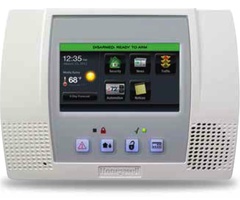
Honeywell L5100 - LYNX Touch Wireless Alarm Control Panel https://www.alarmgrid.com/products/honeywell-l5100
Honeywell L5100-WIFI AlarmNet LYNX Touch WiFi Alarm Monitoring Communicator https://www.alarmgrid.com/products/honeywell-l5100-wifi
TRANSCRIPT
ALARM GRID
This video was made by Honeywell and proudly distributed by Alarm Grid Security monitoring and accessories http://www.alarmgrid.com. Alarm Grid is a home security company focused on the experience of the customer. We offer no contract alarm monitoring that allows you more choices without sacrificing the quality of your monitoring. We are here to help you protect your life's most important assets without the hassle of being caught in a contract with no way out.
Transcript
Using scenes you can control a single or a group of devices together. For example, one scene might lock the door, dim the lights, and lower the temperature. The LYNX Touch 5100 has 20 scenes that you can configure with up to 10 devices. Here's how to do it:
From the home screen select the automation icon, select the scenes icon, select add new scene. To name the scene, select the clear icon; then enter a name. In this example, we'll name it away. When finished, click the done icon. To save energy, we want our hall light off when this scene is enabled.
Select add new device. The system will show you the available Z-Wave device types. Select the switches icon, select the hall light tab, select the off icon, select save. To save energy we want to set back our thermostat. Select thermostats, select main T-stat, select mode until you see the set sack icon. Select the up or down arrow, until the heat set point is set to 63. Select the up or down arrow, until the cool set point is set to 83; select save.
Now we want the door to lock when this scene is enabled. Select locks, select front door, select locked, select save. Select the back icon until you return to the home screen. Now we would like to create a new scene for when we arrive home. From the home screen, select the automation icon, select scenes, select add new scene.
To name the scene, select clear; then enter a name. In this example, we'll name it arrive home. When finished, click done. We want our hall light to turn on when this scene is enabled. Select add new device. The system will show you the available Z-Wave device types. Select switches, select hall light, select on, select save.
We want to set the thermostat to room temperature when this scene is enabled. Select thermostats, select main T-stat, select mode until you see the setback icon. Select the up or down arrow, until the heat set point is set to 68. Select the up or down arrow, until the cool set point is set to 78; select save.
Now we want the door to open when this scene is enabled. Select locks, select front door, select unlocked, select save. Select back until you return to the home screen. Creating rules will allow you to tie the home automation scenes to events from the security system. For example, when you arm your system in the away mode, you may want to automate your lock and lights and thermostats.
From the home screen, select the automation icon, select the rules tab, select the rule one tab, select the edit icon; select the name tab. Type in a name for this rule. In this example, we'll call it away rule; select done. Select the type tab several times until you see scenes. Select the scene tab.
You should see the scenes we created earlier. Select the away tab; select the action tab until you see run scene. Select the system operation one tab, select arm away; select save. We now need to create another rule for when we arrive home. Select rule, select edit, select name, type in a name for this rule. In this example, we'll call it arrive rule; select done. Select type until you see scenes. Select the scene tab. You should see the scenes we created earlier. Select arrive home, select action until you see run scene, select system operation one, select disarm; then save. Select back until you return to the Home screen.
In order to allow your door lock to disarm your security system when you enter, you need to create a master user. Here's how to do it. From the home screen, select the more tab, select the tools icon, enter your master user code. This code is given to you by your dealer.
Select the user's icon, select the master tab, select edit, select the Z- Wave lock control tab to yes, select the Z-Wave unlocking door tab to disarm, then save. Select back until you return to the home screen. For this example, when you open your front door lock, your system will disarm. If your home automation is tied to your security system, home automation events will occur.
- Uploaded
- Duration: