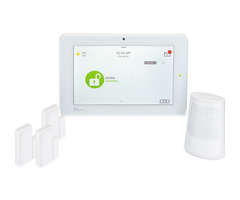
Installing and Using the Qolsys IQ Panel 2 Part 4
Related Products


Related Categories
- Small Business Security Systems
- Monitored Home Security Systems
- DIY Wireless Security Systems
- Apartment Security Systems
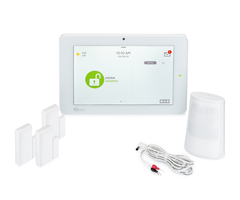
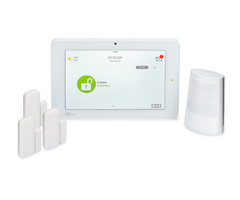
Description
In this video, Michael from Alarm Grid covers part 4 of our installing and using the Qolsys IQ Panel 2. This part covers arming and disarming the system, bypassing sensors, adjusting the arming settings, entry and exit delays, and automatic Bluetooth disarming. You will likely arm your system daily.
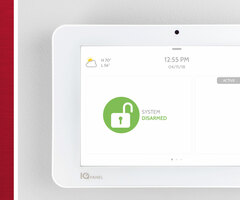
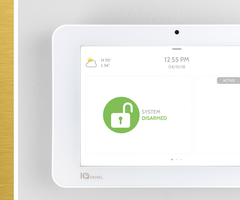
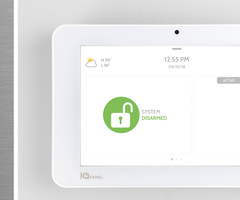
Arming and disarming your Qolsys IQ Panel 2 is something you should definitely know how to do if you use the system on a regular basis. When the system is in an armed state, then various zone types will be able to cause alarms on the system. This includes Entry/Exit, Interior, and Perimeter zones. When the system is in a disarmed state, then only 24-hour zones can trigger alarms. Some examples of 24-hour zones include panic switches, medical alert buttons, and life-safety sensors like smoke detectors and carbon monoxide sensors.
Depending on your system settings, you can arm a Qolsys IQ Panel 2 without needing to enter a code. But you will need to enter a valid code when you go to disarm the system. The system requires you to enter a valid code as a way of confirming your identity and making sure that you are authorized to use the system. If an intruder breaks in, then you do not want them to be disarm the system. That is why it is important that your system only has codes that you and the other people who use the system will know. It is also important that these codes are difficult for others to guess. If an intruder guesses a code correctly, then they will disarm the system!
The Qolsys IQ Panel 2 has various arming settings that you will want to properly configure when you go to set up your system. You can also set up your phone with the system as a Bluetooth device. This way, you can have the system disarm automatically when you return home and your phone is within Bluetooth range.http://alrm.gd/get-monitored
Transcript
Hi, DIY-ers. Welcome to part 4 of our using the Qolsys IQ Panel 2 or IQ Panel 2 Plus system. Today, we're going to be focusing in on arming the system, disarming, and setting the arming settings. So first of all, we have a system right here I just want to show you basically how you're going to arm the system. This is something you will do every day. Remember, when a system's in its armed mode, that more sensors will be able to trigger alarms, particularly entry-exit sensors among other zones. They'll be able to cause an alarm on your system. Now, you actually have two arming types-- Select arm system type. Which are arm stay and arm away. You want to use arm stay when there's going to be somebody in the building, maybe it's nighttime, you're going to sleep, and you might be moving around at some point. So interior zones won't be able to trigger an alarm on the system. You only want to shoot his arm away if nobody is going to be in the building. So that way, interior zone, it would be able to cause an alarm. So you only want choose that if nobody's left the building. Now the difference between these two, when you arm stay, assuming you have the setting enabled to skip the exit delay, I'm just going to arm right away. So I'll show you that right now. Arm stay. It immediately goes into arm stay mode. And if I were to fault an entry-exit zone like that, then it would give me an account down and I'd have to disarm in that period. And I'm just going to go ahead and press it. And then I'll enter my master code, which we kept at the default. System is now disarmed. And it disarms. So now, I'll show you arm away. Select arm system type. Countdown selected. And as you can see, it gives us the countdown. If I wanted to extend the countdown, I could press this plus 60 down here. Exit delay extended. And it gives me more time to exit the building, get all my stuff together, and leave before the system goes into its arm away mode. And we're just going to cancel that. We don't want to wait for that to run down. So that's the basics of arming and disarming. Now, I'm going to show you how you would adjust the arming settings. And actually, before I show you the arming settings, I do want to show you how you would bypass a sensor. When you bypass a sensor, that means the system knows to ignore that sensor and it won't be able to trigger an alarm on your system. Maybe you left a window open, or maybe you just don't want a particular zone to be able to cause an alarm on the system you would bypass the sensor. So that way you don't have to delete it entirely. You can use it later, just for this one time. So what I'm going to show you now, you just click the button. Select alarm system type. And then there's this little arrow button on the side of the system, on the side of this box. You just press it. And you go to All, because our sensor is not active right now. And we have our liquor cabinet and you just click the button to bypass. And then when I go to arm stay or arm away. Arm stay. Liquor cabinet bypassed. It bypasses the sensor. So now, our liquor cabinet won't be able to cause an alarm on the system. So that's how you would bypass a zone on the IQ Panel 2. So now, I'm going to show you how you would change the arming settings for the system. It's pretty easy to do. So what you do, you just press the small gray bar at the top. And then Settings, Advanced Settings. Enter user code. And then you enter your installer code, which are set at the default, 1111. And then you go to Installation, and then you go to the Security and Arming section. That's what we're going to be focusing on this part. So you have several settings in here. I'm not going to cover all of them but I'll cover the ones that are most important for arming. So what you'll do is you'll scroll down and you'll see the Arming section, which is what we're going to focus on here. So you have an option to enable secure arming, which would mean that you would have to enter a valid code to arm the system. This is if you want to have to enter a code before you arm, you can enable that. We'll keep ours disabled. You can have the system refuse to arm if the battery is low, when there is a power outage. So that way, the system won't just power off. You would have to address the problem-- maybe replace the battery or charge the battery before you'd be able to arm the system or plug it back in. You can have auto bypass enabled, which ours is enabled right now. So when this happens, a sensor that's active, it will automatically be bypassed. So the system will ignore it and it won't be able to cause an alarm on the system. So like I said, if you left your window open by mistake and it was still open, the sensor was still faulted, then it would know to bypass the sensor automatically. So we'll keep ours enabled here. And then we have Auto Stay arming. So what that means is if you have an entry-exit zone, when you go to arm away, you need to fault at least one entry-exit zone during the exit delay countdown or else the system will revert to arm stay mode instead of arm away. The reason that it does this is because it assumes, hey, you never left the building. You never activated an entry-exit zone. Someone must still be inside the building. You never left. So it knows to switch to arm stay instead of arm away. But you can disable that so that way the system will go into arm way even if you don't fault an entry-exit zone. We'll leave ours set to the default there. Auto Exit Time extension. So what that means, it will extend the countdown timer if a delay door is opened twice during the countdown process. So that basically means if you go out your entry-exit door and then you come back in, then it extends the timer. And the reason for that is it assumes, hey, maybe you forgot something. You left, you went out to your car, and then you came back in because you forgot your wallet or your purse or your phone. It knows that, hey, you're still in a building, so it's going to give you a little bit more time to get your stuff together and leave in time. We have some key fob settings here. I'm not going to cover those right now. That's a setting that you could use your master code to access the arming settings. We could just use our installer code. That's fine. So now, I want to get into your entry delays and your exit delays. Now, you have two types. You have normal entry and exit delays and you have long entry exit delays. Now, if you're only using Sensor Group 10, you're not using Sensor Group 12, Sensor Group 12 is the extended long entry-exit delays. If you're only using Sensor Group 10 for your entry-exit delays, then you only have to worry about the normal entry and exit delays. So I'm just going to talk about those first. Your entry delay is when you're entering your home when your system is armed, you've armed stay or you've armed away and you've activated an entry-exit zone, you're going to have a certain period of time to disarm the system before an alarm will occur. That gives you a chance to enter your code, set your stuff down maybe, get all settled, and disarm the system. And you can set that setting here. That's your normal entry delay. And you can set it in seconds. So you can scroll around. Let's set to 35, we'll just click OK. You can also manually enter it and you just click Set, and then that changes the setting. Now your exit delay is when you're leaving, you're going to arm your system. And when you're arming away, you're going to have a certain amount of time to get out of the building before it'll be armed and you'll be able to trigger an alarm on your system. So that's your exit delay and you can set it just like you would your entry delay. Now, I do want to get into the long entry delay and the long exit delay. If you have at least one sensor programmed to Sensor Group 12, that's the long exit delay as opposed to Sensor Group 10 which is the normal entry-exit delay. Then what's going to happen is when you go do your to do your exit delay, when you're arming your system to leave, it's always going to do the long exit delay. Your normal exit delay is not going to be in effect. You're never going to use that if you have one sensor programmed to Sensor Group 12. Now, the entry delays are a little bit different. What you might have is you might have some sensors set to-- you might have your front door for instance set to the regular normal entry-exit delay, Sensor Group 10. And you might have, say, your back door is set to Sensor Group 12, the long extended entry-exit delay. So what would happen is if you had your system armed and you activated your front door, let's say that's your Sensor Group 10, the normal entry-exit delay, then it's going to give you the normal entry delay period that you set here. But then let's say you enter through your Sensor Group 12, the back door for instance. Then it's going to give you the long extended entry delay. That would be in the case that maybe that sensor is a little bit further away from the system, you need more time to disarm so you can give it a different setting here that you can set in this menu right here. So now, I'm going to show you how you would set up Bluetooth disarming. This is a pretty cool feature for the IQ Panel 2. If you're walking up to your home, and you have Bluetooth enabled on your phone, the system will know to automatically disarm. So you won't have to actually disarm your system. It'll just detect the Bluetooth from your phone. So it's a prequel feature. So what you do, you press the small gray bar at the top, and you choose Settings, Advanced Settings. Enter user code. And then you don't enter your installer code here, you actually use your master code which is going to be the code you use to arm and disarm regularly. Ours is set at the default. So we'll do 1234. And then we choose Bluetooth devices, and then we go to Add Phone. And now, it's going to search for our phone which we have here. And it'll take a minute for it to find it, so just be patient. OK, so we have our phone Jimmy D33DD, that's our phone name. And we're going to press that. And then it gives us our parent code which we can also see on the phone. We'll just press Pair on our phone, and we'll press Pair on here. And now, we're done with our phone here and we can just set it up on the IQ Panel 2. We'll give it a name, or I guess it sets the name automatically. You can't change that. You can't change the Mac either, but you can choose whether you can allow disarming or disable disarming. So if you just wanted to have your phone paired but it wasn't going to disarm the system, then you could do that. But we'll have ours allow disarming. So we'll do that and then we'll click Save. And the Bluetooth device is added successfully. We can just return to the home screen. So one last thing we want to show you on the Bluetooth disarming. There are some settings that you will want to configure when you're working with this feature. So you press the small gray bar at the top, Settings, Advanced Settings. Enter user code. And you can access this menu through your installer code or your dealer code, but we're just going to do it through the master code here. So ours is set of the default, 1234. And then we have Bluetooth devices here. And so when you go into Settings, you can see that there is a Bluetooth enabled option right here. You want to make sure that's check if you're using automatic Bluetooth disarming. And you also want to have the Bluetooth disarm enabled because otherwise it won't actually disarm when you return home. So make sure those are set out with the marks there. And also, you see this Bluetooth Disarm Time Out button. So what that means is when you go to arm your system, it's going to wait a few minutes before it actually will do the Bluetooth disarming. The reason for that is because if you're at home, you're arming your system and you have your phone on you, you don't want it to just disarm your system right away because you have your phone in present. So it'll give you a timer that you set here and you can go, you can go away, you can go to work, whatever, and then it will disarm once you return later. So we have ours set to 10 minutes here. I'm actually going to reduce this down to one minute just so we can show it for the example, because I'm going to leave for a bit of an arm this system and then we're going to show it do the automatic Bluetooth disarming. So I'm going to set that to one minute and then I'm just going to go back and we're going to go. So I'm going to return home, and now we'll show you what the feature looks like after I arm the system. We'll do that here. Select arm system type. So I just did arm away. And we'll let that count down and then we'll show you the automatic Bluetooth disarming. System is now disarmed by Galaxy J7 V. And as you can see, while I was away, I left the building and then came back, it did automatically disarm the system. And that concludes part 4 of our using the Qolsys IQ Panel 2 system. We showed you how to arm, disarm, and how to set the arming settings, and how to set up Bluetooth disarming for your phone. If you enjoyed the video, please click the thumbs up button below. And click the Subscribe button to subscribe to our channel to receive updates for our future videos. And if you ever need any help, or you have any questions, you can always email us at support@alarmgrid.com. Hope you enjoyed the video. Thanks
- Uploaded