Installing and Using the Qolsys IQ Panel 2 Part 1: Powering On
Related Products


Related Categories
- Wireless Touchscreen Alarm Panels
- Small Business Security Systems
- Monitored Home Security Systems
- DIY Wireless Security Systems
- Apartment Security Systems
Description
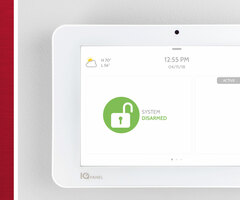
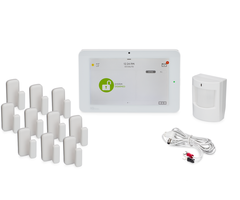
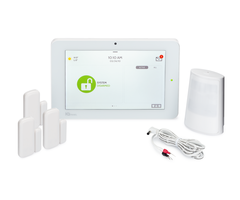
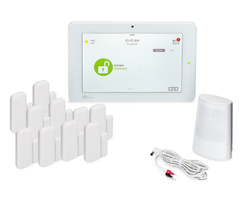
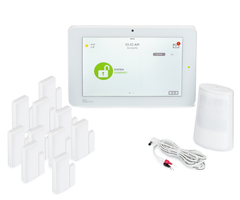
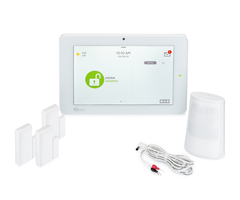
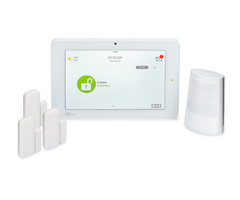
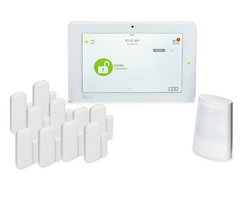
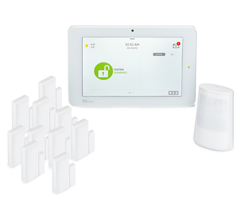
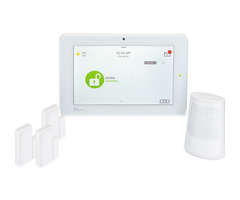
In this video, Michael from Alarm Grid shows you how to power on the Qolsys IQ Panel 2 System for the first time. You must connect the panel to its transformer using the included power wire and plug the transformer into a wall outlet. The system will power on when you press and hold the side button.
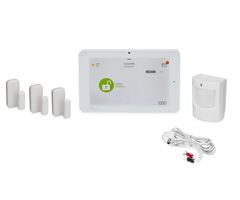
The Qolsys IQ Panel 2 is an excellent system for DIY users. The system is extremely simple to use, and the entire installation can be completed using just a screwdriver. The panel comes with everything you need to power it on, and you can even prop the panel up on a desk or table using its included table stand. This way, you do not need to mount the panel to a wall. This is perfect for users who may not want to drill holes in the wall, as well as those who are renting or live in an apartment.
When you first power on the Qolsys IQ Panel 2, you will be greeted by a setup wizard that will walk you through the entire initial setup process. This includes connecting the system to a local WIFI network and enrolling sensors to the panel. If your system is monitored, this is also a great time to register its cellular communicator. Remember that you will need to provide the IMEI number for the system to your alarm monitoring company. The setup wizard also helps you with setting up smart home automation devices.
If your system is not yet monitored, you can still go through the setup wizard and complete the setup process. But there are some actions you will not be able to perform, such as connecting the system with Alarm.com. You can always go and activate the system for monitoring later on. Remember, monitoring the Qolsys IQ Panel 2 is very important, as that is the only way to have alerts sent out to you and/or a central monitoring station when alarm events occur. It is also needed for controlling the system through Alarm.com.
http://alrm.gd/get-monitored
Transcript
Hi, DIYers. This is Michael from Alarm Grid. And welcome to part one of our installing the Qolsys IQ panel to system. This applies to a Qolsys IQ panel 2 or a Qolsys IQ panel 2 plus. So, in this part-- this first part-- we're just going to show you the basic wiring powering on the system for the first time. It's very simple. It's very easy system to use. So what we're going to do is-- you see that this system comes with the power cable. This is actually the one that it comes with, right here. It's got a positive end and a negative end, as you can see. And then, there's a barrel connector that's actually going to go right to the back of the system. First, what I'm going to show you is just connecting it to the transformer. Now, this is a DC transformer so polarity is going to matter. So you're going to have to make sure that the color wire goes into each of the proper sides. So we have our positive side, red for positive. So we're going to take our red one and this is also the one with the dash lines. As you can see, the positive is going to have the dash lines on it. This is actually the cable that comes with it. So you're just going to take it and put it into here. And then we have our screwdriver over here and we're just going to screw in. And we want it to be tight, so it's firm. But you don't want to make it too tight because it can cast bronze if you need to remove anything later. So let's do the quick tugging. Looks good. Now, we have our negative, that's black. And this is the solid wire. It's not dashed. There's no gray dash on it. So we're going to take it in. And then secure. Same as before, just tight but not too tight. That's good. Give it a quick tug. So our transformer is wired in on that end. Now, what we're going to do-- we have our barrel connector that's just going to go right into the back of the Qolsys IQ panel 2 system. You see, there's a barrel connector right there at that little black part. So we're just going to take it and just put it in. Just like that. And you'll also see that the system comes with a back plate. This is just for making it neat and tidy. Now, you'll see that there is a wire coming out of the system. Now this is actually the antenna, for communicating with sensors. So you want this to be outside the panel. Otherwise, if you tuck it in somewhere, that can cause frequency problems later on-- transmission problems. So you're going to want to leave it outside. So what you can do is you can actually just hook it around that. So you hook around that loop right there. And then this can just kind of go as such you don't need to hook around anything. And you'll take your back plate. And you see there's a little indentation part, that's going to go over the wires there. So you just kind of slide it in. Snap it into place. And you're good to go. So then you just take your transformer and you just plug it into a usual outlet. I actually have one beneath the desk here. So we're just going to go and plug it in. And now it's plugged in. So now we have the system. And to power it on, what you're going to do? You're just going to pull down the button down there. And you have to hold it down for a little bit, don't just release it right away, like give it a good moment. Otherwise, it'll just shut off. And as you can see when the light is solid, that's enough. It will take a second for it to power on. So you can see the green flashing LED, that's a good sign that it's powered on successfully. And when you boot this up for the first time, it's actually going to go to a wizard to help you install the system. So we'll get to that in a second. It does take a minute to boot up. So we'll just wait for that. And I almost forgot you might want to see the table stand for the Qolsys IQ panel 2 system. It's very simple device here, you just put it on the back. And this way, you don't have to mount the system to a wall. You don't have drilling holes. You can install the entire system with just a screwdriver. So what we're going to do, you just have it here. And so it, literally, just goes in there and you push up, and it sticks into place. And then you can have this system standing like so. So then, as you can see, now that we have the system powered on, we have it at the wizard menu. This is what you'll see the first time you turn on the system-- if you are using this system for the first time. And this is actually going to help you use the system-- help you set it up for the first time. If you're new to the system, it will cover everything you need to know. But we'll get into that into the second part. So if you did enjoyed this video, please click the thumbs up button below to like this video. And you can click the bell icon to subscribe to our channel, if you want to get updates on future videos. And if you have any questions, you can email us at support@alarmgrid.com. We hope you enjoyed the video. Thanks
- Uploaded