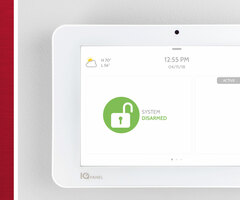
Installing and Using the Qolsys IQ Panel 2 Part 2: Setup Wizard
Related Products


Related Categories
- Wireless Touchscreen Alarm Panels
- Small Business Security Systems
- Monitored Home Security Systems
- DIY Wireless Security Systems
- Apartment Security Systems
Description
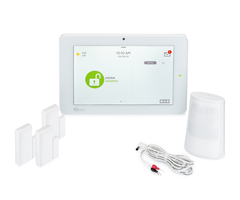
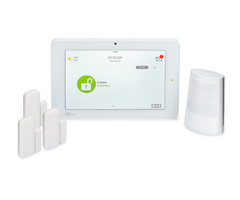
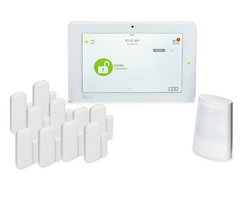
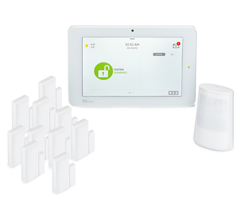
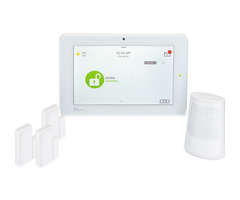
In this video, Michael from Alarm Grid goes through the Setup Wizard that appears when you first use a Qolsys IQ Panel 2 System. This Setup Wizard is very helpful, as it covers the initial setup process. Some parts of the Setup Wizard will require the system to be monitored, though this is optional.
Going through the Setup Wizard for the Qolsys IQ Panel 2 System is optional. You can technically set everything up through the regular system menus. But the Setup Wizard is nice, as it puts everything in one convenient spot. The typical end user should have no trouble completing the Setup Wizard, as it is very simple and easy.
There are many tasks you can complete using the Setup Wizard. One of which is connecting the system to a WIFI network. The system uses WIFI connectivity for connecting with Alarm.com. It also uses cellular communication for this purpose. Remember, you must activate the cellular communicator to use the IQ Panel 2 with Alarm.com. You cannot use connect the IQ Panel 2 with Alarm.com through WIFI alone. You will need to provide the IMEI number for the system to your alarm monitoring company to activate the cellular communicator.
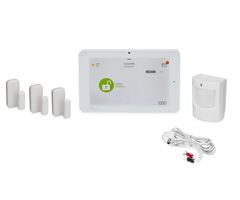
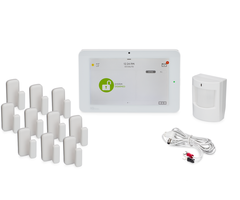
Another thing you will do using the Setup Wizard is enroll sensors. The system uses sensors to determine when certain actions occur in your home or business. When enrolling sensors, you should make sure to have a good understanding of the Sensor Groups you use. The Sensor Groups determine how the system responds when sensors are faulted or activated. You need to make sure you choose the proper Sensor Groups, or else the system will not work the way you want it to.
You can also use the Setup Wizard to add new user codes to the system. This can be be helpful if you have multiple people using the system, and you don't want them to share codes. It is recommended that you change the Master Code away from its default of 1234. You should choose a new Master Code that you can easily remember, but others are unlikely to guess.
http://alrm.gd/get-monitored
Transcript
hi-dee-hi wiris this is michael from alarm grid and today welcome to part 2 of our installing the closest IQ panel to system so as you saw in part one we power down the system we connected it to the transformer and plugged it into an AC outlet and powered on the system and now we have the system powered on and we're at the wizard menu that appears when you start up the IQ panel - or IQ panel - plus system for the first time and we're just gonna go through the menu and show you what everything looks like we're going to enroll some sensors get it connected to a Wi-Fi network and we're gonna show you how to go about enroll starting up the system so of course you get a nice welcome screen at the main screen the system you want to make sure your system is plugged in ours is plugged in and we're just gonna click the start button here and so the first thing you're going to do is you're going to connect to a Wi-Fi network now our Wi-Fi network is called alarmgrid so we're gonna go and click that and now we have to put in our password here and now it's connecting to the network so we're just going to give it a moment here or actually I'm sorry I have to press the connect button on it first and that will connect it to the network and it's connected well it's checking the internet connection first so you just have to give it a minute be patient no it will connect as long as you did everything correctly and as you can see ours did we are connected successfully so we're gonna go to the next button here down in the bottom right corner and now it's doing the dual path check as you know the IQ panel to system it has a built in Wi-Fi card and it has a built in LTE cellular LTE card so that's for dual path for connecting with alarm comm and so it's just gonna go ahead and check the battery and power settings and everything there so it's checking z-wave as you know it does home automation so it's just gonna go and go through everything so we'll let it run its course and as you can see it is connecting to a cellular network but ours is not set up for sale your solar yet you'd have to talk to your alarm monitoring company and provide the IMEI number we're just doing this for test purposes so ours is not gonna be connected to cellular but when you're setting it up for alarm monitoring service hopefully with alarmgrid then you would provide that number and they would activate this cellular card so as you can see our cellular tests timed out that's because we're not actually activating the system for monitoring services this is just for testing if you had it connected with your monitoring company it would go through and connect the cellular but we can go ahead and skip that now you do see we have our IMEI number so we're just gonna go ahead and skip in the bottom right corner and now it's downloading system settings from the cloud um it may not be able to get anything because it doesn't it's not connected to cellular but we're gonna let this run its course so as you can see our system settings were unsuccessfully downloaded again because we're not actually monitoring the system we're just setting it up for testing purposes so we're just going to go ahead and click skip at the bottom oh sorry but a little bit too fast there so now we're ready to add sensor screen and we are ready to add sensors actually um because we have sensors in front of us right here today we have a nice door and window contact sensor right here and we have a motion sensor so that's what we'll be adding to the system today so first we're just gonna click the green start button at the bottom and it's searching for sensory so we're gonna fall to our door window contact and it appears on the screen so I'm gonna go through and tell you a little bit about sensor programming here um there's a few things you need to know it's not super complex or anything but you do want to know what you're doing when you go ahead and set this up so the sensor DL ID that's gonna be automatically generated when you fall to the sensor you auto-enrolled the sensors so you're not gonna have to touch that this is a door and window contact so you don't have to change the sensor type here now sensor group is important the sensor group tells the system how to respond when the sensor is faulted and the system is going to respond differently whether you have the system armed or disarmed and depending on the arming type that is armed stay or arm away so I'm gonna go through some of the sensor groups that you would use for a door and window contact okay so the default one is sensor group 10 and treat exit normal delay now if you have your system armed away or armed stay and you fault this sensor then you're gonna have to disarm the system within the usual entry delay time if you fail to disarm the system within that countdown then the system is going to go into alarm so that gives you a chance to you know maybe set your bags down maybe you get a little bit situated and disarm the system within a timely manner but you're gonna have to you know still work pretty quickly you can't delete at all all day you're gonna have to do it fairly so that way you don't cause an alarm so just bear in mind if you have this on entry/exit mode and you fault the sensor well it's armed way or armed state you're gonna have to disarm within a countdown so that's the first one now another one you might use is 12 entry eggs at long delay now that's the same as an entry eggs at normal delay but this is going to give you a little bit of a longer entry delay countdown so maybe you've entered from your back door you have a door window contact in your back door and you know that when you enter from that part of your home or your business it's going to take a little bit longer for you to get to your panel so you can provide a valid disarm code so that's going to give you a little bit longer of a time period so maybe you know settle down the kids a little bit and you know take a little bit more of your time but again as long as you disarm within the countdown period then you're gonna be fine and it's not going to go into alarm now the next one that you might use is 13 instant perimeter door and window so if you fault this sensor while it's in entry and I'm sorry arm stay or arm away then it's going to go into a media alarm you're not gonna have a chance to disarm at all it's just going to go into a meaty alarm so that's something you might use with a window that you wouldn't use for entering or exiting your home there's something that would only be opened if someone we're trying to break in so like I said that's gonna go into a media alarm if this is if this is faulted while the systems armed away or armed stay and now 14 instant interior door that's actually really similar to 13 the only difference is if this one is faulted after an entry exit zone while it's in the countdown period it's not gonna go into alarm so in 13 if you fault it while it's in the countdown it's gonna go into alarm but in this one it's gonna know to ignore this sensor because this is an interior door so like if you had to open up another door to get to your system the system would know hey you came in through a usual way through an entry exit door that you would usually use for entering and it's okay that you fall to this because you might need to get to your system or maybe your kids are running around and they're opening up their bedroom doors or something so it's not going to go into alarm so 13 wouldn't matter if you were if you had faulted an entry exit zone first and this one it will know to ignore it so that's the difference between those and then 16 away instant follower so the way this is going to work the sensor is only going to be armed if your systems and armed away so if you fault this sensor while your systems in armed way it's going to trigger an immediate alarm on your system now if this if your system is in armed stay mode as in there's somebody inside the building some somebody's moving around they might open the door it's not gonna trigger an alarm so you would only this would only be active if you had the system in arm away mode okay an arm stay it's gonna be automatically bypassed it won't be able to cause an alarm but if you fault this sensor while it's in arm arm when I'm away mode then it's gonna trigger no immediate alarm so then the last one I'm gonna talk about we have 25 local safety sensor now if you have it on 25 local safety sensor it's not going to trigger an alarm at all it's just gonna fault you'll see the fault on the screen and it'll do a chime if you have a chime enabled but it's not gonna be able to trigger an alarm so that's something if you just didn't want it to report to the Central Station you just wanted a chime to know if a door was open so I'm gonna go ahead and set this to 10 the standard one and so you can set a sensor name here you can choose custom description if you wanted to give it a custom name we're just gonna call it front window or actually pull out front door because we're gonna end up having it on a door so we're gonna leave that there and chime type that's gonna be the sound that the system makes when the sensor is faulted so you can try out a few different ones that's called on the hunt and then there's doorbell so various options there I'm not gonna go through all of them but I will show you that if you go down or no I'm sorry not down all the way to the top then there's an option called none so if you don't want a chime when you fought the sensor then you can choose none and it's not gonna make it sound but I'm gonna put it on high wire just so we have something on there and lastly voice prompts so that's gonna be whether or not this the system speaks out the sensor name in our case that would be front door when you fault the sensor it would say front door open front door well I don't know yeah I will just say front door open if you fault the sensor and it will speak the name and source you don't have to play with because this is a 319 megahertz sensor it automatically detected that because we auto-enrolled so we have everything set up the way we want it so we're just going to click Save at the bottom to finish and the sensor is out except successfully so now we're going to add our motion and it did add successfully just stuck a minute there and now it's searching for the sensor to add so we're just gonna take our motion and it detected movement so it has our motion loaded and so I'm gonna go through the programming settings that you would see when setting up the sensor so as before a sensor DL ID that's the serial number you don't need to change that that's Auto detected when you Auto enroll the sensor and then the sensor type is a motion so we don't have to change that either now remember sensor group is important that's how the system responds when the sensor is faulted so I'm gonna go through the common ones that you would use with this with this type of sensor with the motion so the default is 17 away Instant Ocean now if you have your system armed away and you fault this sensor it's gonna trigger an immediate alarm and one thing I do want to say about any motion sensor sensor group if you fault an entry/exit zone first it's gonna know to ignore the sensor so that way if you walk past your motion on your way to disarming your system it's not gonna matter you'll still be able to disarm within the countdown it's only if you activate the motion without activating an entry/exit zone then someone was breaking into your home or your business and they activate the motion sensor your system would go into a media and alarm depending on the sensor you choose the sensor group you choose so the default as I was saying is 17 away incident motion if you have your system armed away and you fault this sensor then your systems going to go into a media alarm you won't have a chance to disarm it's just gonna go into a media alarm and if you have the system armed stay then it's gonna bypass the sensor so in stay mode you'll still be able to move around and you won't have to worry about faulting this sensor so this is a good sensor if good if your motion sensors inside the home or business and you that way if you set it to arms day and someone's still inside the building they'll be able to move around without having to worry about causing an alarm on the system but if your systems armed away then it's going to go into media alarm so that's a way Instant motion 17 so one you might use is stay instant motion that's 15 so the difference between that is this will trigger an immediate alarm for armed stay or armed away so as long as your systems armed then this is going to trigger an immediate alarm so it would only not be activated when your systems disarmed this is kind of what you would consider a perimeter motion if this was not supposed to be activated when your system was in any arming type so that's 15 stay motion it'll be activated an armed stay and armed away 17 will only be activated in armed away won't the activator arm sit so the next one you might use you might do stay delay motion so this will be activated when you do armed stay or arm away but the difference here is that it'll go into an entry delay countdown so you'll be able to have a chance to disarm the system before the alarm occurs with 15 and 17 that was going to trigger an immediate alarm this one you'll actually have a chance to go and disarm your system before an alarm would occur so if you want to have a chance to disarm before an alarm occurs good false alarm prevention then you would use that one and there's also a similar one it's called 20/20 away delay motion so this will be activated in Arma way only it won't be activated in armed stay so if you fault the sensor while the system is in armed away mode then it'll go into a delay countdown and you'll have a chance to disarm the system you've failed to disarm in time then it'll go into alarm so that's 20 away delay motion and then the last one here that you might use is 25 safety motion so this will not cause an alarm on your system this will just it will just chime and you'll get the sensor description name readout if you have voice prompts enabled but this will not be able to trigger an alarm so we're gonna set ours to 17 away instant motion just the default again that's only gonna be activated an arm stay mode and it will trigger an immediate alarm so now we have a chance to choose our sensor name and we'll just give it a hallway motion detector why not and chime type we'll check out a few the chimes yeah high wire before and on the hunt yes so you can choose whatever time you like and again there is a none option at the top we'll just do high wire and voice prompts well we'll have that on because we want to hear it and I suppose and as you can see this time the source says estline because this is actually an encrypted s-line sensor when you use it with an IQ panel to system or an IQ panel - plus with a 319 point 5 megahertz daughter car then it's gonna it's going to use encryption rolling code encryption you can also it's also backwards compatible with like an inner logic system or an original IQ panel that's not going to use the s-line but if you do that then it's just gonna be a regular three nineteen point five megahertz sensor it's not gonna be encrypted with the s-line encryption so but since this is an IQ penalty system it's going to use the rolling code encryption so we're going to go on our motion here so we're going to just click Save and our sensor has been added successfully so we have successfully added our sensors to the IQ penalty system so we're ready to go on to the next step here we we can do a scent quick sensor test here it did detect the front door when we opened it it's in its strong signal so we're happy to hear that and now it's gonna stop because I did a line at this time or apparently not it should be good yo right there yes so we're not going to hear from our front door anymore but we're glad that our front door is working the way that we want it to and now and it looks like we're going from good to strong there but apparently our motion is working and we're not going to touch that anymore but as you can see we did pass the sensor test and we're actually and we're actually going to show you another part of testing the sensors in a future installment of this video series but that won't be today we'll do that another time but we did passed our sensor signal test and we are very glad that we did so we're gonna go to our next section here now you'll have the option to enable the panel blast break the the panel actually has a microphone built-in for listening for a broken glass event that could be someone breaking the window or if you're you have a jewelry store perhaps a store where your products are displayed in protective casings and someone were to smash the casings then you could use this as a glass break detector but we're not actually gonna do that today we're gonna skip that step so we're just gonna go ahead skip and one thing I do want to say if you were to use a glass break detector in the built in glass break detector you would want to test using a glass break stimulator as possible it works better than using an app that would just make a similar glass shattering sound but we're gonna go ahead and skip that today and now we have the option of enrolling z-wave devices and unfortunately we do not have an easy wave devices in front of us right here so we will have to show you that in a difference of this video so we're just gonna skip that for now and then you have the option of pairing Bluetooth as you may know the Qualis IQ panel to system allows for automatic Bluetooth disarming which is very convenient if you're walking up your home and you have your phone with Bluetooth enabled the system can actually detect the Bluetooth and disarm the system for you we're gonna show you how to set that up in a later installment of this video series so we're gonna skip that today and now you have the option of hearing an IQ remote that's a secondary keypad for your IQ panel to system which it's good if you want to be able to arm and disarm from a second location in your home or business and it's a great keep at it has the exact same screen as the regular IQ panel too and they actually introduced the ability to livestream alarm comm cameras from the IT remote which is very cool as it's excellent keypad it really is but we're not going to set that up right now we're just gonna go ahead and skip that and now I do want to show you how to add users because that is something that you will do when using your system this is how we are gonna arm and disarm so we're gonna go ahead and add a new user here and it's gonna ask us for our name we're gonna choose alarmgrid because that is who is using the system so now we get to enter our custom four-digit code that we're gonna use for arming and disarming um now you want to make sure you don't choose an easy code that would be that would be guessed by anyone 1 2 3 4 is the default master code and any anyone can just go and guess that code so we don't want to use that the default installer code is 1 1 1 1 which we're not gonna use that the default dealer code is 2 2 2 2 we're not gonna use that one either but we'll use we'll use 7 7 7 7 which could be guessed but again this is just for demonstration purposes maybe choose a code that somebody won't easily guess but you'll easily remember so that way you do not run into problems later but you can cross that bridge when you get to it and we're gonna click this screen button down here in the bottom right corner to accept and we have to confirm our user code 7 7 7 7 and we click the green button again and we get to choose what type of user we can choose user guest or master we're master users here so we're just gonna set ourselves to master because we are the best so we're gonna click add user and the user has been added successfully and you see if I click this view user list here then you can see alarm grid has been added as master and there's also the regular master which uses the code one-two-three-four which you can go ahead and change that on your own time and duress that's if you wanted to send a silent arrest to the Central Station if you were in a hostage or duress situation you wanted help immediately without letting anyone know that's what you could press and installer is used for installing the system and we actually don't get to choose the dealer code here that would be if we go into dealer settings later on but we're gonna go ahead and skip because we are done so now we are setting up our dealer contact info let's see if we can go ahead and add that in actually we won't be able to because well we can we go and we can go ahead and enter it manually but usually if you were setting it up with Central Station service if you had activated the cellular card you're monitoring company's information would be in here but we'll go ahead and fill this out because we want to show off the alarm grid contact info so we'll go ahead and enter an alarm grid okay and we'll enter in our phone number which as you know is our support number eight eight eight eight one eight seven seven two eight and you're always welcome to call us if you ever need help using your system and then we go to our website we're gonna put in an alarm grid comm and as you may see behind me I have that on the computer over there which it's the best website ever so be sure to check it out and we'll just go ahead an alarm grid comm there and press the green button and I think I think we got all the settings there I'm good yes okay just have to hide the keyboard I suppose yes there we go a little keyboard button and then it lets me hide it and then I can click Save and our contact info has been added successfully so we're going to go to skip and check for updates we actually have this updated to the latest firmware version which at this time is two point four point zero you can go ahead and upgrade your system if you need to update your system but we're fine here so we're just going to go ahead and skip that for now and as you can see our system is ready to use we get our congratulations message and we're ready to go so we also want to show you if you have a power G sensor that they enroll a little bit differently than the other sensors used with the IQ panel - plus these will only work on a plus model with a power G daughter card they won't work on a standard IQ - plus you might have gotten these if you've gotten a cryptid kit with alarmgrid so today we have the PG 9 9 1 4 motion sensor it's a pretty good motion from DSC you can mount it the same way pretty much as another motion like a non power D motion but they do enroll a little bit differently now they each follow a unique process I'm gonna go over this one and I'll briefly cover the other ones as well but I'm gonna show you how to put it in so what you're in doing you're gonna go on the IQ - you've been with the main screen there you're gonna click on the small gray bar at the top and you're gonna choose settings and you're gonna go to advanced settings and then you can enter your dealer code or your installer code will do the installer 1 1 1 1 and we'll go to installation and we'll go to devices and we'll go to security sensors and then we'll go to auto learn sensor in a moment but first I'm gonna show you how to open it up just um so there's like a little tab on the back of the sensor it's like mark right there now you don't need to like pry it off or anything you actually just take a flathead screwdriver and push into there just like that and then it comes off there so now it's opened up you can see and so there's actually an enrollment button on this one now some of these what you would do is you would put it into auto enrolment mode and you would just insert a battery this one that's not quite enough you have to put in the battery and you have to press this enrollment button down here so what I'm gonna do I'm gonna take the battery this is a cr123a battery this is also known as a camera battery and actually I misspoke that this is not the enrollment button that's the tamper switch right there the enrollment buttons down there hidden below so what you'll do is you'll put it in make sure you have it facing the right way you just kind of insert it there and you see it's powered on now I'm gonna put this into auto learn mode and now it's ready to accept the transmission from the sensor so so I have the cr123a battery here and I'm just gonna put it in and then what I'm gonna do I'm gonna press and hold the enrollment button down until a solid orange LED light appears and as you can see it auto-enrolled I'm so impressed okay and then it's a lot of the same settings as before the big difference is that the source is set as power G just because it's power G sensor and so once you're finished you can just go and add new and it will take a moment for it to add the sensor and there you go then you can just return to the main screen there and that's how you would enroll a power G sensor so in the next part of the series we'll go ahead and show you how to install some sensors but if you did enjoy this video please click the thumbs up button below because we appreciate that and you can click the bell icon to get updates for future videos and subscribe to our Channel and if you ever need any help feel free to email us at support at alarm grid comm we hope you enjoyed the video thanks have a great day
- Uploaded