Installing and Using the Qolsys IQ Panel 2 Part 3: Sensor Installation
Related Products


Related Categories
- Wireless Touchscreen Alarm Panels
- Small Business Security Systems
- Monitored Home Security Systems
- DIY Wireless Security Systems
- Apartment Security Systems
Description
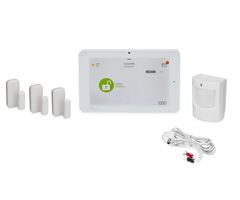
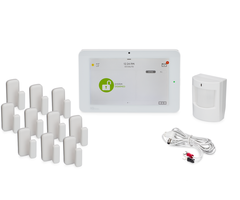
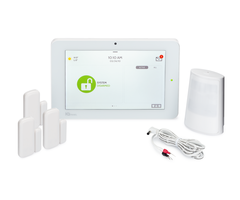
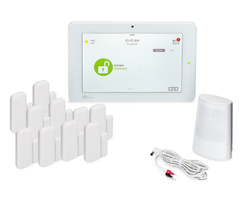
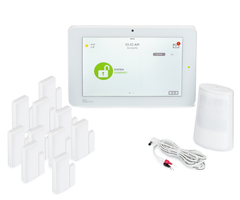
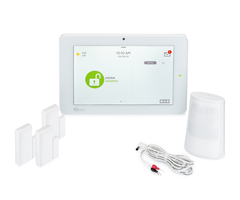
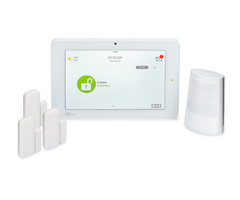
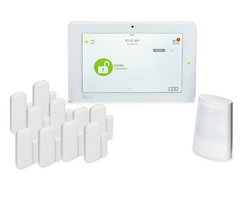
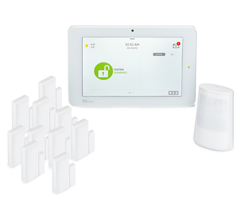
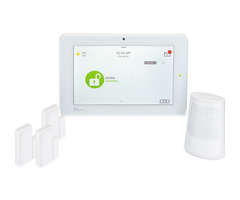
In this video, Michael from Alarm Grid installs some of the most commonly used sensors with the Qolsys IQ Panel 2 System. Most notably, he shows door/window contacts and motion sensors. There are a few different ways you can mount these sensors in your home or business. Remember to test the sensors!
Sensors are some of the most important devices you will use with a security system. The sensors detect when certain activities occur. These activities include things like a door being opened or someone walking past a motion sensor. How the system will respond when a sensor is activated depends on the programming settings for the sensor and whether or not the system is in an armed state. You must install sensors correctly so that they can properly detect activity and not cause false alarms. A great aspect of most wireless sensors is that they can be installed without having to drill any holes in the wall. This is done using double-sided foam tape.
Door and window contacts are placed on doors and windows. The larger sensor should go on the door or window frame. The smaller magnet should go on the moving structure of the door or window. Most door and window sensors have some type of marking or indentation so that you know which side of the sensor should be facing the magnet. The sensor and magnet should be very close together when the door or window is closed. Usually, you will want them within a half-inch if possible.
Motion sensors have many rules that must be followed to ensure that false alarms do not occur. They are usually mounted from about 6 to 8 feet high. Qolsys recommends a height of 7.5 feet for its motion sensors. The motion sensor should not be facing any windows or vents. If you have pets, then the motion sensor should not be facing any furniture or stairwells that a pet could climb upon to get within the sensor's field of view. Motion sensors can be corner-mounted or flat-mounted. However, you will need to flat-mount a motion sensor if you want to install it without having to drill holes.
http://alrm.gd/get-monitored
Transcript
Hi, DIYers. This is Michael from Alarm Grid. And welcome to Part 3 of our installing the IQ Panel 2 system. Today we're going to be mounting our sensors, which we enrolled last time using the set-up wizard after we had powered the system on. So we first have our sensor, our door and window contact, on a door. This is the same way you would install it on any door more or less. So what you're going to want is you're going to want to have the smaller magnet portion on the moving part of the door, and then the sensor itself on the door frame. Now, the reason for this is if you were to slam the door hard or you were to swing it around and the sensor were to get damaged or something, it would be better if the magnet was vulnerable rather than the sensor itself. The magnet, the larger portion, is the more valuable piece of equipment. So it's better to put the smaller magnet in harm's way on the moving part of the door or window. So these sensors usually have a magnet spacing gap of about a half an inch. I think the IQ Panel 2 sensors, the Qolsys IQ sensors, IQ contacts. Those have a spacing gap of about 3/4 of an inch. So you got a little bit more of a tolerance. Now, when you see ours here, we kind of are going on the fringe there. We're going to have a little bit of the magnet a little bit further away than the sensor than you might preferred. You can shimmy the magnet by putting some extra layer of foam tape. That's what we use to mount, by the way. You do not need any screws or holes in the door or the walls to install your system. You can use foam tape for everything. And that's what we have here. So like I said, the magnet on the moving part and then the sensor on the frame. And so we had them aligned. We made sure that the indentation, that's the little-- on this one, there's a little triangle that shows which side the magnet should be on. And so now I'm going to open the door. And when you see it open-- when I open the door, you might hear the message from the IQ 2 system, which we have off to the side, that the door has been opened. I believe we labeled it as a front door. So we're going to go and test that now. Front door open. And as you can see, it did indeed detect it, because they were close enough together. Ideally you would have them in direct contact if your door allowed for it. Our frame's a little bit angled, so we weren't able to do that. Have them in direct contact-- that's why the sensors get the name of contacts. So we're going to go ahead and do that one more time just to show you that it does indeed work. Nothing's hitting, and everything's smooth. Front door open. And it works as described. So our door and window contact is working perfectly on this door. So we're going to go ahead and go on to our next sensor. So now we're going to show you how to install a door and window contact on a window. The same principle as before-- we have our sensor on the stationary frame, if you will, the non-moving part of the window-- in this case, next to the window, because that's the way our window is set up. This works best for this configuration. And we have our magnet, the smaller portion, on the moving part of the window. So they're close enough. Remember, bear in mind of that magnet spacing gap we talked about earlier. And we do have it aligned. The little triangle is facing the magnet. If I go and open the window-- Front window open. --see, it detects the window being open. And we'll go ahead do that one more time. Now it closed. It restored the zone. We'll go ahead and bolt it. Front window open. And it works as described. And so that's how you would do it with windows, the same as a door more or less. But now you have it on a window-- sensor on the stationary part, and the magnet on the moving part. So now we're going to go on to our next sensor. OK, so now we have our motion sensor mounted. We did a flat mount, which a flat mount's the only way that you can mount this motion sensor with foam tape. If you were doing a corner mount, you would have to use some screws drilled into the wall. But we want to show you that you can install the system without having to drill any holes, without having to use anything other than a screwdriver. So we have it flat mounted this way. Now, a few things to keep in mind when you're using a motion sensor-- the Qolsys IQ Motion, it's best suited at a height of 7 and 1/2 feet. Usually you can go between 6 and 8 feet, but the official recommended height for this motion is 7 and 1/2 feet. So keep that in mind. And also you don't want to have your motion sensor facing any windows, because the light can cause problems with the passive infrared. You don't want to have it facing any air ducts or vents, because the blowing hot air could cause problems as well. So have it away from those sources of infrared energy. So don't have it facing towards any windows or air ducts. And if you have pets in your home, then you want to make sure that the motion's not facing a couch, or a piece of furniture, or a stairwell that a pet could climb upon, because-- just because a motion sensor is pet immune doesn't mean that a pet cannot set it off. A pet immune motion sensor is designed to look in the areas where a human would be walking upright while ignoring the areas closer to the ground where a pet would be walking. Now, if you have it facing a couch or a stairwell, a pet can get higher up. And it could-- they could absolutely set off your motion sensor. So keep that in mind when you go to install your motion. Make sure you choose a good spot that's not facing any hazards like that that could cause issues. So we have our motion here. You're going to want to make sure it's leveled. So you might want to use a leveling tool if you have one to make sure that it's nice and sturdy. Again, 7 and 1/2 feet is the ideal height for this particular motion sensor. And we mounted ours with double-sided foam tape, which, as you can see, it works pretty well. And so we have our motion sensor mounted. We're going to show you a different part of testing the motion sensor in our later testing installation of this video series, which we will get to later. But for now, we're going to go and show you how you would corner mount a motion sensor. So now I want to show you if you were to corner mount your motion sensor, you would have it just go into the wall, the corner, right about there. Now, if you're corner mounting, then you do have to use screws. You will have to drill holes in the wall. It's only flat mounting that you can use the double-sided foam tape. And we do have another shot that shows this a little bit better. But I want to briefly cover the holes that you would use if you were drilling holes. For flat mounting, there's actually some center holes right there. You would do those two. You probably can't see it too well in this shot, but that's what you would do. Now, for corner mounting, what you would do, you would either do on the right side, the upper two over there, or the left side over there. You don't want to do one on each, because that can warp the plastic, which isn't good. So you'd either do the upper two on the right side or the upper two on the left side. And you would do the screws and just get it there secured. Do your holes in there. And then you would attach the motion to the back plate. I'm just holding the back plate here. And again, 7 and 1/2 feet to the ideal location. And the good thing about corner mounting is you get a little bit better coverage of the room than you would if you were flat mounting. Flat mounting still works very well. But if you just want a little bit better coverage, then you can corner mount. So let's go on to our next sensor. So the last type of sensor we want to show you is if you had a contact on a cabinet, a medicine cabinet or a liquor cabinet, then you would have them like this. You could have them on the outside, but that wouldn't be very sneaky. It wouldn't be very discreet. So it's better to actually have these sensors on the inside of the cabinet. Since these are double-sided doors, you're actually going to have to put the sensor on the moving portion of one of the doors and then the magnet on the other. Just make sure they're aligned. Again, the indentation should be facing the magnet when the cabinet is closed. So and one thing I do want to point out, this is actually a metal door. So if you were to mount a contact, or any sensor really, on a metal surface, that can reduce the RF transmitting range. We have ours close enough to the panel that it's not really an issue. But just bear that in mind if you were to try to use it from a far distance away, you may experience some rain issues. And in that case, you might want to use a wireless repeater, which we can certainly help you find one if you email support at alarmgrid.com. But now we're going to go ahead and test ours. We have ours set up as a liquor cabinet on the IQ Panel 2 system. So that's what it's going to say when I open them up later. So first I'm going to go ahead and close them. And that's what I'm doing now. And then we're going to go ahead and open them up. Liquor cabinet open. And as you can see, our liquor cabinet has been opened. So we're going to close these again just to test them one more time. And-- Liquor cabinet open. And there we go. We're good to go. So we've shown you how to install sensors on a door, sensors on a window, and a motion sensor, a corner mounting and flat mounting. And we just showed you the cabinet, which we'll do one more time here. Liquor cabinet open. And there we go. So we've shown you how to install the basic sensors that you would use with the IQ Panel 2 system. There are other sensors out there, but this is a good starter set with motions and door and window contacts. So if you did enjoy this video, you can click the thumbs up button below to like this video. And if you want to get updates on future videos, then you can click the bell icon to subscribe to our channel. And if you need any further assistance or help, you can email us at support@alarmgrid.com. We hope you enjoyed the video. Thanks. Have a great day.
- Uploaded