Installing the Resideo LTE-IV On A VISTA P-Series System
Related Products


Related Categories
Description
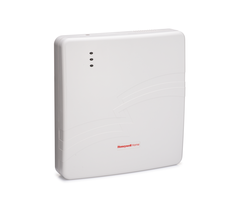
In this video, Jarrett shows the process for installing the Resideo LTE-IV Verizon LTE Communicator for Honeywell VISTA P-Series Panels. Adding the communicator will allow your VISTA System to connect with the AlarmNet360 Servers across the Verizon LTE Cellular Network. It is very simple to install.
Adding a communicator is arguably the most important upgrade you can make for a Honeywell VISTA Series System. The communicator is what allows the panel to send out alerts and notifications to you and/or a central station when system events occur. This could be a burglary or fire alarm, some type of system trouble, or really any other system activity.
When using the Resideo LTE-IV, the VISTA System will connect with the AlarmNet Servers that are operated by Resideo. AlarmNet then passes on notifications and alerts to a central monitoring station and/or the end user directly through the Total Connect 2.0 platform. Using TC2 is only possible if you have an AlarmNet Communicator for your Honeywell System. The Resideo LTE-IV is an example on an AlarmNet Communicator that will allow you to use TC2 with your system.
There are many things you can do through Total Connect 2.0. The platform is accessed by logging into your Total Connect 2.0 account through either a web browser or a mobile app. Once you have logged in, you can arm and disarm your system, check current system status, control Z-Wave devices (Z-Wave controller required), view Total Connect 2.0 IP Cameras, and more.
Before fully mounting the Resideo LTE-IV, you should make sure the module can receive adequate cellular signal strength. You can conduct a basic test at the module yourself, and your alarm monitoring company can perform a more thorough test. If you live in a rural area that is far away from any cellular towers, then you might consider adding a cellular amplifier or a cellular antenna to boost signal strength.
Note: In this video, Jarrett shows the connections to a Vista-21iP. This is because the Vista-21iP is the only VISTA P-Series panel available for demonstration purposes at this time. The keypad bus wiring connections for the VISTA-21iP are exactly the same as those for the VISTA-20P and VISTA-15P. If he were actually connecting an external communicator to the VISTA-21iP, he'd also need to power down, and set the Jumper on the board to the OFF position. This removes power from the VISTA-21iP's internal communicator, allowing you to connect and use an external communicator. There are certain situations where this is advantageous, such as with a panel that has been chip updated to support Total Connect 2.0, but where the built-in communicator will not support it.
Note: When referring to AC Power, Jarrett uses the terms "Positive" and "Negative". There actually is no polarity when it comes to AC Power wiring, so there is no "Positive" or "Negative". He's using these terms interchangeably with "Red Wire" and "Black Wire".https://www.alarmgrid.com/faq/how-do-i-install-the-resideo-lte-iv-on-my-vista-p-series-system
http://alrm.gd/get-monitored
Transcript
Hey, DIYers. Jarrett with AlarmGrid here. Today we're going to discuss how you would install the Resideo LTE-IV on the Honeywell VISTA P-Series systems. The Resideo LTE-IV is a dual-path communicator that allows you to be able to use both the cellular connection and an internet connection with your alarm system. Now the Resideo LTE-IV uses a Verizon LTE cellular network. And if you wanted to set up internet with the system, you are going to use an ethernet cable with it to be able to have internet with it. It unfortunately will not be able to use Wi-Fi connection. Now, the Resideo LTE-IV is able to be used with both the VISTA P-Series systems and the VISTA Turbo Series systems as well. Some examples of some of the VISTA P-Series systems are the Honeywell VISTA-15P, the Honeywell VISTA-10P, the Honeywell VISTA-20P, and the Honeywell VISTA-21iP. Now, if you're looking to be able to use Total Connect 2.0 with your alarm system as well, with the Honeywell LTE-IV, you are going to need to check some information about the system first. If you're going to be using a Honeywell VISTA-15P and a Honeywell VISTA-20P system, you want to check the PROM chip for your system. Because the PROM chip is going to be very, very important when it comes to having your system compatible with Honeywell's Total Connect 2.0. So the PROM chip is going to be the small square black chip that's going to be in the center of your circuit board, and it's going to have a little white sticker on it. Normally, if it's a 15P, it would say WA-15P. If it's a 20P, it would say WA-20P. And you'll be able to see the manufacturer's date on there. You'll be able to see the revision number on there as well. Now, the reason why the PROM chip is important is because of the revision number. The revision number for those systems need to be on revision 9.12 or higher. If it is below 9.12, then unfortunately you won't be able to use Total Connect 2.0. So you definitely want to check that out. So if you're using a VISTA-21iP, it's the same exact thing with the PROM chip. You want to check that out. It is going to be at the center of the board as well. But the revision number that it needs to be on is 3.13 or higher. If it is below that, then you are going to need to swap that out to be able to use Total Connect 2.0. Now lastly, the VISTA-10P unfortunately is not able to use Total Connect 2.0. So when you're installing the Resideo LTE-IV, the second step is mounting the communicator. And when you're mounting the communicator, you're just basically mounting it where you want the communicator to be installed. And when you're setting this up, you are going to be supplied with anchor screws so that you can proceed with the mounting for this device. And when you have the LTE-IV, as you can see there's a hole down here and there's two holes up here where you would create the hole for the wires to come through. And then you would create the holes for the screws. Now when you're mounting the device, you definitely want to make sure the battery backup is out. Because then it's going to be a lot easier to be able to mount the device without that extra weight. So what you're going to do when you're mounting the LTE-IV, you're going to place it on the wall where you would like it to be installed. And you're going to mark the holes on where you want the screws and the wires to be located. So as you see, you have the first area up here where you would just mark the dot with either a pen or pencil for where you want the first screw. You have the other option or the other area for the other screw. And then you have the hole down here where the wires are normally going to be running through where you can run the ethernet cable, or you could just be running the power, and you can hide the battery backup cable back there if you wanted to as well. And then once you've made the appropriate holes, you're just going to put in the screws where you're going to be mounting this. And before you actually screw in the screws all the way, you're going to want to leave a little bit of space so that you can just pop the LTE-IV on, and just rest it in place. And then you're going to screw in the screws all the way. So when you've mounted the Resideo LTE-IV, the next step to proceed with the installation is to complete power down your VISTA P-Series system. And what you want to do is unplug the battery backup first, and then unplug the transformer. You always want to power down the system before you actually start installing this equipment, so you make sure there's no power issues. You're not shorting the board and you're not possibly destroying the new equipment that you just purchased. So you definitely want to power it down first. Now, if you have any keypads that are being powered by the system, they are going to show a blank display. There's nothing that's going to show up on there because they're going to be powered down with the system. If you have any other keypads that are using any secondary power supply, then they are going to show Open CKT or OC, or maybe even ECP error. That is because they're not able to connect back to the system because it is completely powered down. So when you're powering down the VISTA P-Series system, you're going to unplug the battery backup first. So what you'd do is just unplug the cables for the battery backup. Now that's done. And you're going to unplug the power for your VISTA P-Series system. Now in this instance, we have an LTE cable set up with our VISTA-21iP. But when you do have the transformer set up with the system and you don't have the LTE cable, you are just going to unplug the transformer from the wall, and then it will power down the system. But in this instance, we're just going to unplug this. And now our VISTA-21iP is completely powered down. So the fourth step in setting up the Resideo LTE-IV is wiring the power for it. Now the Resideo LTE-IV uses the Honeywell 1361-GT transformer to be able to power it up. Now there are two ways to be able to power up the communicator. You can either use just the transformer itself to power up the communicator, and then also have the power for the system separately. Or you can even have the one communicator, which is the Honeywell 1361-GT, power up both the communicator and the panel at the same time, and you don't have to use two separate transformers. So what I'm going to be showing you is the first step where you're powering up the communicator with just it's transformer. And then the second step will be showing you how to power up the panel and the communicator with the one transformer. So as you can see, we have the Resideo LTE-IV right here. We have the terminal screws right here. And then as you can see, we do have the terminal numbers labeled down underneath. So when I'm talking about wiring the wire to the correct terminal screws, as you can see we do have the numbers here. So I am going to explain that as well. Now, if you're wiring the power to just the transformer, you're basically just going to be taking the positive, negative, and wiring them to terminals 1 and 2. And then you're going to be wiring it to the transformer itself. As you can see, we do have the Honeywell 1361-GT right here. This is the transformer that comes with the communicator. And when you are doing this project, you do want to at least have a flathead screwdriver. As you can see, we have a small flathead screwdriver right here, because the screws for these terminal screws are flat heads. And for the transformer, you do want to have a Phillips screwdriver. So when you're taking your power, what you want to do is wire the positive and negative to terminals 1 and 2. Now when you're wiring the power for the communicator, polarity does not matter. So it doesn't matter whether you're putting the positive or negative on 1 or 2. As long as the power is running to the transformer you're good to go. So what we're going to do is wire the positive to terminal number 1. Just pop that in there. You're going to screw that in. Let's make sure it's nice and snug. And then you're going to wire the negative to terminal number 2. You're just going to screw that in as well. So you're just going to make sure that the positive and negative cables, they are snug within the screws. And then what you're going to do is just take the other end of the cable and you're going to wire it to the transformer. So I'm just going to move this over real quick. And you can see where the transformer right here, we have the two AC screws on both sides of the transformer, and then we do have the ground in the middle. If you wanted to wire the ground, that's fine. That's basically just the ground the electrical for this transformer. But you don't normally have the wire the ground if you don't want to. So what you could just do is wire the positive and negative to both the AC sides. So as I said, polarity doesn't matter, but I'm going to wire the positive and negative to the correct sides anyway. So we're going to do is just take the positive cable, and I'm going to just lightly put it underneath the screw. Then you're going to take your screwdriver and just screw that in real quick. Just make sure that this is nice and snug underneath. You don't want this to be loose. So you just want to make sure that the screw is catching on to that cable when you are screwing it down. Because as I said, you want it to be nice and snug when you are plugging this in. As you can see, it finally caught. So the cable's not loose anymore. So on the other side, we just want to unscrew this real quick, make sure there's enough room to fit the cable under. So you're just going to take your negative, pop it underneath the screw. We're actually going to unscrew this a little bit more real quick. As you can see, it is fitting underneath now. So we do have the negative underneath the screw. And we're going to just screw that in real quick. And as you can see, they both are very snug. You want to make sure that both the positive and negative are snug, are screwed in correctly when you are setting this up. You do not want these to be loose at all. All right. So now that you've wired the power from the LTE-IV to the transformer, the next step is to wire the correct cables from the LTE-IV itself over to the VISTA-21iP or the VISTA P-Series that you're setting this up to. All right. So now we're going to be wiring the data in and data out from the LTE-IV over to the VISTA P-Series system. So what we're going to start off with is just wiring the cables in the Resideo LTE-IV first. So what you want to do is, your red cable, you're going to wire that to terminal 3. I'm just going to pop that in, screw that in there. Make sure it's nice and snug. And then you're going to wire the black cable into terminal 4. It's going to be right next to terminal 3. So just pop that in, screw that in, make sure that's nice and snug as well. Then you're going to take your yellow cable and you're going to wire it to terminal number 5. Pop that in as well. And then you're going to take your green cable and wire it to terminal number 6. And as I said, you want to make sure all these cables are not loose at all. All right. So what we're going to be doing is we're going to be wiring the cables from the LTE-IV over to the VISTA P-Series system. So you're going to start with the red cable, which is wired to terminal number 3 on the communicator, and you're going to wire it to terminal number 5 on the VISTA. Then you're going to grab the black cable, which is wired to terminal Number 4 on the communicator, and you're going to wire it to terminal number 4 on the VISTA. Then you're going to grab the yellow cable, which is wired to terminal number 5 on the communicator, and you're going to wire that to terminal number 7 on the VISTA. And then you're going to grab the last cable, which is the green cable, and that's going to be connected to terminal number 6 on the communicator. And you're going to wire that to terminal number 6 on the VISTA. So what you're going to do is you're going to take the other end of your cable. And as you can see, we have the red, black, yellow, and green cables. And as you can see, we have the terminal screws on the VISTA P-Series system. So this is where you want to have the Phillips screwdriver, so you can make sure you're wiring this correctly to the board. And as I said, the red cable, which is wired the terminal number 3 on the LTE-IV, is going to wire to terminal number 5 on the VISTA P. So one, two, three, four, five. So it's going to be this screw right here. So we're just going to take this out real quick. Four, five. Just going to unscrew that a little bit, make sure the other cables are not going to fall out. And then you're going to take your red cable and just screw that, pop that into terminal number 5. Just make sure that fits nice and snug inside. I'm just going to screw that in. You're going to take your black cable, which is wired to terminal number 4 on the panel or on the communicator, and you're going to wire it to terminal number 4 on the VISTA P-Series system. So it's actually going to be right next to this red cable. It's going to be right here. So we're going to unscrew this a little bit so you can fit the cable in. Just pop that in here. See, that' nice and snug as well. Then we have the yellow cable, which is wired to terminal number 5 on the communicator. You're going to wire it to terminal number 7 on the VISTA P system. So we're going to count over one, two, three, four, five, six, seven. So it's going to be this terminal right here. We're just going to screw that real quick. Make sure I can fit that cable in there. Screw that in. So the last cable that we have is the green cable. This is currently wired to terminal number 6 on the LTE-IV. And we're going to be wiring it to terminal number 6 on the VISTA P-Series system. So what we're doing is checking for which terminal 6. So one, two, three, four, five, six. So this is going to be terminal number 6. So what we're going to do is just wire that in real quick. I already have the screw screwed a little bit. We're just going to wire that, screw that in. Let's make sure that it's nice and snug. Make sure none of the cables are loose at all. So now what we've done is set up the Resideo LTE-IV to be powered up by the single transformer, or by its own transformer, which is the Honeywell 1361-GT. Now if you did want to set up the communicator this way, you would basically just set up the battery backup with the communicator and then just plug in the AC power so that the communicator is powered up. And then you would plug in the VISTA P-Series panel by plugging in the battery backup and then plugging in the AC power. So they both would use their own separate power sources. Now if you did want to set up the battery backup, we are going to go over that step a little bit later. That is step 5, actually, with setting up the Resideo LTE-IV. But what we're actually going to be doing, or what I'm going to show you next, is how to set up the VISTA P system and also the Resideo LTE-IV to work or be powered up by one single transformer. So what you would actually do to be able to set that up is, you would have to locate the transformer that is currently powering up your VISTA P-Series system, and you're going to replace that transformer with the Honeywell 1361-GT. And then at that point you'd just move some of the cables for the power of the Resideo LTE-IV so that it's powered up by the system. So we're going to jump that really quick actually. So as you can see, we have both transformers on our display right now. We're going to be moving over the power from the existing transformer over to the new Honeywell 1361-GT so that both the VISTA P-Series system and the Resideo LTE-IV are both being powered up at the same time. So what you will do, or what we're going to do first, is we're going to remove the power from this transformer since we had that set up previously. So we're just going to remove this real quick. Make sure you have enough room for the new cable coming in. And then we're going to be removing the negative and positive from the previous transformer. So we're just going to move the previous transformer out of the way. Now we have the new Honeywell 1361 transformer. We're just going to wire the positive exactly where it was before. Make sure that this is nice and tight as well. You don't want it to be loose. And then we're going to take the positive, and we're going to wire it to the same exact area as well, just like it was before. Make sure that's nice and snug. That's not going to move. As you can see, they're not loose at all. This is definitely what you want to have when you are doing this. So now we've moved the existing power cables from the previous transformer over to the new transformer. Now what we're going to be doing is taking the positive and negative that are running to terminal 1 and 2 on the Resideo LTE-IV, and we're going to be moving those actually to terminals 1 and 2 on the VISTA P-Series system. So that you can then just plug in the transformer, and then power up both the VISTA P-Series system and the Resideo LTE-IV. So now that we have the transformer wired up to be able to power up the VISTA P-Series system, what we're going to be doing is grabbing the cable that is wired to terminals number 1 and 2 on the Resideo LTE-IV, and we're going to be taking those cables and wiring to terminals 1 and 2 on the VISTA P-Series system. So this is in turn going to power up the Resideo LTE-IV once the transformer is plugged in and the VISTA P-Series is powered up as well. So what you're going to do is you're going to take your screwdriver, and you're just going to make sure that you can put the cables in place. We're just going to screw this real quick. And we're just going to take the positive, wire it to terminal number 1. Just going to screw that in real quick. Then we're going to take our negative and wire it to terminal number 2. As I said, you want to make sure that both of these cables are pretty snug. Right now it is a little bit loose because the other cables are pushing that forward. So you're just going to try to make sure that it's tight enough. So these are not loose anymore. So now that you've set up the wires for the Resideo LTE-IV, and you made sure that all of your connections are correct, the next step is setting up the backup battery with the Resideo LTE-IV. So as you can see, we have the Resideo LTE-IV right here. And this is where the battery backup would normally go. And we don't have it installed yet. But you do receive this backup battery when you do get the Resideo LTE-IV. And you're basically just going to take it, and you're going to unscrew this so this is nice and loose. And you're just going to drop the backup battery in place. If you want to make sure this is nice, and is not able to move, as you can see, we have the screw in this side. So you'll just take a screwdriver and just screw that in place. As you can see, this is nice and snug so this is not moving. And it is holding the battery back up in place. And then what you're going to do is take these cables. You actually get these cables in the packaging of the Resideo LTE-IV. And this is the set of the battery backup. So what you will do is, you're going to take the positive and negative. And if you look at the top of the backup battery, you have red for positive and you have black for negative. So you'll be able to match up the cables very easily. So what we're going to do is plug in the connectors for the battery backup. So as you can see, we have the red cable for positive and then we have a black cable for negative. So you're going to take the red cable for positive, plug that in. Slide that in place. You're going to take the negative cable, the black cable, and just slide that in place as well. You'll get a little click whenever you pop that in place. You'll know that these are nice and secure. And you'll just take this end of it, and you're going to be plugging it in to this little piece down here. So you'll just slide that in place, and it's going to click. You're going to hear a little click when you pop it in place. As you can see, it is pretty snug. And it's not going to be able to pull it out. So when you plug in the battery backup, as you'll see, the LED lights are going to turn on. This is basically just giving you the basic functionality of the system. It's just giving it some power. Now it isn't exactly 100% working. You do want to have the power running for the alarm system so that you can have this communicator actually be effective if the alarm were to go off. So now that we have the battery backup plugged in, the next step, which is step number 6, is plugging in the ethernet cable. So as you can see, we do have the ethernet port, which is right here. It's built into the communicator. And if you wanted to run internet to it, you basically just run an ethernet cable through this little hole down here. And you're going to plug in the ethernet cable down in this port. As you can see, there is an ethernet port right here. It might be a little bit hard to see at this angle, but that's where you would basically plug it in. Once you have the battery backup installed, you have the ethernet cable plugged in, then the next step is restoring power to the VISTA P-Series system. So this is going to be step number 7. And what you want to do to power up the VISTA P-Series system is plug in the battery backup first, and then plug in the AC power, which is the transformer. You never want to plug in the transformer first and then the backup battery, because you could possibly cause some power issues and possibly even fry some equipment. You definitely don't want to do that, especially if you've just installed the new Resideo LTE-IV. So what we're going to do is power up the VISTA series, or the VISTA-21iP, and then we'll get going with this. So you're going to take the negative cable, just plug it into the little black area. And then you're going to take your positive cable and plug it into the little red area for the positive and negative. And then for this system we do have the LTE cable set up. So at this point you're just going to plug this in, and it is going to power up the VISTA-21iP. So now once you have the VISTA-21iP set up or powered on, this is going to go through its process. Now, if there are any faults that come up when the system powers on, you could just try disarming the system with the master code, and then pressing the number 1 to clear any faults that come up. Now, when you are powering up the system and you have the Resideo LTE-IV installed and ready, you do want to make sure that the cover is actually on. Because there is a tamper switch on this communicator. And if this cover is not on, then you are going to get a tamper error on the keypad. So what we're going to do is just plug that in. Now as you can see, the Resideo LTE-IV now has its covering. You can't see any of the cables except for underneath. But if it was installed on the wall then you wouldn't be able to see any cables at all. So once you have the Resideo LTE-IV set up and everything, and you have the cover on, the next step is activating the communicator for monitoring services. So if you were an AlarmGrid customer, if you were looking for monitoring services, check out our website. We do have different monitoring plans available. If you're looking to use the cellular option for this communicator, then you're going to be looking at either the gold plan or the self-gold plan. If you are by any chance looking to use IP-only with this communicator, then you can take a look at the internet-only options we have, which is the bronze, silver, self-bronze, and self-silver plans. And we do have the link to our monitoring plans below so you can take a look at all of them. And that is how you install the Resideo LTE-IV on the VISTA P-Series system. If you have any questions about the Resideo LTE-IV or alarm systems in general, please contact us that support@alarmgrid.com. Or go to our website, Alarmgrid.com. If you found this video helpful, please like and subscribe. If you want notifications of future videos, please click the bell icon. This is Jarrett with AlarmGrid. You have yourself a great day.
- Uploaded