Lyric SIXPIR: Corner Mount Installation
Related Products

Related Categories
Description
Honeywell releases the Lyric system SIXPIR passive infra-red motion detection sensor, which is quite possibly the most advanced motion detection sensor on the market. This video will show you how to install the sensor in a corner mounting area.
The new Lyric security system from Honeywell has all new technology for all in one wireless home protection. All of the sensors are battery operated and have full supervision which will give you complete control of your entire home defense system.
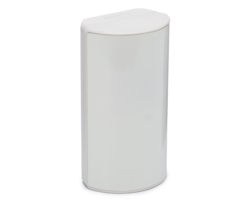
The SIXPIR passive infra-red motion detection sensor is a mini computer that is able to receive wireless firmware updates through the secure connection. The look of the sensor matches the look of the lyric system which allows for aesthetic appearance and a low profile.
The Lyric SIXPIR is a bit larger than the previous series motion sensors, however, with wireless technology, signal encryption, built in thermistor and a longer rage, these are the most popular passive infra-red motion detection sensor sensors on the market.
To install the SIXPIR motion detection sensor, you need to determine the proper placement. The sensor works between 7 feet and 9 feet off the ground, with optimal detection at 7 feet 6 inches.
You should also note that you cannot mount this directly up against the ceiling. The battery will eventually need to be changed and you will need to remove the sensor from the mounting plate to do so.
The tab for sensor removal is on the top of the sensor. When installing, ensure you leave enough room to access the tab with a finger so that removal is easy.
When looking at the mounting plate you will see two screw holes on each of the beveled edges. The video will point these screw holes out. To install the mounting plate you do not need to use wall anchors.
Press a screw into the screw hole and drill it into the wall with a power drill. Make sure, as the video will warn, that the beveled edges are flush with the adjacent walls. To ensure a snug and proper fit, use all 4 screw holes and alternate sides when tightening.
It is important to note that you should not over tighten the screws. Doing so can cause the mounting plate to bow or warp. If this occurs, the sensor will not fit into the mounting plate.
Once you have the mounting plate secure and ensured that it is flush and level, position the sensor to the guides and slide the sensor down, locking it in place. If you have difficulty, view the video to see how it is done.
Once the sensor is properly mounted you will need to test it. Walking by the sensor with it active will set the control panel off and you will hear the audible alarm.
You can view our other videos to learn more about the SIXPIR passive infra-red motion detection sensor, or the Lyric control panel in our video library.
Transcript
Hi, DIYers. Sterling with Alarm Grid here. Today we're going to show you how to install a Six PIR, which is a Honeywell wireless motion detector for the Honeywell Lyric Security System. The Six PIR, we've shown you in a prior video how to program this device to your Honeywell Lyric system. This is one of the Six Series sensors, very different than the 5800 wireless sensors. This is an encrypted device and bi-directional to the Lyric panel, meaning it can talk to and from the panel. Other than that it's a passive infrared motion. It does have new wireless technology, but in terms of detection, for security purposes, it works just like the 5800 PIR-RES. It's a passive infrared motion that's looking for a change in passive infrared energy in the room.
To detect the motion, it's looking for a change in temperature or passive infrared energy. But for all intents and purposes, it's looking for a change in temperature. A human body is the different temperature than the ambient temperature in the room, and therefore when the body walks throughout the room then the motion activates and the alarm is triggered.
You can see that the entire front face is the lens. When you open up the unit there is a tab at the top that you press and it pops the back from the front and you can see on the back it says "Up." You want to make sure "Up" is towards your ceiling. Basically the tab to open it goes to the top and for that reason we want to not install it right up at the ceiling because you would have no way to get it down. If we put it just slightly below the ceiling, enough to get a finger up and push the tab down, then we'd be able to pop this unit off if we ever had to change the battery.
Optimally this is installed at seven and a half feet, although it will work anywhere from seven to nine feet up. Right at this location we happen to be about seven foot two inches. We should be at perfect installation height so that we can still get a finger to open up the sensor when we need to, but it's going to be good for the angles of detection for triggering the alarm.
We are going to set aside the motion and we going to mount the back plate to the wall. The motion actually, at least for our beta purposes, came with two screws, and on the back plate there is two different mounting options. If we're going to mount it flat to the wall like this, then you would use this screw hole and this screw hole. If you're going to use the corner mounting, like we're going to do, then there are actually four screw holes options. One here, here, here, and here. Basically, you mount and you push it into the corner so it's flush. Your beveled corner edge is flush to each wall. Then you put your screw into one of these little screw mount options and you use your power drill to screw right into the wall. We're going to go ahead and just use one to mount it, because when you do two, you run the risk of having them angled and beveled so it would bevel the case backing a little bit.
We don't want to put pressure at two different points like that, so we're just going to use one screw. This isn't a very heavy device, so it shouldn't need more than one screw to hold it in place. We have our power drill with our nice Philips head tip. We mount or hold our unit up to the wall here and I'm going to come at it to this screw hole here and we're just going to screw it into place. You can see the plastic kind of frayed open as it got to that point and just going to loose this just a tad, and we have a really nice secure bracket. Obviously one more screw to this side could hold it as well but it's not going anywhere with just the one.
Now we take our motion and you fit it so it's just slightly below the top edge, and then it snaps up into place. Now we can get our finger up there if we have to pull it down. When it's up and closed it's good to go. Actually, I'm going to go ahead and put that second screw up. I'm not liking that it does have a little bit of play so I'm going to go opposite corner here and screw in the bottom corner. I'm not going to go tight, but now we can see there's no give it all. I don't think I warped the back plate at all doing that and I think it will be a better install. We don't really want any homeowner to feel like it's a little loose up there. Now it's a little more secure.
That's how to install a Honeywell Six PIR wireless Lyric or Six Series motion detector for a Honeywell Lyric Security System. We hope you've enjoyed this video and now you know how to install your Six PIR. If you have any questions on using or installing your Lyric motion sensor, please email support@alarmgrade.com. Also make sure to subscribe to our channel so you're kept up to date on all of the great new installation, programming, and feature videos we have about the brand new Lyric Security System.
- Uploaded