Adding a Siren to the Qolsys Hardwire 16-F
Related Products
Related Categories
- Alarm Sirens
- Sirens
- Alarm Sirens & Strobes
- Wired Alarm Strobes
- Wired Alarm Sirens
- Sirens
- Alarm Sirens & Strobes
- Alarm Sirens
Description
As of Firmware 2.7.2, but possibly in earlier firmware versions, performing a panel siren test will no longer activate the Hardwire 16-F siren output. This has been confirmed by Qolsys Tech Support. For these panels, to test the siren once it's been connected to the module, you'll need to cause an audible alarm on the panel. Be sure your panel is on test with the monitoring station prior to performing this type of test.
In this video, Joe shows users how to connect a siren with the Qolsys IQ Hardwire 16-F Wired to Wireless Converter. The IQ Hardwire 16-F is a great device because it functions as a wireless relay between the IQ Panel 2 and a hardwired siren. This eliminates the need to add a separate external relay.
If a user has a hardwired system with existing sensors, they might add a wired to wireless converter when upgrading to a wireless system. This way, they can keep their existing sensors in place and avoid having to purchase completely new sensors. The hardwired sensors will connect with the converter. The converter will then communicate with the wireless system wirelessly. This is done on the behalf of the hardwired sensors. The panel will then recognize these hardwired sensors as though they were wireless sensors. Each hardwired sensor that is used in this manner will require its own wireless zone on the system.
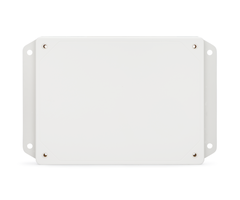
The Qolsys IQ Hardwire 16-F actually offers a few unique features as a wired to wireless converter. The device features 16 zone terminals for hardwired sensors. The 16th zone is a normally open zone designed for 2-wire smoke detectors. You can also use it as a standard zone if desired. The IQ Hardwire 16-F has siren terminals that are used for providing power to an external siren during alarm events. And a built-in relay will even cut power once the alarm is cleared. The module can provide up to 500mA of power to operate the siren. As long as you do not exceed this load, then no external power supply will be needed. The device is used primarily with the original IQ Panel 2 and the IQ Panel 2 Plus Systems. But it can technically be used with any 319.5 MHz system.
The Qolsys IQ Panel 2 Plus RF PIC Version must be version 11.1.4 G2 or higher to support wirelessly controlling the Hardwire 16-F's siren output. The module will work on older RF PIC versions, but the siren wiring would need to be modified using Alt Siren Wiring - A, or Alt Siren Wiring - B from the Install Guide.
http://alrm.gd/get-monitored
Note: The Qolsys IQ Hardwire 16-F only operates as a wireless siren relay if the IQ Panel 2 Plus System is RF PIC Version 11.1.4 G2 or higher. It is impossible to upgrade from an older IQ Panel 2 system. If you have an older IQ Panel 2 and you want the IQ Hardwire 16-F to operate as a wireless siren relay, then you will need to replace the system.
Transcript
Hi, DIYers. Joe, from Alarm Grid. And today, we're going to show you how to connect a siren-- we're going to use a strobe today-- to a Qolsys 16-F, which is a hard-wired-to-wireless converter. And we're going to have this run from our system, our IQ2. What we're basically going to do, we have a strobe right here. We have this connected to our hard-wired 16-F. We're going to program this into our IQ2 over here. And then we're going to activate the strobe using our IQ2. The Qolsys 16-F is a great device to use. It converts hard-wired zones into wireless zones and then lets your IQ2 pick them up. So it saves a ton of time with installation. And really, one of the biggest benefits to this device is that you can attach a hard-wired siren to the unit. Today, we have a strobe on there. And you're going to see that the strobe doesn't work as well as a siren. But really, it's meant for a siren to be connected to it, just to give you another point of sound if there is an alarm that occurs in the house. Now there's a couple particular steps that you have to do to get this programmed into the system. As you can see, we already have connected our strobe to the device. And these go on these two terminals right down here. You'll see in the installation manual, it points this out clearly. But the negative goes to the ground. And the positive goes to the out under siren. Then there's a jumper that's going from aux on the out portion, to the in on the siren portion. As long as we have that set up, our siren should activate. Now this learns in like any other wireless device. So on the system, I'm going to slide down from the top. I'm going to click on Settings, Advanced Settings-- (DIGITAL VOICE) Enter user code. Our default code is to 2222. Click on Installation, Devices, Security Sensors, and then Auto-learn Sensor. Now, the 16-F, we actually have to take the tamper wire out of the terminal and then reinsert it to get it to be picked up by the system. The first thing that I have to do to get this to learn to the system is click the EOL button over here on the right. So I'm going to press that down. And then I'm going to let go when I see this light illuminate. Now what I have to do is I actually have to remove the tamper jumper from one of the terminals to get it to learn into the system. So I'm going to loosen up one of those terminals. [DIGITAL CHIMING] And as you can see, when the connection became loose, the wire moved and the system picked up the 16-F. So I'm just going to re-tighten up this terminal on our tamper. And I'm going to say, OK on the system. And on here, what I want to do is I want to change the sensor type to a hard-wired translator. With that set, we're really good to go. I'm going to click on Add New. (DIGITAL VOICE) Sensor added successfully. And as you can see, the 16-F was programmed into the system. So now, if to click Home to go back, when I do a siren test on the system, we should see this strobe illuminate. I'm going to slide down from the top, click on Settings, do Advanced Settings-- (DIGITAL VOICE) Enter user code. --2222. System Tests, Panel Test, scroll down, Sirens. [HIGH PITCHED BEEPING] And there you go. As you can see, the strobe doesn't really work that well with the 16-F. But you can hear that little relay clicking quickly. That's actually the relay for the siren, if you had one connected to the system. Now, before you go out and purchase a 16-F for your IQ2, you're going to want to make sure that the RF pick version of your IQ2 is at least 11, 0.1, 0.4, G2, or higher. If it's below that, there's nothing you can do. You actually can't update this to get it up to a higher version. You have to purchase the system that is this version or higher, to use the 16-F with it. To check to see if your system is of that version, or not the honor system, we're going to click the back arrow. We're going to click the back arrow. And then actually, we'll just go back to the Main Menu to show you exactly where this is. Main menu, slide down from the top. Do Settings, Advanced Settings, 2222. I'm going to click on About. I'm going to go to Hardware. And if I scroll down, you'll see the RF picked version is right here. And our system is 11.1.5-G26, which tells us that this system is compatible with the Qolsys 16-F. If you do have any questions, though, about connecting a siren to the 16-F, the Qolsys system, or alarm systems in general, feel free to give us a call at 888-818-7728. Head over to our website, www.alarmgrid.com, or send us an email to support@alarmgrid.com. Did you enjoy the video? Feel free to subscribe. And if you want to be notified when we post future videos, hit the notification button below, and we'll send you an update when we do so. Thanks for watching, and have a great day.
- Uploaded