Addressing a Honeywell Alarm Keypad
Related Products


Related Categories
Description
In this video, Joe shows users how to address a keypad on a Honeywell System. This is an important step when setting up a new keypad. In addition to wiring, setting the address allows for proper communication between the keypad and then panel. On a VISTA System, addresses 16 thru 23 are for keypads.
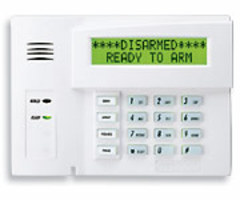
Addressing a keypad is completed when a panel is first powered up. Therefore, if you need to address a new keypad, you should power down your panel completely. Next, connect the keypad to the panel using a four-wire connection. Two wires are for data, and the other two are for power. Then power the panel back on, and the keypad should power on as well. Press and hold the [1] and [3] keys within 60 seconds of boot up. The keypad will display the existing address, which is set to (31) by default.
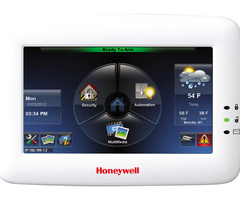
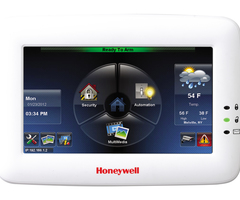
You can clear the current address by entering [00]. Then enter the address you want to use. It is recommended that you use (16) as the address for a first keypad. Then the second keypad can use (17), and so on until you reach (23) and no more keypads can be added. Additionally, AUI keypads like the Honeywell Tuxedo Touch will need to use one of the four AUI addresses. These are 1, 2, 5 and 6. Remember, the Total Connect 2.0 platform takes up one of these AUI slots. The AUI slots must be enabled using the programming field [*189].
Keep in mind that the addresses for standard push-button keypads must also be enabled from within programming. These are programming fields [*190] thru [*196] for addresses 17 thru 23 respectively. Please note that keypad address 16 does not have an associated programming field, and it cannot be disabled. Keypad address 16 is always kept enabled so that the system always has at least one keypad address available.
Note: It isn't mentioned because it technically doesn't have anything to do with the keypad address on the Tuxedo, but when Joe shows the ECP Address screen on the demo Tuxedo, it shows a checkbox for "Primary RIS Device" as being checked, and the RIS Address set to 25. When using Total Connect 2.0, you do NOT want this box checked, but you do want to set the RIS device address to 25.
http://alrm.gd/get-monitored
Transcript
Hi, DIYers. Joe from Alarm Grid. And today, we're going to show you how to address a keypad for a VISTA panel. Now today, we have a 21iP, and this process is going to work for a 15P, a 20P, or a 21iP. So we have a couple of different keypads that we do have connected. Today, we're going to show you how to do this on a 6160RF and on a Tuxedo Touch. Now, if you do have a 6160, the process is exactly the same as the 6160RF. It's just a little bit easier as it doesn't have all the extra menus for the RF settings on this keypad. So to begin, the system can support up to eight regular keypads or can support the four touchscreen keypads on the 21iP. The regular keypads, the keypad address starts at number 16, and it goes up from there. If you do have a brand new system and you have a brand new keypad that's never been addressed before, the keypad-- you'll be able to actually address it with the system already powered up. You just have to press and hold one and three on the keypad, and then enter the address that you want. We've addressed this keypad already, but if it was fresh and brand new, all that I would have to do is press and hold one and three. And as you can see, it says Con Address. This is the keypad address, and it's set to 16, which is the first keypad address on the system. But, as you can see, when I enter numbers, it won't change anything because it's already been addressed. If you're in the situation and you do want to readdress the keypad, what you actually have to do is reset the system and then press one and three within 50 seconds of the system powering up. So let's give that a shot. So I'm going to undo one leg of our backup battery, and then I'm going to unplug our main power. The system is turned off. So I'm going to plug it back in. Power it up. We're getting the boot process showing on our keypad. So now that we're powered up, I'm going to do one and three. There's our keypad address. I'm going to do zero, zero to clear it out and then one, six for what we want. I'm going to click star to confirm. As this is a 6160RF, we have the different RF options. We want the receiver on. Receiver address. We want this to be zero, zero for this particular panel. Star to confirm that. High security, we're going to leave off. Disable High Security Devices. We don't have to do anything with this. And that's it. After you star through those menus, the keypad's going to go back to the main screen ready to arm. And now we do have this keypad set to the address that we want. Now, let's move over to the Tuxedo Touch. The Tuxedo Touch, as it's a touchscreen keypad, uses a different address set then one of the touch button keypads. It actually uses one of the AUI addresses on the system. There's four of those addresses, and if you do have Total Connect on your system, it's going to occupy one of them. So if you do have your system activated, and you're using Total Connect 2.0, you're only going to be able to use three touchscreen keypads. Another thing to keep in mind is that if you have a 15P, that only has two AUI addresses. So you'll be able to use two touchscreen keypads. And if you have that on Total Connect 2.0, you'll only be able to use one. This is important because if you're planning your system out and you're planning to have x number of touchscreen keypads, you're going to have to decide whether you want four without Total Connect or three with Total Connect. So let's head over to our Tuxedo Touch. As you can see, it's ready to arm. So the first thing we're going to have to do-- we've already done this, keep in mind-- but we will have to enable the AUI address that the Tuxedo Touch is going to use. There's one, two, five, and six. So to do this on the Tuxedo Touch-- let's say we didn't have any other keypads available-- we'll have to jump into the Console mode on the Touch, go into Installer Programming, and set this up. So to do this, we're going to go to Security. We're going to go to More Choices, and we're going to go to Console Mode. Now, I'm going to enter the Installer Code, four, one, one, two, and then eight, zero, zero. As you can see, it shows Installer Code 20, and now we're the Installer Programming. So I'm going to click star. Then I'm going to enter one, eight, nine. Now we're in the AUI address setting. So what I'm going to do is I'm just going to turn all four AUI addresses on to be enabled for partition one. If you do have this activated with an alarm company, one of these addresses-- if you're using Total Connect 2.0-- it will have to be set to five. If you ask your alarm company why that is, they're going to tell you that is because with Total Connect, if you do Arm Away, you don't want Auto Arm Stay to work with the system when you use that feature. But we're not worried about Total Connect 2.0 today, so I'm just going to set them all to one. So I'm going to enter one, one, one, one. So now we've enabled all of our AUI addresses to be active on partition one. I'm going to do star, nine, nine. That backs out of programming. And if you do do this on the Tuxedo Touch, it will reset after you complete this. So now that we have the Tuxedo Touch powered back up, we're going to have to set the Tuxedo Touch to one of the AUI addresses. As we enabled all-- one, two, five, and six-- we'll have to set this to one of those. To get to that menu, we're going to click on the Tools icon. We're going to click on System. Then we're going to click on CS Setup. Now, you're going to enter the installer code for the system as it's connected to it, so four, one, one, two. And then do ECP Address. Right here is where you'd set that. So as long as we have this on one, two, five, or six with our current panel setup, the Tuxedo Touch will work. If you do have Total Connect 2.0 connected to the system, whatever address your Total Connect 2.0 is set to, you will have to have the Tuxedo Touch on a different AUI address. So let's say TC 2.0 is on address two. The Tux would have to use one, five, or six. But again, if you do get Total Connect 2.0 on your VISTA system, you will be interacting with your alarm company in some fashion. So just communicate with them with what's going on if you are setting up a Tuxedo Touch on your own, and they'll definitely help you out. So I'll set the Tuxedo Touch to the number one. I'll click Apply. And it's going to reset. As we've enabled those AUI addresses though, it will work with the system. That's how you set up a regular push-button keypad or a Tuxedo Touch or touchscreen keypad on your VISTA 21iP. If you do you have any questions though about addressing a keypad to your panel, keypads in general, or the Tuxedo Touch, feel free to give us a call at 888-818-7728, send us an email to support@alarmgrid.com, or jump on our website at www.alarmgrid.com. If you enjoyed the video, feel free to subscribe. And if you want to be notified when we post future videos, hit the notification button below and we'll send you an update when we do so. Have a great day, and thanks for watching.
- Uploaded

