Disabling Auto-Stay Arming on a Honeywell Vista
Related Products


Related Categories
- Small Business Security Systems
- Monitored Home Security Systems
- Home Security Systems
- DIY Wired Security Systems
- Business Security Systems
- Apartment Security Systems
Description
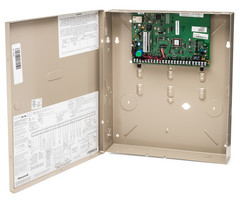
In this video, Jorge shows users how to disable Auto-Stay Arming on a Honeywell VISTA System. The Auto-Stay Arming option is available in programming as the *84 field. A user can set Auto-Stay Arming to be enabled across the system, enable it for specific partitions, or disable the feature entirely.
Auto-Stay Arming is a protection feature designed to prevent false alarms. This feature reverts the system to Arm Stay Mode if no entry/exit zone is faulted during the exit delay period after setting the system to Arm Away. The idea is that if no entry/exit zone is activated during the exit delay, then it must mean that someone is still inside the building. If the system were to Arm Away, it would be likely that the user would cause a false alarm by activating an interior sensor. So instead, the system switches to Arm Stay to prevent this from occurring.
It's important to understand the difference between Arm Stay and Arm Away on a security system. Both are relatively standard arming types, but certain sensors respond differently in these modes. With Arm Stay, the idea is that someone is still inside the building. Interior sensors, which typically include motion sensors and indoor contacts will remain inactive in Arm Stay Mode. This was, the user can still move throughout the building freely. But perimeter sensors can still cause alarms.
On the other hand, Arm Away means that nobody is inside the building. An immediate alarm will occur if an interior motion or contact is activated in this mode. After all, there should be nobody in the building, so if an interior sensor is fault, it means there is a break-in. However, these sensors follow a particular logic. If an entry/exit zone sensor is activated first, like normal, then a user will still be able to disarm the system within the entry delay period before an alarm occurs, even if they activate an interior sensor while doing so.
http://alrm.gd/get-monitored
Transcript
Hey, DIYers. I'm Jorge from Alarm Grid. Today we're going to be discussing how to disable the Auto-Stay Arming feature on a Honeywell VISTA alarm. Now, let's get a little bit into what the Auto-Stay feature does. It's basically a setting in the system, which when you Arm Away, if no entry or exit door has been tripped, then the system reverts to an armed state. The reason for that being is, logically, if an entry/exit has not been tripped, then it knows that nobody has left the house. So the system automatically sets it to an armed state. Now the reason it does that is because when you do an Arm Away, it activates any motions that you may have [? learned ?] into the system. So if you do an Arm Away and you activate the motions, but you never left the house, then you're more than likely going to get a false alarm especially if you walk by one of those motions and if the system actually is in an Arm Away state. So that's why the feature is enabled by default to an armed state so that it's unable to cause or to prevent false alarms. Now as helpful as it is, it also causes some issues for users who's their first time using an alarm system. It gets kind of confusing for them because they're doing an Arm Away. And they're wondering hey, why does my system keep going to an Arm Stay? Well, the reason for that, again, because no entry/exit has been tripped. So they get frustrated. So you guys want to make sure that if you are testing the system and you're doing an Arm Away and it keeps going back to an Arm Stay, it's because of this Auto-Stay feature. Now granted this is a feature that you can disable on the system. It does need to be disabled through the programming, which I'm going to show you guys how to do it. It's actually going to be *84. So first thing we want to do is go ahead and go over to our keypads. I'm going to be using a 6160. You can also-- if you have a 6150. Since this is deep-level programming it's always best to use the 6160. But if you do not have one, this is a setting that you can change on the 6150. But if you change it, be careful because you don't want to miss any other settings up with the 6150 since that is only a fixed English keypad, it only shows you numerical values. And it doesn't actually show you what field you're in or anything like that. It'll show you the number of the field, but it doesn't actually show you the writing. So if you guys are using 6150, just be careful. It's always best to use a 6160, and I'll show you guys why. So let me go ahead and-- right now it's showing a system low battery. Just going to leave that like that. Now I'm going to go ahead and go into my programming screen, which is installer code 800. My installer code is devoted at 4112. So you want to make sure that you use your correct installer code. So I'm going to enter in 4112800. Immediately it shows Installer Code 20 on the 6160. If you have a 6150, it would just show 20. Now from here we go to *84. *84 is the Auto-Stay feature. And you'll see here it says Auto-Stay. And the field is 84. On a 6150, it would just have the number 84 up there. Now if you guys want to disable the Auto-Stay feature, you just enter in 0. If you want to enable it for partition 1, you enter in 1. If you want to enable it for partition 2, you enter in 2. If you want to enable it for all the partitions, you enter in the number 2. I'm going to enter in 0. Switches it to 0, and then it jumps over to the next field. I'm going to go ahead and just exit out of here. And now if I arm my system Away, I can arm it Away. And since the Auto-Stay feature is open, I do not have to open an entry/exit door. So right now I do have a wired front door contact [? learned ?] into the system. I'm going to leave it closed the whole time. I'm not going to open it or trip it. And you'll see that the system will go to an Arm Away. So I enter my master code. My default is 1234. Yours may be different, of course. And then the number 2 for Away. [ALARM BEEPING] And at the end of this countdown, since the Auto-Stay feature is disabled, the system will go into an Arm Away. [ALARM BEEPING] Couple more seconds. [ALARM BEEPING] And you'll see that the system is now Armed Away. If the Auto-Stay feature was on, it would have gone into an Auto-Stay. I'm going to go ahead and disable the system for now. And that is just a quick walk-through on how to disable the Auto-Stay feature on the VISTA system. If you guys do have any questions, feel free to email us at support@alarmgrid.com. If you guys found the video helpful, make sure that you hit Like underneath. Subscribe to the YouTube channel and enable notifications so that whenever we upload new content, you guys do get notified. Thank you. I'm Jorge. I'll see you guys next.
- Uploaded


