MAXPRO NVR XE from Honeywell Security
Related Products
Related Categories
Description
Watch a demonstration of MAXPRO NVR XE from Honeywell security. This system is a great starter kit for businesses or homes that need to get started with a video monitoring solution.
Transcript
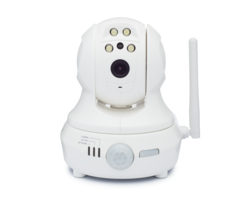
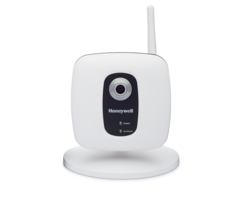
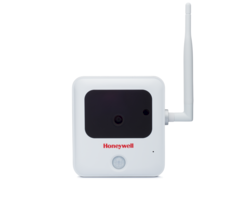
Introducing Honeywell's MAXPRO NVR XE, and our latest IP performance series cameras. The first complete HD video surveillance solution for small businesses and it's only three clicks to live video.
An affordable HD solution from Honeywell, a trusted leader in security, MAXPRO NVR XE is perfect for capturing sharp pictures of people, objects, and activity. And high-definition video leads to more accurate identification, and quicker access to video evidence than standard analog can provide.
It's ready to use right out of the box, saving you time and money, and setup is quick and easy with the help of installation wizards, that guide you to live video in just three clicks. It's HD, it's easy, and it's affordable. Choose IP. Choose Honeywell.
How to mount a 5811 on a Double Sliding Door
Hi DIY's, Sterling, with alarm grade here. Today we're going to show you how to install a 5811 Wireless Door and Window Sensor on a sliding patio door. So every sliding door is a little different. This one that we have here actually opens from both ends. so we have a door here that opens. We also have a door on this end that opens. This door does go all the way over, and then comes back and closes.
Because of the nature of this door, we're actually going to have to use two sensors, one on the right side and one on the left side. So we have our 5811, with any wireless door and window sensor, it's made up of two devices, the contact which is the bigger box, and then a smaller magnet.
When the contact is in line with the magnet the zone is happy and the system can be armed. As soon as the door opens, and the magnet slides away, the panel beeps and announces the zone. We have already programmed this sensor to our L50100 LYNX Touch Security System, and if you need some help on how to program a 5811, please check out our video on programming this sensor.
We have also installed the battery, and again, we have a video on how to replace the 5811 battery, so you can check that out if you need help with that, too. Today we're just going to show you how to install it. So we're going to go and do the right side first.
There is double-sided tape which we're going to use to mount it, and instead of mounting and then making sure it works, we don't want to ruin the tape. We're going to hold it up against the door. We're going to make sure that our magnet is in line with our sensor, and that our zone is happy, before we go ahead and press it onto the door.
So you always want to put the contact on the frame, if at all possible and the magnet on the door. The reason is when you slide and shut the door we don't want the contact circuit board to get banged around. So for us, we have a nice flat piece of a frame here. We have already cleaned it and dried it to make sure that it will stick as good as possible.
What we're going to do is mount it as close to the top right corner as possible, and we're going to put the magnet on the actual door. On this door it may be hard to see in the video, but you're actually not totally in line with the magnet and the contact, however this sensor can take a ¾ inch magnet gap and still be happy, so even though we are not totally in line, it will work.
So when we open the door, the magnet slides across, and we're good. Now that we have verified our mounting location, it's as simple as peeling off this tape. With this sensor there is a bar code sticker with the serial number of the device. It's always good to hold on to this, just in case during your installation, you want to make sure you have the right serial number.
You can even write patio right door where you are going to be mounting it. We'll hold on to that. And along the side of the 5811 are two plastic tabs. That shows you on which side the magnet has to go. It's very important that you do it on the right side, because there are no tabs on the other side, and the magnet will then not work.
So now that we're ready we're going to simply stick and press the contact to the door. Press hard so it stays, and then we are going to peel off the magnet tape, the paper off the back of the tape. You don't have to hold on to that one, and then the magnet is ready to be mounted.
Align it directly with the two tabs, press, and hold. Installation is done. The zone is happy right now. Open the door and the panel says patio right door, which is what we programmed this zone to be. Close the door. System is ready to be armed.
So now that we have mounted the right side, we just have to do the same thing on the left, so same idea. You want it in the top left corner. You want to do the magnet on the door and the contact on the frame. We remove the tape, careful to hold on to the bar code sticker, and again right left door patio on there, careful to put the two tabs that align with the magnet on the bottom side. Press and stick to the frame, like so.
Remove the backing from the tape on the magnet and press and stick the magnet in line with the contact. In this position the system is happy, ready to arm. You open the door and the panel beeps and chimes and announces patio left door. Close it back up, and we are done with the installation of our 5811 Wireless Door and Window sensor. If you guys have any questions on how to install a 5811, please give us a call or shoot us an email at support@alarmgrade.com.
- Uploaded
- Duration: