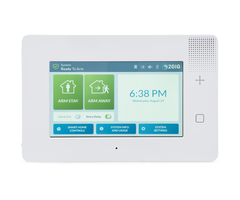
Pairing a Z-Wave Device to the 2GIG GC3e
Related Products


Related Categories
- Wireless Touchscreen Alarm Panels
- Small Business Security Systems
- Monitored Home Security Systems
- Home Automation Controllers
- DIY Wireless Security Systems
- Apartment Security Systems
Description
In this video, Michael from Alarm Grid shows you how to pair a Z-Wave device with a 2GIG GC3e Security System. The 2GIG GC3e has a built-in Z-Wave Plus ...
Transcript
Hi, DI wires. This is Michael from Alarm Grid. And today, I'm going to show you how to pair a Z-Wave device with your 2GIG GC3e security system. Now once you pair your Z-Wave device with your 2GIG GC3e, you'll be able to control it from the panel. And if your system's monitored and set up with Alarm.com, you'll be able to control it remotely from that platform using a mobile app or a web browser. And you can include it with Alarm.com Smart Scenes. And the GC3e also offers local scene control as well. But let's just get right into it for pairing the Z-Wave device. So what you're going to do, you're going to choose System Settings in the bottom right corner. And then you can enter in your installer code, which-- ours is at the default 1561. And then we're going to choose Smart Home Settings. And we're going to choose Remove Devices first, because we want to clear the device from the Z-Wave network before we add it in. This wipes out any residual Z-Wave data. So that way, you can do a successful pairing. So we're going to choose Remove Devices. And it's listening for a device to remove. And we have our Kwikset Z-Wave lock here. And we're going across the Inclusion/Exclusion button. And you can see that the device was successfully removed from the network. So then we're going to press Back. And then we're going to use Add Devices. And now it's going to allow us to add the Z-Wave device, so we're going to press the Inclusion/Exclusion function. And you see, it received the input after I pressed the button. And now it's taking it's time to add the lock. It usually takes a few seconds for locks. There's a little bit more information there. So just be patient. It'll go through once it does. And remember that the inclusion/exclusion process for your Z-Wave device might be different depending on the device you're using. Some locks require you to enter in a specific code and to do an inclusion/exclusion. Anyway, you can see that our device has been added. And like I was saying, other Z-Wave devices will have a button for that purpose, as is the case with our Kwikset Z-Wave lock. So just refer to the manual for your Z-Wave device to figure out how to do an inclusion/exclusion. And remember, in most cases, you will want to clear the device from the network first like we did. Once you add the device, you can rename it. We see, we have the default name of Entry Control. We'll just call it Lock, L-O-C-K. And there, we have our lock setup with our 2GIG GC3e. And then we can press the return arrow on the left side of the screen to go back to the main menu. Just repeatedly press it. And any changes we made will be automatically saved. If we want to control the lock, we can choose the Smart Home Controls button down here. And we can choose Locks. And you see that our lock is locked right now. And if I press the on, it's going to do a refresh. And it also shows that our battery needs to be changed soon, apparently. And we can press the button. And as you can see, it-- as you can see, it controls the lock, which is fantastic. And I do want to remind you that the GC3e has a built-in Z-Wave Plus controller. So that when you add Z-Wave Plus devices with the system, you'll get the extended range and battery life as opposed to using Z-Wave Classic devices. So if you have the option, try and add a network of Z-Wave Plus devices. You'll get better results out of your Z-Wave devices when you set up Z-Wave plus devices with your GC3e, which has a built-in Z-Wave Plus controller. Remember, you can go into Alarm.com to control the devices remotely from a mobile app or web browser, which is a nice feature as well. And Smart Scenes will allow you to have the devices activate automatically based on a set schedule or with pre-determined system events. For example, you might have your lock lock the door automatically when you arm away and you go to work for the day, which can be a nice convenient little touch. So that's how you would pair a Z-Wave device with your 2GIG GC3e. Remember to exclude and then include. And you can always do the exclusion process even if it's paired with a different network or if it's not paired with a network at all. Often, you'll find that Z-Wave devices have residual Z-Wave data even when they are fresh out of the factory for testing purposes. So even if your device is brand new, do the exclusion process anyway. Always a good practice. But that aside, that was how you pair a Z-Wave device with your 2GIG GC3e. If you found this video helpful, make sure to give it a thumbs up below to like the video. And remember to subscribe to our channel to get updates on future videos. And if you have any questions about Z-Wave devices or the 2GIG GC3e, send us an email at support@alarmgrid.com, and we would love to help you out. Hope you enjoyed the video. Thank you.
- Uploaded
