Adding a Siren to My LYNX Touch Panel Using The 5800RL
Related Products


Related Categories
Description
http://alrm.gd/get-monitored.
Transcript
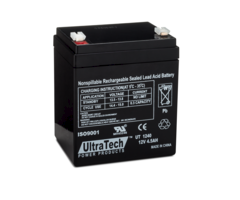
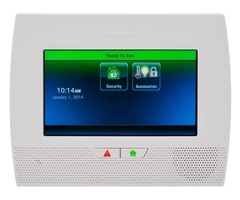
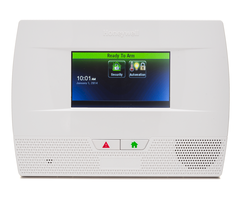
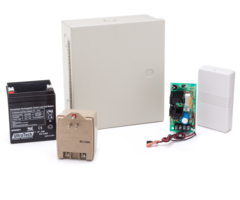
Hi DIYers. Joe here from Alarm Grid. And today we're going to show you how to connect a wireless external siren to your LYNX system. And today we're going to use the 5800RL wireless relay. We have a Honeywell power supply. And we also had a strobe instead of a siren, because that would be really annoying if it screamed in my face. The one thing that you're going to want to know about the 5800RL relay is that you want to power this up without anything connected just to make sure that it resets its relays back to the default mode. If you do connect stuff to this and you power it up and it's incorrect and it tries to reset, you could damage your relay, and you may have to buy a new one. So let's do that first. To get this thing powered up, it actually does need DC power. So as you can see, I have a couple wires that are already connected to it, which we're going to use later. Or this one rather, we're going to use later. For right now, though, we're just going to connect our DC power to our Honeywell power supply over here. Now, the Honeywell power supply, as you can see, it does have whips for an external battery, which can let you operate this external siren if the power goes out. We're going to leave those unplugged for now. If you do decide to use that, which you should, all you have to do is install a 12 volt battery of whatever type is compatible. This is a 4 Amp power, but you can also use a 7 Amp power if you choose. So to get this thing powered up, first thing I'm going to do is I'm going to connect the DC power input from the power supply to our relay. So I just grab a screwdriver. And we're going to do red to plus. And we'll do black to negative. So they're nice and secure. I'm going to go over here and power it up. So as you can see, we have lights on our power supply. And we also have lights on our relay, which tells us that everything is at least powered on. So I'm going to go ahead and unplug it so that we can do the remaining connections. All right. So now what we have to do is on the relay, we actually have to make a jump from the negative power input to terminal number 2. So I'm just going to loosen up the terminal real quick. Slip the wire in. And that's good to go. Now, as far as our siren strobe goes, we're going to have to take negative coming off of that. And we're going to have to attach it to terminal number 3. This is the common on the first relay. So I'm going to loosen this up. Slip it in, then tighten it up. All right. Now, one of the funnier connections is that we actually have to take our hot, or the positive, from our siren. And we have to put that on the positive output on our power supply, the positive DC output. Make sure you don't connect it to the AC. So I'm going to loosen this terminal up. Got this going on in the terminal, and nice and secure. So as you can see, there's not too many connections to make on this setup. But you will want to make sure that you do follow the instructions and that all your connections are nice and secure. So with this set, let's go ahead and power up. Great. And we do have lights. The last thing that you're going to have to do on your relay to get it to communicate to your system, is have it set to the same house ID that you have set on your LYNX system. You'll notice that on the right side of the relay, we have DIP switches on the bottom. And in the relay instruction manual, it'll show you the different combinations that you can use to set up the house ID on the device. I had it currently set up to house ID number 1, which is what I do have set on the LYNX system. So just to confirm that we have the house ID correct on our LYNX system, let's go into programming and double check. So we do Tools, Installer Code 4112, Program. And then you'll see this option, System Type. And as you can see, our RF House ID code is 1, which is also what is set on the relay. So it should be good. So now let's back all the way out to the main menu. Whenever you see Allow Installer to reenter programming, you're going to want to hit Yes. Back. And now let's set off a panic alarm. So I hold down the button. I click Fire. And as you can see, the strobe is following the alarm. If this was a siren, it would be making a noise right now. And this is a super convenient way to add a wireless external siren to your LYNX system. I'm just going to disarm this to stop it from flashing and then clear the alarm. And we're all set. If you do have any questions about adding an external wireless siren to your LYNX system, about the relay, the power supply, or any alarm questions in general, feel free to head over to our website, www.alarmgrid.com. Give us a call at 888-818-7728, or send an email to support@alarmgrid.com. If you did enjoy the video, feel free to subscribe. And if you want to be notified when we post future videos, hit the Notification button below, and we'll send you an update when we do so. Thanks for watching, and have a great day.
- Uploaded