Programming Report Codes For a Self Monitoring Plan With Alarm Grid
Related Products


Related Categories
Description
In this video, Jorge shows users how they should program the report codes for their panel if they have a self-monitoring plan. Self-monitoring means that the system is not connected with a central monitoring station for automatic dispatch. Instead, the user must contact the authorities on their own.
When a user has self-monitoring service, they receive text and/or email alerts regarding system activity. This includes alarm events like break-ins, fires and medical emergencies. If a user receives notification about an alarm event, it will be up to them to contact the necessary authorities. Nobody else will do it for them. This type of monitoring is appropriate for users who can check their text messages and emails reliably. Any user who might not notice a text or email right away is usually better off with central station monitoring.
Most alarm systems are set up for service with a central station. By connecting with a central station, the user can receive automatic dispatch in the event of an emergency. The central station will receive an alert whenever an alarm event occurs. A highly trained dispatcher will respond to the alert immediately and attempt to contact the end user and make sure that everything is alright. If the central station does not receive a response, or if the end user says that they are experiencing an emergency, the authorities will be contacted immediately.
But with self-monitoring, the system is not connected with a central monitoring station. As such, the system should be programmed so that any reporting codes are disabled. Otherwise, the panel might display a trouble condition when it is unable to successfully contact a central station. This is necessary for an system connected with Total Connect 2.0 and AlarmNet360. For Alarm.com panels that are self-monitored, it is not necessary to disable any report codes. This is because the monitoring company can simply disable reporting from their end.
http://alrm.gd/get-monitored
Transcript
Hey, DIYers. I'm Jorge from Alarm Grid. Today, we're going to be going over how you should program your report codes if you're doing a self-monitoring plan with Alarm Grid.
So first of all, let's get into what a self-monitoring plan is. It is literally in the name. It's a self-monitoring plan, which means any signals from the alarm system are not being transmitted to a dispatch or central station, in other words. Right? So the self-monitoring plan only sends the signals to the interactive platform that you have, whether that's Total Connect 2.0 or alarm.com. The app then sends you emails or text message notifications when an alarm goes off, and again, this is only if you're being self-monitoring.
Now, you don't need to have the reporting codes enabled on your alarm system, whether you have a VISTA, or a wireless Honeywell, 2GIG, Qolsys, whatever kind of system it is. You don't need to have the reporting codes enabled on this, because if you do, then that means it's trying to signal out to a central station, when on a self-monitoring plan, it is not. Now, more often than not, Alarm Grid technicians will actually take care of that programming for you, so that way you don't have to do it. But if you want to get a jumpstart and do it on your own, I'm going to show you guys a quick little video on how to do that.
Now, the method differs between if you're using a wired VISTA system or a Honeywell Lynx or Lyric system. It also differs if you're using an alarm.com system, which we can actually turn that off on our own. So you don't actually have to do that if you're using Qolsys, 2GIG, DSC, Interlogix, anything like that. All right?
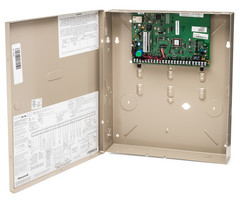
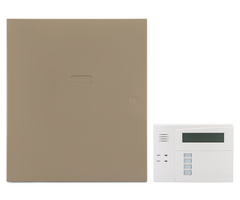
So first thing we're going to go ahead and start off with is going to be our VISTA system. So if you have a VISTA system, the first thing you want to do is go ahead and head over to your keypad, because we're going to need to enter into programming. Now, when you go into programming, there's actually one main thing that I want you to pay attention for. So first thing you got to do is go to your system. You're going to need to know your installer code.
Now, a lot of people get the installer code and the master code confused. The master code is what you use to arm and disarm the system whenever you leave or whenever you go to sleep at night. The installer code is what you use to go into programming. They're two complete different codes, so make sure you have the installer code.
The default installer code for a VISTA system or a Honeywell system is 4112. So to go into programming on a Honeywell VISTA system, I'm going to enter in my installer code and then 800. So it's going to be 4112800. Now, this is what I want you guys to pay attention to if you enter in your correct installer code and 800 right after, you should see installer code 20.
Now, if you see installer code 20 on the keypad, that is perfect. But if your keypad only shows the number 20 on the screen, that means you have a fixed English keypad. And if you go any deeper into programming, you're basically going to be working blind.
So if you get to this point, where you only see a 20 on the screen, hit star 99 to exit out of programming. We're going to stop there, if you have a 20, if you only have a 20 on the screen. And you're going to have to buy an alphanumeric keypad, and then we'll come back to doing these steps. All right? So make sure you're keypad says installer code 20. If you're keypad says installer code 20, you're OK to proceed, and we'll then move on.
So the first thing we're going to go ahead and do is get into the reporting codes for the individual zones themselves. So what I'm going to go ahead and do, I'm going to go ahead and go into star 56. That's going to bring me into a deep level zone programming, star, 5, 6. It's going to ask you if you want to set to confirm. Just hit 0, and now it's going to our Enter Zone Number screen.
So you only need to disable the report codes for the zones that are programmed. So if you only have zones 1, 2, 3-- if you only have one zone on your system, for instance, I'm only going to have zone 1. I'm going to show you how to disable it. You can enter in the zone number there. So if it's like zone 3, you can enter in 03.
If it's zone 1, I'm going to go back to 01. Whatever zone you want, the zone number is going to be right there in the bottom right corner. So once you hit the zone you want, you're going to hit star to proceed. It's going to bring you to a Zone Summary screen.
Now, if you go to a zone, and you see the Zone Type is set to 00, you do not need to disable the report code for that, because if it's 00, that means that zone is disabled. So if you see a 00 under ZT, Zone Type, you do not need to change the report code for that. Right now, my Zone Number is set to 1, my Zone Type is set to 0, and I actually already have my reporting code set to 00. But here's what I'm going to show you guys what to do now.
So after you get to your Zone Summary screen, you're just going to hit star until you get to the Report Code screen. The Report Code screen is going to look like this. So I'm going to hit star to proceed. I'm going to star to proceed, star again, and now this is my Report Code screen. It has my Zone Number in my top left, it has report code right after it, and then the second line is where you need to switch everything to 00.
So if you see something different here, let's say sometimes you'll see a 10, 10. If this is what you see on your zone, make sure you switch this out, and you enter 00, 00. And after you confirm that both the first and the second have been set to 00, 00, just hit star to proceed, and just hit star until you get back to the Zone Number screen. You don't need to program the alpha, so I'm going to hit 0 for that, and then now we're into Enter Zone Number again. All right?
Once you've completed this for every zone that you have, just hit 00 to quit. That's going to take you out of the deep level zone programming. So I'm going to hit 00, and it's going to take me back to my enter star or field number. So it's going to take me back to my normal programming screen.
Now, that we're back at our main programming screen, we now have to disable some of the other reporting codes on some of the other features on the system. That's going to be fields 59 through 76. All right? So 59 through 76, really all you're going to do is hit star 59. That's going to take to the field, and after that, you're basically just going to keep hitting 0 until you hear three beeps to confirm on everything. And I'm going to show you guys in a second what that looks like.
But once you get to 77 which is a daylight time savings, you're just going to stop there, and we're going to exit from programming. So here's what it looks like. Right? Again, I'm going to start as star 59, so star 5, 9, and it's going to say Exit Error Report. It has a number there. I'm just going to hit 0. [BEEPING]
It gives me the three-beep confirmation, and it automatically jumps to the next one. Again, I'm just going to hit zero, and if you don't hear the three beeps, hit 0 again. [BEEPING] Those three beeps are confirmation that you're changing the setting in that field. Now, Bypass Report Code-- sorry, that number in the bottom right is actually showing you the field number. So we did 59, we did 60, and now we're at 61.
So we hit 00. [BEEPING] We now jump to 62. Again, you can just keep hitting 00. [BEEPING] It'll jump to the next one, and we're going to do this all the way until we get to 77 and then stop. So again, 00, [BEEPING] 00. [BEEPING]
Some of them may require more than one or two 0's. So just keep hitting 0 until you hear the three-beep confirmation. OK? So again, now, we're in 66, so we have about 10 more to do. [BEEPING] As you see, this one took a lot more 0's. [BEEPING] [BEEPING] [BEEPING] [BEEPING] We're now at 72, [BEEPING] [BEEPING] [BEEPING] and again, all I'm doing is I'm just pressing down the 0, until I hear the three beeps.
Now, we're at 76. This is our last one. [BEEPING] It jumps over to 77, and it brings us to our daylight and savings time. Right? So right there, that's where we stop. That's what we're done with the reporting codes on the VISTA system.
Once you get to that field, just hit star 99 to exit programming. Make sure you only do star 99. If you do anything else, you may lock yourself out of programming. So it's star 99 to exit programming, and you should be fine. So star 9, 9, and we're back at the main screen. We're out of programming, and that is how to disable the report codes on a VISTA system.
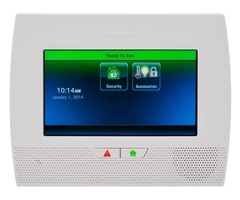
Now, we're going to jump over to our Lyric and Lynx systems. If you have a Lynx or Lyric system, the process is going to be a little bit easier, because we don't actually have to go through the actual zone fields. And you might not need the manual on all this, and just everything is on a graphic user interface screen. So it's a lot easier to deal with.
So the first thing we have to do is go into programming, same way we did on our Honeywell VISTA series system. We've got to do the same thing on the Lyric system. Again, default installer code for these systems is 4112. Your code may have been changed by you or your company during the installation, so make sure you guys are using the correct code. Again, there is a big difference between a master code and an installer code. All right?
So on the Lyric system to get to programming, we're going to hit Security. We're going to go to Tools, and this is where you enter in the installer code, minus 4112. If you are not taking to this screen, then you are not using the correct installer code. If you're taking to a user's advanced setup and different things like that, you're probably using your master code. So make sure you use the installer code, that way you can get into programming.
Once I'm on this screen, I'm just going to go into programming-- into programming. And the first thing we're going to do, same thing we did on the VISTA system, is disable the reporting codes for the actual zones themselves. So I'm going to go over to Zones, and let's say I'm going to go to my zone 3, and I'm going to hit Edit. Right? So you highlight the zone. You hit the Edit button. So right now, you see it says Alarm Report in the bottom left. You want to-- [ALARM RINGING]
Sorry about that, just a couple of faults on the VISTA system. So what you're going to want to do on the Lyric system is, if you see the Alarm Report, it's set to Yes. You're going to want to hit that option and set it to No, and this is going to be for every zone, if you're being self monitored.
Again, this is for a self-monitoring plan only. Do not do this if you're being monitored by a central station, because if you turn off the reporting, that means if an alarm goes off on that door, it will not get sent to the central station. So this is only for self-monitored people, and yeah.
So Alarm Report, you set that to No, and then obviously, always hit Save before you do anything. And again, you can do this for all of your zones. You go to Backdoor, Edit, Alarm Report, toggle it to No, hit Save, and you do that for every single zone. All right?
Once you've gone through all your zones, depending on how many you have, just hit the back arrow key one time, and now we have to disable some of the panel features. So we go to Reporter. We're going to go to I believe it's Report Selection. Yes. So it's the Report Selection, and all of these that show Enabled we're just going to toggle them to Disabled. If you literally tap them, they will go from Enabled to Disabled.
Now, there may be some grayed ones that you cannot change. If that is the case, don't worry about it. You can leave them as is, but you want to try to set every single one that you can to Disabled. So there's only a couple of them that I couldn't change. I'm going to hit the down arrow key.
There is a second page, so make sure you disable those as well. Again, some of them are grayed out, so I'm just going to disable the ones that are not grayed out, and there we go. And then, once you're done with everything, you had Save. All right?
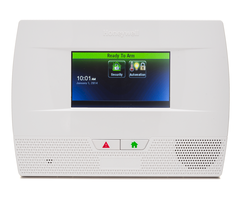
So as you saw the Lyric system, same concept on Lynx system. They both have the same fields, so just do the same stuff, and you saw how much easier it was on the touch screen systems. Now, on the Lyric system, we're going to hit the back arrow key all the way out.
If you're doing this on a Lynx system, on an L5210, L7000, L5100, L5200, make sure that when you guys are backing out of programming, there's going to be a prompt. That says, do you want to do you want to allow the installer to re-enter programming? You always, always, always want to say Yes to that. If you say No, getting back into programming is going to be a headache for you. So always say Yes on that prompt.
Now, after that, you disabled the reporting codes on the Lynx system. If you have VISTA system, showed you how to do that as well. And that was just a quick video on how to show you guys how to program report codes for a self-monitored plan. Now, again, self-monitored plans means that there is no central station. You're only getting text and messages from the app, and then it's up to you to contact the authorities. Right? Those are self-monitored plans.
If you guys have any questions at all about the plans or about their reporting and programmings, feel free to email us at support@AlarmGrid. If you found the video helpful, make sure you hit Like underneath. Subscribe to the YouTube channel, and enable notifications, so whenever we upload new videos, you guys get notified. I'm Jorge, and I'll see you guys next time.
- Uploaded