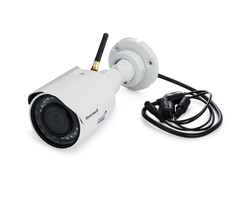
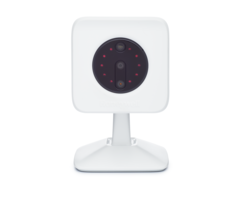
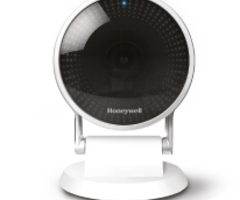
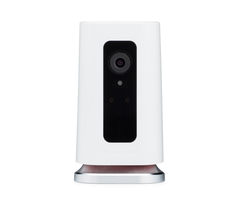
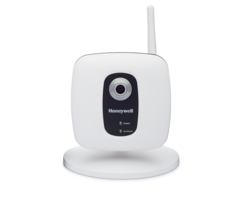
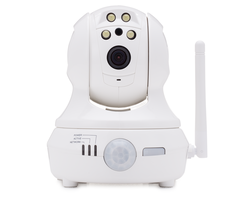
Getting an Alarm or Zone Open or Close to Activate a Honeywell IP Camera
Related Products
Related Categories
- Wireless Security Cameras
- Outdoor Cameras
- Low-Light Security Cameras
- 720P Security Cameras
- 1080P Security Cameras
Description
In this video, Joe talks about how you can get an alarm event or a specific zone to activate a Honeywell IP Camera. You will need to create a notification through Total Connect 2.0. You can have notifications occur when a sensor is closed, a sensor is opened, an alarm occurs, or an alarm is cleared.
Normally, a Honeywell IP Camera will start recording when it detects motion or sound. You can set the hours when the camera can be triggered to record from Total Connect 2.0. Unlike an Alarm.com Camera with a Stream Video Recorder, it is not possible to set a Honeywell IP Camera to record continuously 24 hours per day. Instead, you need trigger events to get these cameras to record. This can be audio or motion during set hours. Otherwise, you need to create a notification to get these cameras to record.
A notification is normally used to send you alerts when certain events occur. This can be anything like a sensor being activated or an alarm occurring. But there is also an option when creating a notification to trigger video capture as well. You can set the hours when video capture should occur, and you can select which camera(s) to begin recording. After you save your changes, the notification settings will go into effect.
There are many reasons why you might set your Honeywell IP Camera to record based on a notification. For example, you might want a camera to start recording when someone opens a door or when someone walks into a room and activates a motion sensor. This is particularly useful for areas that need extra security, such as an office or a room with precious valuables. Remember that the cameras themselves also have motion sensors and will start recording based on motion. You only need to create a notification for this purpose if you need separate sensors to initiate recordings.
http://alrm.gd/get-monitored
Transcript
Hi, [? DORs. ?] Joe from Alarm Grid, and today, we're going to show you and talk to you about how to get a sensor opening or closing to activate a Honeywell IP camera. Now you need a bunch of stuff set up before you're actually able to do this. You're going to need a Honeywell alarm system. You're going to need sensors connected to the alarm system. You're also going to need Honeywell IP cameras. You're going to have to have this alarm system activated on or an AlarmNet and have Total Connect 2.0 on it. And you're also going to need the proper feature upgrades in Total Connect to use cameras for this feature. But if you have all this stuff set up, you can have a sensor opening or a sensor closing trigger a camera. This is super convenient, and it gives you a lot more flexibility when you're configuring your home or location with your security system. Just as an example, you could have a door opening trigger a specific camera on your location to start recording. This is nice because compared to past iterations of different Honeywell devices, you don't have to just rely on motion triggering on the camera to actually get it to start recording. This can just be from any sensor opening, closing at the location or any sensor, really, you can have trigger the other recording feature on the camera. So it gives you a greater level of security when you're setting your stuff up, it makes the system more sensitive to different environmental factors, and it just gives you more options when you're doing your configuration for your alarm system. Today, though, we do have everything already set up. We have a Honeywell system that's activated on AlarmNet with Total Connect 2.0. We have some sensors connected to it. And we have some IP cams set up with it. So let's head over to the tablet, load up Total Connect 2.0, And i will walk you through the process of how to set the sensor open close to trigger the camera to start recording. So on a, tablet I'm going to load up Total Connect 2.0. It's going to log me in. I'm going to go to More, and I'm going to go to Settings. From here, I'm going to click on Notifications. After it's loaded, I'm going to click on List. Then I'm going to click on the plus hamburger button in the upper right hand corner to add a notification. For this one, I want to click on Security. We don't want to click on Built-In Camera, Video Doorbell, or any other thing for this particular function. Even Cameras, we're not going to use for this. I'm going to click on Security. I'm going to click on Sensor Open/Close. So let's say we want a notification a trigger when the sensors open-- and let's give it a name. And we'll call this Test Record. So I'm going to do Censor Open. So when a censor opens, we want this feature to activate. Click on Continue. Which censor do we want to trigger the notification? As you can see, it's a checkbox, so we can select more than one sensor to trigger this particular function. So I'm going to do Test Door. And then I'm going to do Back Door. So if either of those doors open, this record function that we're setting up will activate. Click Continue. The notification schedules we're not going to get into right now. You can have it so it will only send out a notification during a specific time period or event. For now though, we're just going to click Always. I'm going to click Continue. And then the Group, this is your notification group. So if you have specific people that you only want to receive a specific notification, this is where this would come into play. For now though, we're just going to do Default Group. So any users that are in the Default Group will receive the notification. I'm going to click Continue. And lastly, the Video Capture. This is where we set which camera we want to a record during this event. So I'm going to click the button on. And as you can see, we can pick the different cameras that we want to activate when this occurs. You can have more than one, we can do all the video cameras. Let's do that for now for all intents and purposes. Also, on the top, you can set the schedule for when you'd want this to occur with the camera. We're going to click Save. We're going to click Yes to save the changes. And we're all set. So if we scroll down our list, we should find this under right there. You can see that there's test record, sensor open the back door and test record sensor open the test store. So that's actually the notification that we just set up. It's getting us one block for each of these for each of the sensors that it's configured with. But as long as this is enabled, when other either of these doors open, those cameras will start recording. If you have any questions about how to set up your security system with Total Connect, getting it activated, adding in IP cameras, or how to consider them all together to do this or different functions, feel free to give us a call at 888-818-7728, head to the website www.alarmgrid.com, or send us an email to at support@alarmgrid.com. If you did enjoy the video, feel free to subscribe. And if you want to be notified we post future videos, hit the Notification button below, and we'll send you an update when we do so. Thanks for watching, and have a great day.
- Uploaded