Introduction to AlarmNet Cameras
Related Products
Related Categories
Description
When you are looking for security cameras for your AlarmNet system, you have several options. This video introduces four models with different options.
The cameras are Honeywell cameras that can be used either indoor or outdoor. Each model will have specific functions and how they operate and function. As you will see in the video, all of these cameras run on the Honeywell WAP plus wireless network or are hardwired with an ethernet cable.
You can quickly set up the cameras using the WPS button on the top of your encrypted router if it is available. The video covers this in detail and tells you what to look for to ensure your cameras are connected.
There will be a monthly charge for using the AlarmNet dealer service. Our video discusses the reason for this and will answer your primary questions. You will have to talk to an AlarmNet dealer for specific monthly pricing for your service needs.
All of the cameras covered in this tutorial video have motion detection capabilities. As you will see in the video, you can set up the motion detection using the 8-second video clip when the camera detects movement. The Total Connect 2.0 app will allow you to control that 8-second clip by adjusting it forward or back to 7 seconds either side of the motion.
From this video, you will be able to see other tutorials for each specific camera listed here. The 4 cameras (3 indoor and 1 outdoor) have different abilities.
As you will see in the video, the outdoor camera has night vision and can be mounted to monitor anything out side. Parking lots, back yards, walk ways and even entry doors.
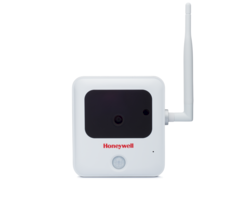
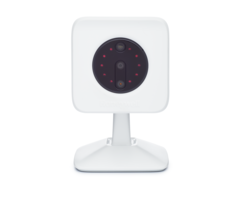
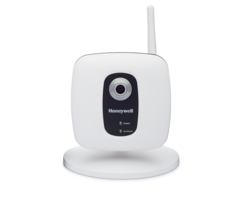
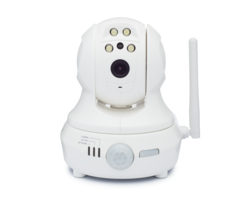
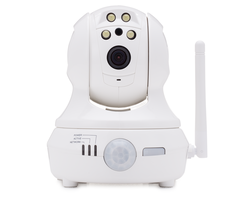
Of the indoor cameras, one of them has pan tilt capabilities as discussed in the video. One is simply fixed, and the other is a fixed camera with night vision.
Set up for the cameras is simple using the AlarmNet system. As the video will discuss, you must use the WAP plus system, or the WPS button on top of WPS enabled routers. All cameras are specifically designed for use with Honeywell’s Total Connect software.
As you will learn from the video, all motion captured video is saved to the cloud and view-able using the Total Connect software app.
You can view our other videos to learn more about each specific camera in the Honeywell line up. The Honeywell WO is the out door camera. The indoor cameras include the Honeywell WL, the Honeywell WI2 and the Honeywell PT2.
Each of these cameras is a wireless IP camera that allows for easy installation and monitoring using your existing wireless network. You can follow along in the video to learn more about the entire system and set up of the cameras.
Transcript
Hi, DIYers, this is Frank at Alarm Grid. And today, were in the Alarm Grid lab, working on the Honeywell AlarmNet video cameras. We'll specifically be working on four cameras.
We have an outdoor camera and three indoor. One is a pan-tilt, one is a fixed camera, and the other is a fixed cam with night vision. So we're going to set up all four of these today with Wi-Fi network using the Honeywell WAP Plus.
The WAP Plus is basically a wireless access point that has a WPS button on it. WPS is the way that you have to enroll these cameras with your Wi-Fi network. There's no other way to do that.
And you can also hardwire them, of course, using ethernet, if you have the ability to. And if your existing router has WPS encryption on it and has that physical button on the top of the router, then you can use that as well.
This is assuming they don't have that router, we're going to use the WAP Plus. Otherwise, we're just going to set them up.
So we're going to first work on the outdoor camera. The outdoor camera is a great option for getting video in your backyard or in any outdoor area, parking lot, whatever it may be. There's motion detection built into all the AlarmNet cameras.
So the way the AlarmNet video works is, first, you have to enroll in the service within an AlarmNet dealer. Now, the AlarmNet dealer will give you pricing on what that costs. Usually it's every six cameras. You pay a certain amount of monthly dollar amount per month, basically, based on those cameras.
So each camera has the ability to detect motion. And when it detects motion, it can trigger video recording. There's an eight second video clip that it can record, as well as snapshots. And you can basically slide the eight second clip up to seven seconds before motion and seven seconds after motion. And you can do that on your end on the TotalConnect 2.0 app.
So we'll get further into that later. For now, I want to introduce the cameras one at a time, starting with the iPCAM-WO.
- Uploaded