Enrolling a Camera or Other Video Device to an Alarm.com Customer Account
Related Products

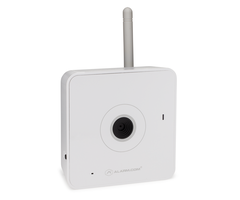
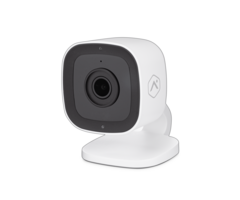
Related Categories
Document Transcript
Enroll a camera or video device to a customer account
To enroll a camera, connect the camera to the customer's network, then associate the camera to the customer's
account.
There are three local options for connecting video devices to the network:
Ethernet, Wi-Fi Protected Setup (WPS) Mode,
and Access Point (AP) Mode. Some video devices can only be connected using some of those options, so verify which
methods are supported before beginning the enrollment process.
Pre-enrollment checklist:
•
AC power adapter (required for non-PoE connections)
•
Broadband (Cable, DSL or Fiber Optic) internet connection with a router
•
A computer or mobile device with internet access
•
An Ethernet/Cat5 cable (if using an Ethernet-capable camera)
•
Customer account access through the Customer Website, Customer app, or the MobileTech app.
For more information about how to reconnect a camera to a network after it has lost its original connection,
see
Reconnect a camera to a Wi-Fi network if the router, equipment, or Wi-Fi
settings change
.
Connect the video device to an internet network
For camera specific installation guides, see
Video
Devices
.
AP mode
Note
: To ensure sufficient Wi-Fi signal, complete these steps with the camera near its final location but prior to
mounting.
1.
Connect the camera’s AC power adapter and plug it into a non-switched outlet.
2.
Press and hold the video device's
WPS
button for about six seconds, then release when the LED begins to flash
white.
3.
On a
Wi-Fi enabled device, connect to the wireless network
ALARM (XX:XX:XX)
where
XX:XX:XX
is the last six
digits of the device's MAC address, which is located on the back or bottom or the video device.
4.
On the same Wi-Fi enabled device, open a web browser and enter
192.168.1.1
in the address bar.
5.
Follow the on-screen instructions to add the device to the wireless network.
For more details about the AP mode
procedure, see
AP mode Installation guide
.
6.
When the LED is solid green, the wireless connection is complete.
If the LED is not solid green after a few
minutes, retry AP mode or try to connect using a different compatible mode (i.e., WPS or Ethernet).
https://answers.alarm.com/ADC/Partner/Installation_and_Troubleshooting/Video_Devices/General_Video_Information/Enroll_...
Updated: Fri, 15 Jan 2021 20:26:32 GMT
1 7.
Add the video device to the customer's account by following
instructions to
Enroll the video device to the customer
account
.
WPS mode
Note
: To ensure sufficient Wi-Fi signal, complete these steps with the camera near its final location but prior to
mounting.
1.
Connect the camera’s AC power adapter, and plug it into a non-switched outlet.
2.
Press and hold the
WPS
button for about three seconds, and then release when the LED begins to flash blue.
3.
Activate the WPS mode on the router. The device begins to connect to the wireless network.
For more details
about the WPS mode procedure, see
WPS Installation guide
.
4.
When the LED on the video device is solid green, the wireless connection is complete.
If the LED is not solid green
after a few minutes, retry WPS mode or try to connect using a different compatible mode (i.e., AP or Ethernet).
5.
Add the video device to the customer's account by following
instructions to
Enroll the video device to the customer
account
.
Ethernet mode
1.
Plug an Ethernet cable into the video device and the customer's router or networking device. For a
list of
Alarm.com video devices that have an Ethernet port, see
Video device Ethernet cable compatibility
.
2.
Connect the camera’s AC power adapter and plug it into a non-switched outlet. If the video device is using Power-
over-Ethernet, ignore this step.
3.
When the LED is solid green, the wired
connection is complete.
If the LED is not solid green after a few minutes:
a.
Power cycle the camera.
b.
Try a different Ethernet port on the router or networking device.
c.
Try to connect using a different network connection option
(i.e., WPS or AP) if one is available.
4.
Add the video device to the customer's account by following
instructions to
Enroll the video device to the customer
account
.
Important
: If the video device is going to be connected wirelessly, configure the video device's Wi-Fi settings
once
the camera is added to the account.
Enroll the video device to the customer account
Once the video device is connected to an internet network, it can be associated to a customer account using
the
Customer app, Customer Website,
or MobileTech app.
To enroll the video device
using the Customer app installation wizard:
Note
: The device being enrolled using this method must be a Preferred Device in order to appear on the installation
wizard. For more information about how to customize preferred devices, see
To enable and manage preferred devices
.
https://answers.alarm.com/ADC/Partner/Installation_and_Troubleshooting/Video_Devices/General_Video_Information/Enroll_...
Updated: Fri, 15 Jan 2021 20:26:32 GMT
2 1.
Log into the Customer app.
2.
Tap
.
3.
Tap
Video
.
4.
Tap
.
5.
Tap
Add Video Device
.
6.
Tap
Install
for the desired video device to be installed.
7.
Follow the on-screen prompts for installing the video device.
To enroll the video device using the Customer Website:
Important
: The user's login credentials must be used. Logging in with access as the customer from the Partner Portal
does not provide permissions to add video devices.
1.
In an internet browser address bar, enter
www.alarm.com/addcamera
and log into the customer account.
Alternatively:
a.
Log into the Customer Website.
b.
Click
Video
.
c.
Click
Settings
.
d.
Click
Add Video Device
.
2.
Find the desired video device in the list and enter a name for the video device.
3.
Next to the desired video device, click
Install
. The video device appears in the list automatically when it is on the
same local network as the device performing the installation.
If the video device is missing from the list:
a.
Enter
the MAC address found on the video device's label, and then click
Find
.
Note
: For the 2GIG HD100,
use its
ETH
MAC address.
b.
In the device name field, enter a name for the video device.
c.
Click
Install
.
4.
After the device
is successfully installed, the
camera settings are configurable
using
the Customer Website. If the
video device needs a Wi-Fi connection but was installed using an Ethernet cable, the video device's Wi-Fi settings
need to be configured.
To configure the
Wi-Fi settings,
see
Change a video device's wireless network settings
.
5.
Power down the video device, and install it in its final location using the included hardware.
To enroll the video device using the MobileTech app:
Note
:
Users can enroll more than one video device
at a time using
the MobileTech app.
1.
Log into the MobileTech app.
2.
Find the customer account.
3.
Tap
Equipment
.
https://answers.alarm.com/ADC/Partner/Installation_and_Troubleshooting/Video_Devices/General_Video_Information/Enroll_...
Updated: Fri, 15 Jan 2021 20:26:32 GMT
3 4.
Tap
Add Devices
.
5.
Tap
Video
.
6.
Verify the video device is connected to the network. For a guided network connection
tutorial:
a.
Using
the
Select Video Device for Guided Installation Tutorial
dropdown menu,
select the desired camera.
b.
Tap
Open Installation Tutorial
.
7.
Find the video device in the list. If it is missing from the list: In the
Enter MAC Address
field, enter the video
device's MAC address, or
tap
to scan the video device's MAC address QR code.
Note
: For the 2GIG HD100,
use its
ETH
MAC address.
8.
Tap
Install
.
9.
After the device
is successfully installed, it appears under
Recently Installed Video Devices
.
10.
Tap the name of the video device
to configure its post-install settings:
◦
Configure
Wi-Fi settings. If the video device needs a Wi-Fi connection but was installed using an Ethernet
cable, the video device's Wi-Fi settings need to be configured.
To configure the
Wi-Fi settings,
see
Change a
video device's wireless network settings
.
◦
Rename the camera.
◦
Request an image upload.
◦
Configure Video Analytics or Video Motion Detection.
Note
: These settings can only be changed in the MobileTech app for a short period of time after enrollment.
Any future changes will need to be made using the customer website.
11.
Power down the video device and install it in its final location.
https://answers.alarm.com/ADC/Partner/Installation_and_Troubleshooting/Video_Devices/General_Video_Information/Enroll_...
Updated: Fri, 15 Jan 2021 20:26:32 GMT
4
- Uploaded
