Does the Qolsys IQ Panel 2 Support The Use of Prox Tags?
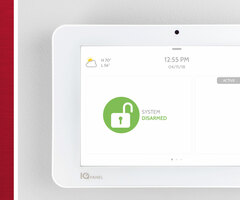
Yes, the Qolsys IQ Panel 2 Plus supports prox tags, but only under very specific circumstances. The panel must be on firmware version 2.5.3+. In addition, a Visonic KP141 or KP241 PowerG wireless keypad must be present. Only then will you have the option in User Management to "Add Prox Tag".
The Visonic KP141 and KP241 PowerG wireless keypads are no longer available. However, if you already have one, you can take full advantage of it with the IQ Panel 2 Plus on version 2.5.3 or higher. It's important to note that PowerG is also used in Europe, but at a slightly different frequency. Only keypads that use 915-3 MHz will work. There are 915-0, 915-1, and 915-2 versions also available. The IQ Panel 2 Plus will learn the keypad like a wireless zone. Once the keypad has been paired with the panel, you can add prox tags through the keypad by going to User Management.
Only an IQ Panel 2 Plus can support prox tags because a PowerG wireless keypad is required. The original IQ Panel 2 did not support PowerG devices. If you have a Visonic PowerG KP141 or KP241 you will need to add it to the IQ Panel 2 Plus by navigating to sensor programming: Tap the gray bar at the top of the screen then choose Settings > Advanced Settings > Enter Installer or Dealer Code (1111 or 2222 respectively, by default) > Installation > Devices > Security Sensors > Auto Learn Sensor.
On the KP141 or KP241 the asterisk [*] key is also known as the Function Key. Once the panel is in Auto Learn Sensor mode press and hold the Function Key until the keypad LED lights yellow. The panel should indicate that "Sensor 371-#### is requesting to be added to your list. Do you want to continue?" Assuming this is the Sensor DL ID of the KP141 or KP241, choose "Yes" and then configure the keypad zone. The sensor type should be set to Keypad. Next, you'll need to select the Sensor Group. You have several to choose from. The Sensor Group determines whether the system supervises the keypad, and how the panic will be treated:
| Group | Name | Supervised | Scenario |
|---|---|---|---|
| 0 | Fixed Intrusion | Y | The keypad is in a fixed location and sets off a Police Panic. |
| 1 | Mobile Intrusion | N | The keypad can be mobile and sets off a Police Panic. |
| 2 | Fixed Silent | Y | The keypad is in a fixed location and sets off a Silent Police Panic. |
| 3 | Mobile Silent | N | The keypad can be mobile and sets off a Silent Police Panic. |
| 4 | Fixed Auxiliary | Y | The keypad is in a fixed location and it sets off an Auxiliary (Medical) Panic. |
| 5 | Fixed Silent Auxiliary | Y | The keypad is in a fixed location and it sets off a Silent Auxiliary (Medical) Panic. |
| 6 | Mobile Auxiliary | N | The keypad can be mobile and it sets off an Auxiliary (Medical) Panic. |
| 7 | Mobile Silent Auxiliary | N | The keypad can be mobile and sets off a Silent Auxiliary (Medical) Panic. |
Once you have chosen the Sensor Group, you can choose a Sensor Name. This can be a pre-existing description from the panel's vocabulary, or you can make a custom name. Whatever you choose the sensor name should describe the keypad, such as Master Bedroom Keypad, or Study Keypad.
The next two (2) options won't matter for the keypad. Chime Type and Voice Prompt can remain at None and the Source should automatically come up as PowerG when the initial Sensor DL ID is learned. Once you have all fields programmed, be sure you press "Add New" to complete the keypad's enrollment.
Once the keypad is enrolled you will be able to add prox tags. You do this through User Management. Tap the gray bar at the top of the panel screen then tap Settings > Advanced Settings > Enter Installer, Dealer, or Master Code (1111, 2222, or 1234 respectively, by default) > User Management > Add Prox Tag.
The system should prompt you through the addition of the prox tag. You can assign the tag to an existing user code or create a new user code for this tag. The user code assignment is done predominantly for logging purposes. By using a proximity tag, the user is no longer required to remember a code to arm and disarm the system. But, since the tag is assigned to a particular user, you can still keep track of who is arming and disarming, and when, through the panel's event log and activity shown in Alarm.com.
If you choose to add a new code for the proximity tag, you'll need to set the user up as you would any other user code. Assign a 4-digit code that is not easily guessed and provide a name and user type. When you're done, tap "Add User." This will take you back to the proximity tag programming screen, you'll need to hit the drop-down and select the user you just created (it doesn't do this automatically). Then click "Add." This will add the proximity tag, and assign it to the user selected.
Did you find this answer useful?
We offer alarm monitoring as low as $10 / month
Click Here to Learn MoreRelated Products

- Answered
- Answered By
- Julia Ross
