How Do I Alarm My Fence Gate?
You can alarm your fence gate by programming an outdoor contact with your alarm panel, mounting the contact to your fence gate, and arming your system. If someone opens your fence gate, the sensor will notify the panel. You can configure the sensor to cause a system alarm when this happens.
Complete the following steps to alarm your fence gate:
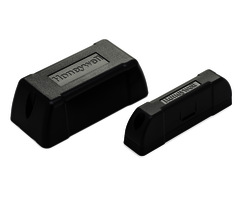
1. Enroll a sensor. You will first need to program the door and window contact that will be used on your fence. Since your fence is probably outside, you will most likely want the sensor to be wireless and suitable for outdoor use. A great sensor to use for this purpose is the Honeywell 5816OD. But keep in mind that this sensor operates at 345 MHz, and it will only work with Alarm Systems that accept this frequency. Some systems that accept the 345 MHz frequency include Honeywell Systems, 2GIG Systems and the IQ Panel 2 Plus with 345 MHz Receiver. If your system does not accept the 345 MHz frequency, then you will need to use a different sensor.
Once you find a compatible sensor, you must program the sensor to your system. The exact steps for this will vary between different panels. But the process typically involves accessing zone programming using the system's Installer Code, putting the system into its wireless enrollment mode, and then faulting the sensor by separating the sensor from its magnet to learn it in. Some systems will require faulting the sensor three times to learn it in, and it should beep to confirm that it has been enrolled. The sensor's Serial Number should be displayed on the screen once it has been enrolled.
2. Configure the zone. The user will then need to configure the settings for the zone. This will determine how the system will respond when the fence gate is opened, and the sensor is faulted. Most systems will have options for causing an immediate alarm or giving the user a predetermined entry delay period to disarm the system before an alarm will occur. For example, on a Honeywell System, a Response Type of Perimeter will trigger an immediate alarm if the sensor is faulted while the system is armed. But a Response Type of Entry/Exit will give the user an opportunity to disarm the system within the entry delay period if the sensor is faulted while the system is armed. Follow the instructions specific to your panel when programming the sensor. Make sure all of the settings have been configured appropriately before continuing.
3. Mount the sensor. Take the sensor you programmed and its corresponding magnet and mount it to the fence gate. In most cases, the sensor and magnet will both be screwed to the fence gate. The sensor should be mounted as close as possible to the magnet for proper operation, usually within an inch. The sensor should be installed on the stationary portion of the fence, while the magnet should be installed on the moving portion of the gate. This way, if the fence is ever shut with excessive force, the sensor will be less likely to break. Make sure that the sensor and magnet are as close together as possible, since otherwise the system may not recognize when the fence is closed. You may want to test the sensor on the system before permanently mounting.
4. Arm your system. Once you arm your system, your fence gate should become protected. If anyone opens your fence gate, an alarm will occur on your system, depending on its programming settings. It may be helpful to put your system on test mode and perform a test to make sure that your system responds the way you want it to when the sensor is activated.
Did you find this answer useful?
We offer alarm monitoring as low as $10 / month
Click Here to Learn MoreRelated Products
Related Categories
- Answered