How Do I Clear a Tamper Error On My Honeywell Home PROA7?
You can clear a tamper error on your Honeywell Home PROA7 by mounting the panel on its backplate and acknowledging the trouble with the system's Master Code. The panel must be set on the backplate correctly so that its tamper switch is pressed down. This also applies to the Resideo PROA7C.
A tamper error occurs when a panel's tamper switch is released. This is typically the result of the panel being taken off its backplate. Even if the panel has since been placed back on the backplate, the trouble will still be present until the tamper condition has been properly acknowledged using the system's Master Code. The reason for this is because the system wants the Master User to know that a tamper condition occurred, even if it has since been resolved. While you should never jump to conclusions, many tamper conditions are caused when an individual attempts to open up the panel while looking for a way to disable the security system.
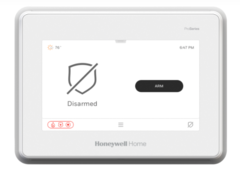
When a tamper trouble arises on the PROA7 or PROA7C, there will be a few indications. For one, the trouble status LED light above the panel's touchscreen display will turn orange. This is the LED on the right-hand side. Do not mix it up with the LED on the left-hand side, as the other LED is used to indicate that the system is receiving AC power. Also, the right-hand LED will be orange to indicate trouble. Do not confuse it with a red LED, as that actually means that the selected system partition is currently armed, or that the system as a whole is armed if partitions are not being used.
Second, you can quickly identify a trouble condition due to the constant beeping of the system. The beeping will continue until you acknowledge the trouble at the panel. Third, there will be a trouble notification in the lower-right corner on the main screen. It may appear as a message inside a red box, or it may be a rectangular speech bubble with lines inside and a red circle on top of it. But no matter how it appears, it will go away once you fix the trouble condition, and then clear the trouble message using the system's Master Code.
Please note that the pictures used in this FAQ features the PROA7PLUS. For the most part, the PROA7 and PROA7C will appear the same. However, the PROA7 and PROA7C do not have the front panel camera that is in between the two LED lights. Also, the PROA7C will say "Resideo", instead of "Honeywell Home".


You can find the tamper switch for a PROA7 or PROA7C on the back of the panel. It is a small red button that is recessed. Users with large fingers might have trouble reaching it. This button needs to be held down at all times, to prevent a trouble error. The only practical way to keep the button pressed down is to properly secure the panel to the backplate. In addition to proper panel alignment on the mounting plate, you can also apply the set screw on the bottom edge of the panel to keep it securely in place.


The ProSeries Panels have a design in which the AC power terminals are attached to the system's backplate. For this reason, an AC power loss condition will usually accompany a tamper condition. Once you reposition the panel on its backplate, the AC loss condition will most likely also be fixed, provided that the AC terminals and power wires are attached to the backplate correctly. Just like the tamper trouble, the AC loss trouble condition will also need to be acknowledged and cleared from the system. If AC power loss does not clear, then you should check the panel's plug-in transformer and the power wires to make sure that everything is properly connected. The PROA7 and PROA7C panels use a DC transformer, so be sure that proper polarity is observed when supplying power.
Complete the following steps to clear a tamper condition on a PROA7 or PROA7C:
1. Attach panel to backplate. The panel must be positioned properly on its backplate, with its red tamper switch pressed down. Take the panel, and align its backside (opposite side from touchscreen) with the backplate, and click the panel into place on the backplate. Check all sides to make sure that the panel is properly aligned. It should fit snugly against the mounting plate. If it's not make sure that nothing is blocking it. You might see that the power wire is not properly routed out the back of the panel or that the AC power terminal block is caught in the way. Remember not to undo any of the wires, or else the system will show AC power loss at the end of this process. Proceed once the panel is on the backplate properly.
2. Clear the trouble. From the home screen, you will see the trouble condition in the bottom-right. It may be a red rectangle, or it may be a speech bubble with a red circle on top as shown in the screenshots above. Either way, click on it. You will go to a screen that shows trouble conditions that have affected the system. Press the "Clear" button in the upper-right corner. Then enter the system's Master Code or any valid user code when the keypad appears. The Master Code is 1234 by default, but it should be changed from that code for security purposes. You will be taken back to the home screen after you enter the a valid code.
3. Apply the set screw. By now, the trouble condition should be gone. The panel will no longer be beeping, the status light above the screen on the right-hand side will be green, and there won't be a trouble condition in the bottom right corner of the main screen. To prevent the trouble from occurring again, you should apply the panel set screw. It easily screws into place at the bottom of the panel using a Phillips head screwdriver.
![]()
Did you find this answer useful?
We offer alarm monitoring as low as $10 / month
Click Here to Learn MoreRelated Products

Related Categories
- Answered