How Do I Enroll a 910 Kwikset on a DSC Impassa?
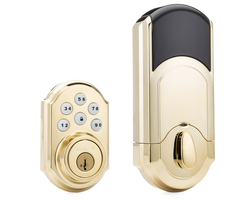
You can enroll 910 Kwikset on a DSC Impassa by putting the panel into its Z-Wave inclusion mode and pressing the inclusion function button on the lock. For the 910 Kwikset, this is the "A" button found under the cover. The Impassa must have an active Alarm.com module to support the lock.

The 910 Kwikset is a Z-Wave lock that will work with virtually any Z-Wave controller. The DSC Impassa Alarm System can serve as a Z-Wave controller once an Alarm.com cellular communicator has been installed and activated with the system. However, the DSC Impassa does not offer local control for Z-Wave smart home devices, and all operation will need to take place through Alarm.com. Assuming that your DSC Impassa is active with Alarm.com, you can complete the following steps to enroll a 910 Kwikset Z-Wave lock so that it can be used with the Alarm.com service:
1. Access Z-Wave setup. The DSC Impassa has a system menu for managing Z-Wave devices. It is called the Z-Wave setup menu. You can access this menu by first starting from the main screen of the panel with the system disarmed. Enter [*] [6] [Master Code]. The default Master Code is 1234, but this code has probably been changed for security purposes. Next, use the arrow keys (< & >) to find the option "Interactive Serv". Press the [*] key to select this option. Then use the arrow keys to find "Z-Wave Setup", and press the [*] key. The system will then enter into its Z-Wave setup menu.
2. Clear the lock. Before adding a Z-Wave device, you should always clear the device from the network first. This will ensure that the Z-Wave device is not enrolled with another network when you attempt to add it. Many Z-Wave locks are programmed with a network before they leave the factory for testing purposes. So this is always a very important step.
Use the arrow keys to find the "Remove Z-Wave Device" option, and press the [*] key to continue. This will put the panel into is Z-Wave exclusion mode. Then activate the inclusion function for the 910 Kwikset Lock. The lock has a button underneath its cover for this purpose. This is called the "A" button. Press this button once to put the lock into its inclusion mode. You may need to bring the 910 Kwikset Lock close to the panel to have the system recognize the command. Once the system recognizes the lock's signal, it will clear the lock from the network. The system will display a message to confirm.
3. Enroll the lock. With the lock cleared from the network, you can then begin adding it to the network. Use the arrow keys on the DSC Impassa to find "Add Z-Wave Device", and press the [*] key. The system will enter its Z-Wave inclusion mode. Activate the inclusion function on the 910 Kwikset, following the same process that was completed in Step 2. Remember, you may need to bring the lock close to the system when doing this. The panel should recognize the lock and add it to the Z-Wave network. A confirmation message will appear once this happens. The lock will then be available on Alarm.com for control.
4. Exit the menu. Keep pressing the [#] key on the system until you are taken back to the home screen. Any changes to the settings will be automatically saved.
Did you find this answer useful?
We offer alarm monitoring as low as $10 / month
Click Here to Learn MoreRelated Products
- Answered