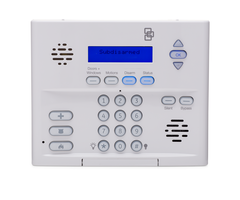
How Do I Get Power to an Interlogix Simon XT?
You can get power to an Interlogix Simon XT by connecting the system to its 9-volt AC transformer and then plugging the transformer into a wall outlet. An 18-gauge two-conductor wire connects the panel and the transformer. The panel also has a backup battery as a secondary power supply.
Inside the Simon XT Panel, there are two terminals labeled "9VAC In". These terminals are where the 9-volt AC transformer will connect to the system. Next to these terminals are the positive (+) and negative (-) terminals for the backup battery. The panel will automatically power on once it is receiving power.
To get reliable power to the Simon XT Panel, you will want to connect both the 9-volt AC transformer and the backup battery. To do this, complete the following steps:
1. Wire the transformer. The Simon XT comes with a pre-made two-conductor wire that is about 6 feet in length. This wire has 2 spade lugs attached to one end for connecting to the screw terminals of the 9VAC transformer.
If you need a longer wire run use no less than 18 gauge wire. Strip one end of the two-conductor wire so that the two inner wires can be worked with. Strip about 1/4 of an inch of these inner wires so that the copper is exposed. One inner wire will connect to one terminal on the 9-volt AC transformer. The other inner wire will connect to the other terminal on the 9-volt AC transformer. Use a screwdriver to ensure that these connections are nice and tight. Since this is AC power, polarity does not matter, and either colored wire can connect to either terminal on the transformer. Make sure that both connections are securely in place before continuing to step 2.
2. Connect to the panel. Start by opening up the panel. To do this, you must remove the screw from the top of the panel and push in the two tabs. You can then pull the panel forward, away from its back plate to access the inside.
With the panel opened, you can connect the two pre-stripped wire ends from the provided cable to the terminals marked "9VAC In". If you are providing your own wire in order to extend the wire run, take the other end of this wire and strip it so that the two inner wires can be worked with. Strip about 1/4 of an inch of these inner wires to expose a small amount of copper. Connect these wires to the two screw terminals labeled "9VAC In". One wire will go to each terminal. Again, since AC power is being used, polarity does not matter, and either colored wire can go to either terminal. Make sure the two connections are securely in place before continuing to step 3.
3. Power on the panel. Plug the 9-volt AC transformer into the wall outlet. Make sure that the system powers on. If it does not power on, check the connections, and make sure they are correct. Also make sure that the wall outlet is working properly.
4. Connect the backup battery. Once you've determined that the wiring connections for the alarm panel's AC transformer are good, unplug the transformer again. The backup battery is a relatively large black box that fits inside the panel. Two wires connect the backup battery to the panel. The red wire connects the panel terminal labeled "Battery + Pos" to the positive (+) terminal on the backup battery. The black wire connects the panel terminal labeled "Battery - Neg" to the negative (-) terminal on the backup battery. Use a screw driver to make sure that these connections are secure and tight. Once you have finished, you can insert the backup battery into its designated tabs inside the panel. Then close the panel when you have finished. Make sure to re-secure the screw on the top of the panel. Finally, plug the transformer in. The panel should now power up.
Did you find this answer useful?
We offer alarm monitoring as low as $10 / month
Click Here to Learn MoreRelated Products
Related Categories
- Answered