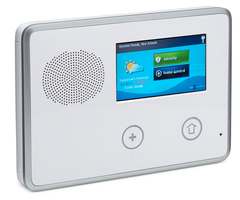
How Do I Replace a Keyfob on a 2GIG Go!Control?
You can replace a keyfob on a 2GIG Go!Control by accessing the programming menu of the system and changing the serial number of the old keyfob to reflect the new one. Then change any of its settings if needed. You will need to know the installer code in order to complete this process.

Complete the following steps to program a 2GIG KEY2-345 Keyfob with a 2GIG Go!Control GC2 Security Panel:
1. Access system programming. From the home screen of the 2GIG GC2, hit the Go Control button in the bottom-right corner of the screen. Then enter the installer code for your system (the default installer code is 1561). Click on "System Configuration". You will now be in system programming.
2. Locate the old keyfob. Press the "Skip" button on the keypad twice to reach keyfob settings. A total of eight keyfobs can be programmed to the 2GIG GC2. If necessary, press the left and right arrows until you locate the keyfob you want to replace. For example, if you want the new keyfob to be assigned to slot 6, then you will press the right arrow until you reach keyfob (6). Pressing the right arrow will take you to the next keyfob in the sequence, and pressing the left arrow will take you to the previous one. Continue to the next step once you locate the keyfob you want to replace.
3. Change the serial number. Press the down arrow. Make sure the keyfob is set to enabled. If it isn't, you can press the right arrow to change the setting. Press the down arrow again. You will want the equipment code to be set to (0866) KEY2-345 4 button keyfob remote. If it isn't, press the right arrow until you reach this setting. Then press the down arrow again.
You will then reach the most important setting for this process, the serial number setting. Press the delete character button in the bottom-left corner of the screen to remove the previous serial number from the input area. You will then need to add the serial number for the new keyfob. You can either manually enter it or auto-enroll it. To manually enter it, locate the 7-digit serial number on the back of the device and enter it in using the keypad. To auto-enroll it, press the shift button on the keypad, followed by the learn button. Press and hold the star button on the keyfob. This is the bottom-right button on the device. The serial number should appear on the display. Verify that the serial number is correct, and then click the OK button in the bottom-right corner of the GC2 screen. Hit the down arrow to lock-in the serial number and move on to the next setting.
4. Program the keyfob. Continue pressing the down arrow and changing any of the settings for the keyfob if necessary. Eventually, you will reach a summary screen. Verify that all of the changes you made are correct. Then select "Skip" in the bottom-right corner of the screen. You will be taken back to the programming screen. Select "End" in the bottom-right corner of the screen. Then select "Exit" in the bottom-right corner of the screen. The system will reboot, thus completing the programming process.
5. Test the keyfob. Wait for the 2GIG GC2 system to complete its rebooting process. Try using the keyfob to arm and disarm the panel. If you are able to arm and disarm the system, then the new keyfob was programmed successfully.
The video shown below will help you with programming a 2GIG KEY2-345 Keyfob to a 2GIG GC2 Panel:
Did you find this answer useful?
We offer alarm monitoring as low as $10 / month
Click Here to Learn MoreRelated Products

Related Videos
Related Categories
- Answered


