How Do I Set Up a Phone Connection for an Interlogix Simon XT?
You can set up a phone connection for an Interlogix Simon XT by first directly connecting the phone jack and the alarm system. Next, the number for the central monitoring station must be programmed into the system. Finally, any reporting options for the system must be configured.
Please note that using a phone connection with an alarm system is not recommended. This is because telephone service is relatively slow, can be physically tampered with, and it is not compatible with the Alarm.com interactive service. But if you do decide to use POTS (plain old telephone service), it can still be done. Remember, the property must have active telephone service to make this possible.
Complete the following steps to set up a phone connection for an Interlogix Simon XT:
1. Obtain a monitoring plan. For a POTS connection, only a basic monitoring plan is needed. For Alarm Grid, this is the Bronze Plan.
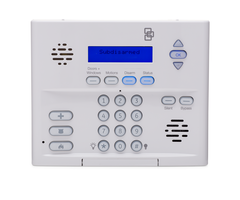
2. Complete the wiring. Connect the phone jack to the panel. The connection port for the phone line on the Simon XT System is found inside the panel. You will need to open up the panel to access this port.

3. Program the number. From the home screen of the Simon XT System, repeatedly press the down arrow until you reach "System Programming". Then press the "OK" button. Then enter in the Installer Code for the system (default is 4321), and then press the "OK" button. Keep pressing the down arrow until you reach "Phone #s", and then press the "OK" button.
Use the up and down arrows to scroll between the different configurable phone numbers. Up to four different numbers can be programmed with the Simon XT System. Phone numbers #1 and #2 are used for reporting out to the central station. If you are setting up monitoring with a central station, choose either of these numbers. Numbers #3 and #4 can be assigned a telephone number other than a central station. This will instruct the system to contact the programmed number directly during an alarm event.
Once the cursor is over the number you want to program, press the "OK" button. Then use the numeric keypad to enter in the appropriate phone number. If you are setting up service with the central station, this will be the telephone number for the central station receiver. Remember to put a "1" in front of the area code. When you have finished entering in the number, press the "Status" button.
4. Configure reporting options. From the current screen, use the up and down arrows to locate "Reporting", and then press the "OK". button. Then use the up and down arrows to locate "Rpt Comm Mode", and press the "OK" button. Use the up and down arrows to locate the phone number you programmed earlier (#1 through #4), and then press the "OK" button.
Use the up and down arrows to toggle between different menu options. If you are setting up the system to communicate with a central monitoring station, choose "All CID", and then press the "OK" button. If you are setting up the system to contact your own number during an alarm event, choose the option "Voice Dialer", and then press the "OK" button. Press "Status" then on "Rpt Options" press "OK". Make sure any desired non-alarm codes, such as AC Loss, Low Battery, Opening, Closing, are enabled for reporting. Then press the "Status" button four times to save your changes and return to the main menu.
5. Test your system. Your alarm monitoring company should be able to test your system to make sure that it is functioning properly. Contact them to complete the test. Always make sure to test your system after programming a new phone number.
Did you find this answer useful?
We offer alarm monitoring as low as $10 / month
Click Here to Learn MoreRelated Products
Related Categories
- Answered