How Do I Test My Honeywell 5806W3?
You can test your Honeywell 5806W3 by pressing and holding the recessed test switch on the device for five seconds. You can also test the 5806W3 using canned smoke. For the best possible results, we recommend performing both tests. Remember to place your system on test mode before testing.
Complete the following steps to test a Honeywell 5806W3:
1. Place your system on test mode. If your alarm system is monitored by a central station, you must place your system on test mode before testing your Honeywell 5806W3. Failing to do so will cause a false alarm with the central station. Contact your alarm company, and let them know that you would like to place your system on test mode. You will be able to provide them with a start time and an end time for the test. If you only have a self-monitoring plan, then this step isn't necessary.
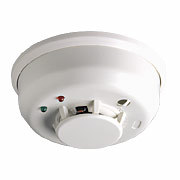
2. Test using the switch. Use a thin object to press and hold the recessed test switch on the 5806W3 for five seconds. If the device is working properly, its LED light will blink once per second, and its sounder will activate after three seconds. This also indicates that the sensor is within the proper sensitivity limits. After completing this test, you can disarm your system using any valid user code or the Master Code. The diagram below shows the location of the test switch on the 5806W3:

3. Test using canned smoke. Direct canned smoke into the vents of the 5806W3. The device should detect the smoke and trigger an alarm on the system. It may take a few moments for an alarm to occur. If the device is unable to detect smoke then the sensor may need to be cleaned. Please see the maintenance section of the installation guide for more information. After completing the test, you can disarm arm your system to clear the alarm.
Did you find this answer useful?
We offer alarm monitoring as low as $10 / month
Click Here to Learn MoreRelated Categories
- Answered