Setting up Camera Options in Total Connect 2 0 on a Tablet
Related Products
Related Categories
Description
Setting up Camera Options in Total Connect 2 0 on a Tablet
Transcript
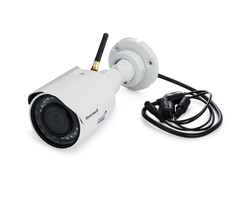
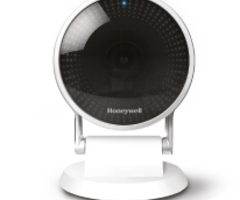
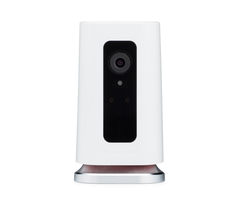
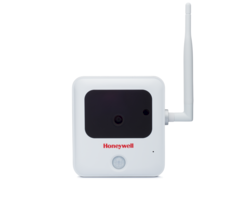
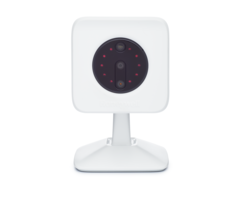
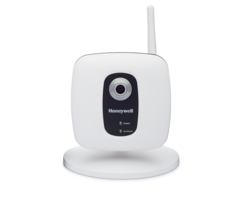
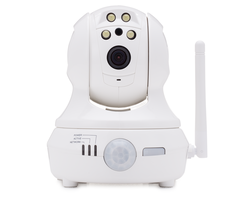
hey di Juarez Dylan here with alarmgrid today we're going over how to attach IP cameras to Total Connect - so for the cameras when we going over an older camera or a legacy camera this is the IP cam PT PT stands for pan tilt and we're also going over the newer camera this is the c1 that's an HD camera I want the newer ones is also the c2 and the WOC one or the newer ones as well so we'll be going over how to integrate both we'll start with the older legacy one and then we'll move our way up to the newer HD camera I'm gonna be showing you how they look on Total Connect the application both on the iPad and an Android device as well so to start with the PT so the older legacy camera is the way that you would get them on Total Connect is that you would have to give the MAC address to your alarm company now the MAC address can be found on the bottom of this one if you have different types of IP cameras Honeywell ones at least if it's not on the bottom like here it's on the back so our MAC address is listed right there we're gonna tie this in to Total Connect by contacting your alarm company giving them that code and then having them enter it on their end that is a necessity to get these older ones to appear on Total Connect there's not really any other way so once we've given them the MAC address and they've set up the account for us where we can view Don total connects when you get the camera online now real quick about the camera so as you've noticed I've been placing it on the table it just kind of sits there you can also mount this so the camera does come with a mount right here basically just slide the two together it's a fact click and that proves that they are together has the screw holes right there so you can put this on a wall you can put this on ceiling anything like that and they'll just slide right off okay so let's go ahead and get this on line so we're going to get this on line by connecting it with an ethernet cord so you can either do an ethernet cord right here or you can do a WPS option our router not in the video room so we're gonna be doing the ethernet with the WPS essentially what you would do is you would go to your router it should have a WPS button on it you press that button and then within about 50 seconds of that you're gonna head back to the camera and then press the WPS option on here as well if that functions properly that's how the cameras going to get online wirelessly go through the antenna this way we're just gonna do wired with the LAN cable just for convenience sake so you'll have your power cable right here and then you will have your LAN connection right here now this button you can see the camera is starting to boot up this button right here next to the power cable this is the reset option so if you're adding this to a new account it's always recommend just do the reset option to hold that down you'll see the LEDs on the front cycle that just resets the camera basically clears it from whatever one of isn't programmed to so connect the ethernet cable right there that way we have it online we have power and then we're going to wait for a network connection here and then I might actually reset the camera as well just in case so I'm gonna hold that down about 12 seconds so there we go we have our network we have our power should be good and then real quick on the front here this is a motion sensor so cameras and motion detectors use two different types of things to pick up movement for the camera it's called I believe it's just called movement itself motion so for camera it's called motion that's basically the change in pixels when you're viewing through the camera a change in pixels will cause a motion not on this one but like another different type of camera see this one right here the see one now for PIR that's mainly for actual motion detectors it gets a little confusing because it's similar terminology but PIR is passive infrared heat will passive infrared it's basically picking up heat detection through the movement so if there's change in heat detection it will trigger movement for cameras not this one of course you'll pick it up with the actual pixel change so the camera is online because we have a solid network light so let's go ahead and see if we can view that on Total Connect so we're logged into Total Connect right here we have our camera section at the bottom so we're gonna go to cameras see the other cameras that we've set up p2 is right there at the top as you can see we are have video playing questing' a livestream basically the application is attempting to communicate with the camera so we can view live videos so the camera does live video it also has clips so the clips those will basically be activated by movement you can have it be activated by sound so on and so forth and those will save on to your Total Connect events so you can view those clips there but you can also do live recording so with live recording you basically go to the camera itself you tap on the video feed over request a video feed and then if it functions properly you can view live through the application so as we see we have my water bottle at the end let me just cover this real quick should go black seems to be on a bit of a delay I don't have the best Network speed so obviously the camera being IP camera its video feed is affected by you know network so as you can see I just took that away it's taking it away slowly enough a better actual network will you know obviously have faster video on there but we're getting the gist of it we got that there you can take screenshots you can do Clips so manual clips so record and then yeah so video clip requested so it's safe to the events log as I mentioned so we can go back in view settings for the camera all right so we have the settings here so we have the camera name you can obviously change that to whatever so if this was in living room I put living room camera a time zone time format date format that's basically just for the clips itself so if a clip is captured at a certain time you have you know whatever time you want 24 hour 12 hour date date same point visible so if you're viewing the actual recording event schedule so say I want this to record at a certain time every day I can basically have it do that they'll record a certain area so if I know I have a package coming at you know time between like 2:00 p.m. and 4:00 p.m. so it's at start time - and time for make sure my package gets there we have event capture so this is basically what is triggering these recordings so you can do pre capture length which is basically how much you're gonna see before the actual recording started post capture after the recording ended interval and then trigger buy trigger buy back up there so you can do PIR since we have the PT has that option or you can do motion which is what I was mentioning before so the difference is you know PIR passive infrared heat motion is pixel change so if I had this say looking through some glass PIR doesn't pick up heat through glass so that's when I would set it to motion so it picks up the actual pixel changes so just do none it's not really setting that up white balance you know it's too bright too dark brightness sharpness of the image ceiling mount basically what ceiling mount does so if I had this mounted upside down unless the cameras fully looking down and maybe the opposite the camera is gonna the image is gonna be inverted so when you enable ceiling mount it basically inverts the image there so even though the camera is upside down when you're viewing it looks right side up that's what ceiling mount does and then pan/tilt speed high-low if you wanted to be fast if you want to be slow and there you go let the iPad done and then ya save your settings camera details Network IP pretty easy stuff do simple and then it'll go to the event log just kind of see what that clip was fence that's our outdoor camera see our outdoor camera does horde quite a lot see your pan so basically any motion Clips would be right there so now for the newer camera the HD camera we're gonna stick with the iPad real quick so for the newer HD camera it's actually a lot it's not a lot simpler it's just they're both easy enough this is a little bit simpler my opinion so with the newer HD cameras you do not need to contact well you do need to contact your provider to have the camera option enabled we do not need to give them a MAC address for the camera so these cameras actually integrate to Total Connect and directly you actually do it on your end so as you can see it does have a Mac ID on the back but if you give that to your company there's not really much that does they just have that information on file then the way that you're going to attach this what we'll do is we're gonna reset this real quick we have to reset button option there hold that down we have the LEDs changing colors right there it's indicating it's resetting we're gonna wait for that to stop cycling and say it a solid to blue so we'll give that a little bit and then while we wait for that to go it's gonna hurt its powering back up and then for here so what we're gonna do pretty much is we're gonna press on the camera option we're gonna do add camera as you can see this shows all the new HD cameras because these these are the only ones you can add through Total Connect so we have the WIC one which is what we're doing today WIAC 2 which is a upgraded version of that one and WOC 1 which is what we have outdoors it's the outdoor HD camera so we are doing I see one and I apologize it's actually solid green when it's ready so solid green in there showing that that's online that's ready so we're gonna do see one camera name I'm just gonna put camera next so plug in your camera it's basically telling me to power up my camera my camera is powered on did you do blink blue so I'm gonna want it to blink blue it has not blink blue so I'm gonna unplug it plug it back in watch the LEDs psycho on there so we're gonna do next searching for the camera it's basically the application is looking for the camera itself you will need to have your device on Wi-Fi camera is not found it's where you try that searching camera okay we're not found again so simple enough so either if it's not found you're either just gonna unplug it again we're gonna do the reset option I'm going to do the reset option wait for that to power cycle [Music] there we go okay so we're gonna get the IDS back now this is just good showing that you know sometimes don't learn in automatically right away there are better cameras but you do have to be persistent sometimes it doesn't learn the first time just keep trying this one we've used a couple times before and a pair there's a couple different accounts so might just be taking a litte bit longer this with a specific one that we've been using so we'll just wait for those in while we wait you can also mount this as well on a wall it does have a low stand on the bottom as well and then right here you have a slot for a micro SD card so if you want to put some of the image captures right on there got the LEDs cycling remember we're waiting for a blinking blue now with these it's very very easy because once you actually get past you know the next option the application walks you through on the whole setup itself so it tells you exactly what to do like right here plug in the camera wait for the camera LED to cycle through the colors until it beeps which we've heard and starts a blink blue which it's doing right now so let's do next so you can see oh wait for that to go perfect now so you heard the tone again it's picked it up again it's telling us exactly what to do it says that we are going to be holding the camera in front of the iPad about two point seven to seven point nine inches so this is gonna generate a QR code on the actual iPad then once that loads we're basically just gonna hold the camera up to the screen so very very easy okay there's our code let's hold the camera up the camera beeps acknowledge I picked it up so here now we have all the networks in the area so this is going to be putting the camera on a certain network it is a IP camera after all so for this one let's see I'm gonna be using our long grid network password okay so it's saying setting up camera this may take 90 seconds so right now we're just waiting for the iPad to do its thing talk to the camera I said well we have set up the camera to our panel well you know to the application at least sorry and press done so we have a right there camera same idea so I can press on the image to request a live stream we had behind the scenes right past and lovely feedback from the camera itself so as you can also hear the camera does pick up the actual microphone so it has a microphone in there you can talk through the camera as well there was a microphone button on the screen there so when you hold that down you're gonna have to actually hold that option down to do it through the camera let me try that real quick so right here hold that down basically talk through the camera now the feedback is kind of messing it up right now so we won't do too much more of that settings for the camera itself similar different layout obviously so we have a camera microphone you can enable or disable it the LED on the front could any board disable that motion detection so right here it's showing what it's picking up its area of influence you can adjust the areas which I can make this smaller if I want to so say I only want to detect that area I could save that and then if I want to do another area we'll do you medium and King just and then for this one I want that one covering this area here so this is basically the two areas it's gonna see this is more high so if anything moves in this it's gonna pick it up very sensitive this one is a little bit more median medium as you can set different pretty much captured zones there sound detection so as you heard does have a microphone so if you wanted you can put this and have sound detection to start recording people will do this for baby cries it's been knocking on the door or anything like that that can enable the actual detection and do the clip video quality obviously Auto low high night-vision auto off or on so if it gets dark it lightens up the image they can still see it everything is looking good and then let's just quickly pull that up on the Android tablet so Android tablet you can see the layout it's different we have cameras on top and pose to the bottom we have the P to the camera that we learned in before and then camera and then we'll check on the p2 I love that speed is actually little bit better perfect so quite a lengthy video a lot of waiting but that is how you set up a older legacy camera and the newer HD camera on Total Connect so just to recap real quick for the legacy cameras you have to contact your alarm company give them the MAC address of the camera which can be found either on the back of the camera or the bottom will say MAC address or MAC ID newer HD cameras you just have to let your company know that you need the cameras option enabled and then you do that all through the application as you saw the application walks you through it step-by-step very easy very simple to follow ceiling mount for the PT basically converts the image so if this is upside down you're not viewing everything upside down you're viewing it right-side up okay so that is the camera setup thank you for sticking through the whole video if you had any more questions on the cameras if you're interested in getting any of the cameras or just learning about the cameras in general or total connects check out our website alarm grid comm and if you did like this video please like subscribe and subscribe and hit the bell icon to be notified when we release more videos
- Uploaded