Honeywell VISTA Turbo Series Addendum
Related Products


Related Categories
Document Transcript
ADDENDUM TO: VISTA-128BPT, VISTA-250BPT Series
(Use with Issue 800-06903) RE: Important information about features that are new or changed in the Vista Turbo Series and its peripherals
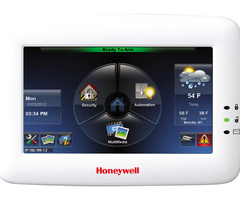
Graphical Keypad Compatibility The Vista Turbo Series is compatible with up to six (6) 6272 graphical keypads as well as later model graphical keypads. These keypads may require a software update in order to be fully compatible. A keypad software version of 3-2-07 or later is required for use with the Vista Turbo Series. Software updates can be installed easily using the removable SD card supplied with the keypad. The updated files may be obtained online from MyWebTech at www.security.honeywell.com/hsc/resources/mywebtech/index.html. NOTE: Model 6271 and earlier graphical keypads are not compatible with the Vista Turbo Series. This note affects graphical keypads only. All 2-line keypads supported by earlier Vista-128BP(E)/Vista-250BP(E) models will work correctly with the Vista Turbo Series. Serial Port Configuration The enhanced serial port on the Vista Turbo Series operates at a speed of 9600bps. Earlier Vista series panels used a speed of 1200bps. (Please note that 1200bps option has been deleted and is no longer supported on Vista Turbo.) Depending on your application, you may need to adjust the configuration of your printer, home automation system or external software package to match the new faster speed. Consult the documentation for your external hardware or software for directions on how to do this. In some cases you may need to contact the vendor of this external hardware or software for an update patch or new driver. Serial Port Connections The J8 connector is no longer used for direct connect, serial printer or home automation applications. On all Vista Turbo Series panels, there are two methods of connecting to the serial (printer/automation) port: NOTE: TB4 and J9 support WIN-PAK, however if you want to connect to a printer you must use TB4. 1) Using flying leads from terminal block TB4 to a 9- or 25-pin serial connector. 2) Plugging the VT-SERCBL cable into header J9. This connector terminates in a 9-pin serial connector. To connect this to a PC, you must use a standard straight through serial cable with a 9-pin connector on the panel end and the appropriate connector for your PC on the other end. The TB4 method is intended for permanent wiring, e.g. when connecting to WIN-PAK or Pro-Watch. The J9 method is ideal for direct-connect programming, where the serial connection being made is only temporary. When connecting via TB4: • Observe the TB4 pin configuration shown on the Summary of Connections label.
Control Panel PC Board
TB4 TXD RXD RTS/DTR CTS/DSR GND
Panel
TXD RXD RTS/DTR CTS/DSR GND
J8
9-Pin
2 (All Configurations) 3 (WIN-PAK or Pro-Watch) 8 (WIN-PAK or Pro-Watch) 4 (Printer Only) 5 (All Configurations)
25-Pin
3 (All Configurations) 2 (WIN-PAK or Pro-Watch) 5 (WIN-PAK or Pro-Watch) 20 (Printer Only) 7 (All Configurations)
J9
1 2 3 4 5 6 7 8 9
J7 30
1 2 3 4 5 6 7 8 9
V128BPT-001-V2
When connecting via J9, use the VT-SERCBL cable assembly. To connect this to a PC, you must use a standard straight through serial cable with a 9-pin connector on the panel end and the appropriate connector for your PC on the other end. NOTES: 1. TB4 and J9 cannot be used simultaneously. If you are using one of these connection points to communicate with the panel, you MUST temporarily disconnect the other wiring. 2. You cannot use WIN-PAK or Pro-Watch and the Printer at the same time.
Serial Programming Options for Automation Applications NOTE: You cannot simultaneously use a serial printer and Home/Facility Automation. The following group of fields must be set to use the serial port for automation applications: *05 *14 1*78 1*79 1*80 Enter 1 to send System Event Messages via RS232 port Enter 1 to enable Home/Facility Automation Control Input Extended Home Control Events (Enter 1 for extended) Home Control Event Types (Enter 1 for each event type to be enabled; 0 to disable) Enter 1 to improve automation performance by disabling fault/restore messages over the automation port. If you require live mapping while the system is disarmed, you must enter 0 here.
Telephone Line Fault Monitor This feature is enabled in field *30. The panel will indicate “PHONE LINE CUT” on the keypad when phone line voltage drops below 2VDC for approximately 120 seconds. The panel will send/log CID code E351 Telco Fault over ECP Communicator. (Please note that the E351 report needs to be enabled in System Group 2, report code programming under “TELCO TROUBLE”.) R351 Telco Fault is sent/logged when phone line voltage has returned for approximately 60 seconds. V-Plex Smart Contact Feature ® Support for V-Plex Smart Contacts was previously available only on fire panels such as the VISTA-128FBP. Smart ® V-Plex sensors such as the DT7500SN and IS2500SN polling loop motion detectors offer enhanced functionality, which tells the detector to stop sending Fault/Restore signals while the partition is disarmed. This prevents the polling loop from slowing down due to high bus activity in busy areas. The feature is enabled by Zone in Zone Programming. When enabled, within about 5 minutes of program exit the panel will send the command to the Smart Contacts to turn off their LED and stop sending fault/restore. (The DT7500SN and IS2500SN will turn off their LED unless the LED DIP switch is set to ON, in which case the LED will always remain enabled). Upon entering Code + 5 (Burglary Walk Test Mode), the panel will again tell the PIR to enable the LEDs and start sending Fault/Restore. The LED will remain enabled until the Burglary Walk Test mode is exited. Removing and replacing the cover of the DT7500SN and IS2500SN, or power-cycling these sensors will also put them in the walk test mode, enabling the LEDs and sending of Fault/Restore for 10 minutes. NOTE: Regardless of Smart Mode, Tamper and Supervision Failure are sent without delay. PIR Anti-Mask Feature Some motion detectors, including the DT7500SN, have an “Anti-Mask” feature that will alert the panel when the lens has been blocked. For DIP switch settings related to this feature, refer to the documentation supplied with the motion detector. Smoke Detector Maintenance Feature 5800 wireless and V-Plex smoke detectors can send a report to the panel when they determine that their sensitivity has deteriorated beyond the sensor’s ability to compensate internally (Dirty). When programmed as a “Smart Contact” in zone programming, a sensor which shows a high or low sensitivity condition will trigger a message on the keypad, a dialer report, and an event log entry. The display message will indicate HSENSxxx or LSENSxxx, where xxx is the zone number. The smoke detector should be cleaned at this time to prevent a false Fire Alarm from occurring. Model-specific disassembly and cleaning instructions are included with the sensors in question.
®
Ê800-06903XXV1$Š
800-06903XXV1 3/11 Rev. A
2 Corporate Center Drive, Suite 100 P.O. Box 9040, Melville, NY 11747
Copyright © 2011 Honeywell International Inc. www.honeywell.com/security
- Uploaded