How Do I Add a Wireless Zone to an Interlogix Simon XT?
You can add a wireless zone to an Interlogix Simon XT through System Programming. Start by putting the Simon XT into its learn mode. Then activate the wireless sensor's tamper to enroll it. The panel will beep to confirm that it has recognized the sensor. Finally, adjust the settings for that zone.
Complete the following steps to add a wireless zone to an Interlogix Simon XT:
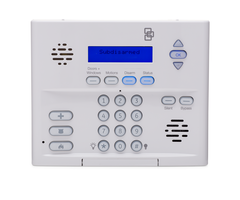
1. Access programming. From the main screen of the Simon XT System, keep pressing the down arrow until you see the option "System Programming". With that option displayed, press the "OK" button. You must then provide the Installer Code for the system. The default Installer Code for a Simon XT System is 4321. Once you have entered the code, press the "OK" button. This will take you into System Programming.
2. Add the sensor. Wireless sensors are assigned to a wireless zone on the Simon XT System. Therefore, adding a wireless zone is essentially the same thing as adding a wireless sensor.
To add a sensor, keep pressing the down arrow in the System Programming Menu until the option "Sensors" is displayed. Then press the "OK" button. The message "Learn Sensors" will be displayed. Press the "OK" button". The message "Trip Sensor" will be displayed. This indicates that the panel is in its learn mode and capable of recognizing new sensors.
At this point, you must activate the sensor to learn it in with the panel. You can activate the sensor by removing the cover to activate its tamper switch. The panel will beep after it has recognized the sensor, and both a Sensor Number and a Group Number will be displayed.
3. Configure the sensor. In order for the sensor to work properly with the system, you must adjust its settings. This involves setting the Group Number and choosing a name for the sensor. The Group Number is set first. This determines what type of action the system will take when the sensor is activated. Use the up and down arrows or the numeric keypad on the panel to select the Group Number. Once the appropriate Group Number is displayed, press the "OK" button. Please refer to pages 8-10 of the Simon XT Installation Manual for a complete list of Group Numbers.
The next step is to choose a name for the wireless zone. The Simon XT has a list of pre-included sensor names. Use the up and down arrows to scroll through the list of possible names. After choosing an appropriate name, press the "OK" button.
4. Exit Programming. Keep pressing the "Status" button until you are returned to the main screen. This will exit programming and save any changes that were made.
Did you find this answer useful?
We offer alarm monitoring as low as $10 / month
Click Here to Learn MoreRelated Products
Related Categories
- DIY Wireless Security Systems
- Wireless Door Sensors and Window Alarm Sensors
- Wireless Door Alarm Sensors
- Wireless Motion Detecting Sensors
- Wireless Glass Break Detectors
- Answered