How Do I Set Up My Fence to Alarm if the Gate is Opened?
You can set up your fence to alarm if the gate is opened by adding a sensor to the gate. There are plenty of outdoor contact sensors that you can install on an outdoor gate. You just have to program one of these sensors to trigger a system alarm when the associated zone is faulted.

Complete the following steps to set up your fence to trigger an alarm if the gate is opened:
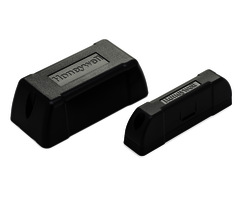
1. Program the outdoor sensor. Choose a wireless contact sensor that is suitable for outdoor use. Make sure the sensor communicates at a wireless frequency that is compatible with your panel. Below are some sensors you might use for this job:
Put your panel in its mode for enrolling new sensors. From there, follow the necessary steps to program the sensor to the panel. We strongly recommend auto-enrolling the sensor to ensure that it communicates properly. This process will vary depending your system and the sensor.
Many sensors auto-enroll by faulting and restoring. Fault and restore the sensor by holding the sensor and magnet against each other, separating them, and then bringing them back together. This will transmit a signal to the panel. Some systems require three (3) faults and restores before the device will auto-enroll.
Other sensors auto-enroll by activating the tamper cover. To activate the tamper cover, simply open up the cover that covers the battery. This will transmit a signal to the panel for enrollment. The panel should recognize the sensor, and allow you to add it to the system.
There are also some sensors that use an "enrollment button" for auto-enrollment. The location of this button and how you activate the enrollment button will vary depending on the sensor itself. Please check the instruction manual for the sensor on how to auto-enroll if the device uses an enrollment button.
Once the system has recognized the sensor, you will now need to configure its zone settings. This involves providing a name for the sensor. Make sure you set the correct Loop Number, if applicable. If Alarm Report is an option, make sure to set it Enabled, or Yes, as you want the panel to report out if the sensor causes an alarm on the system.
One very important thing you need to do is set the Response Type for the zone. This may also be called the Sensor Group. This setting determines how the system will respond when the gate is opened and the gate is opened. Some of the most likely Response Types you might use for this zone are Entry/Exit, Interior, Perimeter, 24-Hour Audible, and 24-Hour Silent. Please note that these names may vary depending on what system you are using. We will discuss each of these Response Types in the subsequent paragraphs.
- An Entry/Exit Response Type will put the system into an Entry Delay countdown whenever the zone is faulted while the system is Armed Away or Armed Stay. You must then disarm the system within this Entry Delay countdown, or else an alarm will occur. This is a good Response Type to use if you want a chance to disarm the system before an alarm occurs. This is the equivalent to Sensor Group 10 on panels that use Sensor Groups.
- An Interior Follower Response Type will have the system go into immediate alarm if the sensor is activated while the system is Armed Away. If the system is Armed Stay, then the zone will be automatically bypassed, and you can open and close the gate without worrying about setting off an alarm. This is a good Response Type to use if you only want an alarm to occur when the system is Armed Away. This is the equivalent to Sensor Group 16 on panels that use Sensor Groups.
- An Interior w/ Delay Response Type will put the system into an Entry Delay countdown whenever the zone is faulted while the system is Armed Away. You must then disarm the system within this Entry Delay countdown, or else an alarm will occur. If the system is Armed Stay, then the zone will be automatically bypassed, and you can open and close the gate without worrying about setting off an alarm. This is a good Response Type to use if you only want alarms to occur while the system is Armed Away, but you want a chance to Disarm before the alarm occurs. Unfortunately, there is no equivalent for Sensor Group panels.
- A Perimeter Response Type will have the system go into immediate alarm if the sensor is activated while the system is Armed Away or Armed Stay. The zone will not be automatically bypassed, no matter which arming setting you choose. If the gate is opened while the system is armed, an alarm will occur. This is a good Response Type to use if you do not want your gate to be opened while the system is armed. This is the equivalent to Sensor Group 13 on panels that use Sensor Groups.
- Lastly, there are two (2) 24-Hour Response Types you can use. These are 24-Hour Audible and 24-Hour Silent. With these Response Types, opening the gate at any time will trigger an immediate alarm. It doesn't matter if the system is Armed Away, Armed Stay, or Disarmed. If the gate is opened, an intrusion alarm is occurring. These are good Response Types to use if the gate should never be opened, for any reason. The difference between 24-Hour Audible and 24-Hour Silent is that whether or not the system's siren(s) activate. 24-Hour Audible will have any programmed sirens activate, while 24-Hour Silent will not provide any audible indication that an intrusion alarm has occurred. You can have a Sensor Group panel trigger an immediate audible alarm by choosing Sensor Group 8. There is no silent alarm option available for door sensors. Note: If you are going to use a 24-Hour Response Type, make sure to put your system on test mode with the central station before enrolling the sensor. This is to prevent a false alarm from occurring while you are installing the sensor.
After you have selected a Response Type and configured all of the zone settings, you can save your changes. Then continue to the next step.
2. Install the outdoor sensor. You will now install the outdoor contact sensor on the gate. You should have the sensor on the stationary frame of the gate, and its magnet on the moving portion of the gate. Make sure that the sensor and magnet are properly aligned and that they are as close together as possible when the gate is closed.
Every contact sensor has a maximum distance that the sensor can be from the magnet when the structure is closed. Having the sensor and magnet too far apart will prevent the sensor's internal reed switch from closing when the gate is closed. As a result, the system will think that the gate is opened, when it is actually closed. For now, just try and have the sensor and magnet as close as possible when the gate is closed. You will test for function in the next step. For more information on properly installing the sensor, please see the installation manual for your sensor.
Note that some outdoor contact sensors can be mounted on round metal surfaces using strap ties. The Honeywell 5816OD is an example of an outdoor sensor that can be mounted this way. If you are installing a 5816OD, then we strongly recommend checking out this FAQ, as it will walk you through the entire process.
3. Test the sensor. You will now test the sensor to make sure it can trigger an alarm. Before doing this, make sure to put your system on test mode with the central station if you have central station alarm monitoring service. If necessary, put your system in the appropriate arming mode where the zone can trigger an alarm.
Once your system is in the arming mode where the zone can trigger a system alarm, and your system is in test mode, open your gate. An alarm should occur on your system. If it doesn't, then there are a few possible causes. The first possible cause is that you didn't program the sensor correctly. Make sure you completed Step 1 correctly. The second possible cause is that you didn't install the sensor correctly. Make sure you completed Step 2 correctly. The third possible cause is that the sensor is not in wireless range of the panel. You might consider adding a wireless repeater if you are experiencing range issues. The fourth possible cause is that your panel is not in the appropriate arming state to where the zone can trigger an alarm. Make sure that your panel is armed so that an alarm can occur.
Did you find this answer useful?
We offer alarm monitoring as low as $10 / month
Click Here to Learn MoreRelated Products


Related Categories
- Wireless Outdoor Fence Gate Alarm Sensors
- Wireless Outdoor Door Alarm Sensors
- Outdoor Door Alarm Sensors
- Answered