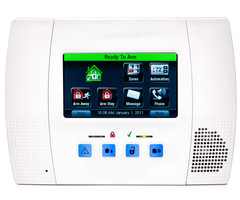
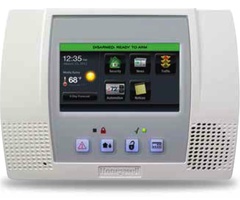
How do I add a Hardwired zone to my L5100?
The L5100 is a Honeyewell control panel that supports 1 hardwired zone, zones 2 - 48 as supervised or unsupervised wireless zones (with zones 46, 47, and 48 as dedicated garage door zones) zones 49 - 64 as dedicated keyfob zones (any device that uses input type 5 or BR) zones 80 - 85 as hi/lo temperature threshold zones for use with Total Connect 2.0, and logical zones 95, 96, and 99 as programmable keypad panics, and finally, zone 97 as the panel's cover tamper response zone, which can not be disabled.
The hardwired zone on the L5100 can be used as normally open, normally closed, or as a 2K End of Line Resistor supervised zone, but it can not be programmed as a fire zone, nor as a carbon monoxide zone. Since there is no auxiliary power available on an L5100, this zone is usually used for a door or window contact, which does not require separate power in order to function. To program zone 1, follow these steps:
1. Go to Security -> More -> Tools -> Enter the Installer Code -> Program -> Zones -> Highlight Zone 1 and click Edit
2. Choose a Device Type. Your only options on this zone are Door, or Window.
3. With Door selected, you can choose a Response Type of Entry/Exit 1, Entry/Exit 2, Perimeter, Resident Monitor, Resident Response, General Monitor, and General Response. With Window selected, you have these same options, with the addition of the option to choose a Day/Night Zone. If you need help choosing a response type, refer to the Installation Instructions page 20. Choose the appropriate type.
4. If you wish this zone to communicate alarm signals to a central station, be sure Alarm Report is selected as Yes. If not, then select No.
5. Depending on the Response Type selected, you may have the option of choosing Yes, or No for Chime. If you select Yes, when chime is enabled, and this zone is opened in the disarmed state, the panel will give 3 beeps, and announce "Fault + the Zone Descriptor"
6. This brings us to Zone Description 1 and Zone Description 2 at the top of the screen. When selecting descriptors, bear in mind the system will automatically speak the Device Type (Door or Window) so you don't want to include this in your descriptor. If we want to say "Front Door" we'd select Zone Description 1 from the programming page, then begin typing F, R, O. As you type, the system will announce available words that match what you've typed so far. When you type F, it will say Factory, when you add R it will speak Freeze, and when you type the O, you will have arrived at the word Front. Since this is the word we want, simply press "Done" at the bottom right and you'll be returned to the zone screen. Since the system will automatically say the word Door as the final word in our descriptor, we can leave Zone Description 2 blank.
7. Finally, in the bottom right, you'll see the option for Supervision. You can toggle between the options of Normally Open, Normally Closed, and End Of Line. If you choose End Of Line, the panel will be looking for a 2K (2000 Ohm) End Of Line Resistor on this zone.
8. Once all programming is done, press Save at the bottom right, then hit the back button to continue programming other zones. Or keep pressing the back button until you've backed all the way out of programming.
Did you find this answer useful?
We offer alarm monitoring as low as $10 / month
Click Here to Learn MoreRelated Products
Related Categories
- Home Security Systems
- Business Security Systems
- Wireless Alarm Control Panels
- Apartment Security Systems
- Alarm Control Panels
- Door & Window Alarm Sensors
- Answered
- Answered By
- Julia Ross