How do I Add a SiXFob to My Lyric Gateway?
As of April 15, 2026, Lyric panels can no longer be activated or remotely programmed using AlarmNet360. For full details, please read this notice.
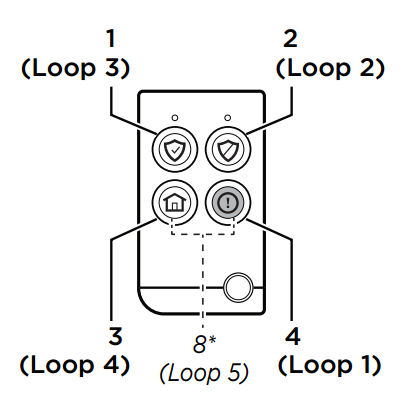
When adding a SiXFob to a Lyric Gateway, first determine if you want to use a panic key, and if you do, do you want to allow a single button panic, or require two buttons be pressed to activate it. In SIA applications, a two button press is required.
Because the Lyric Gateway doesn’t have a programming interface on the panel itself, an AlarmNet account will be needed, and all zone programming will be done by the alarm dealer. For that reason, the end-user need only decide what they want each button to do, then work with the dealer to complete the setup.
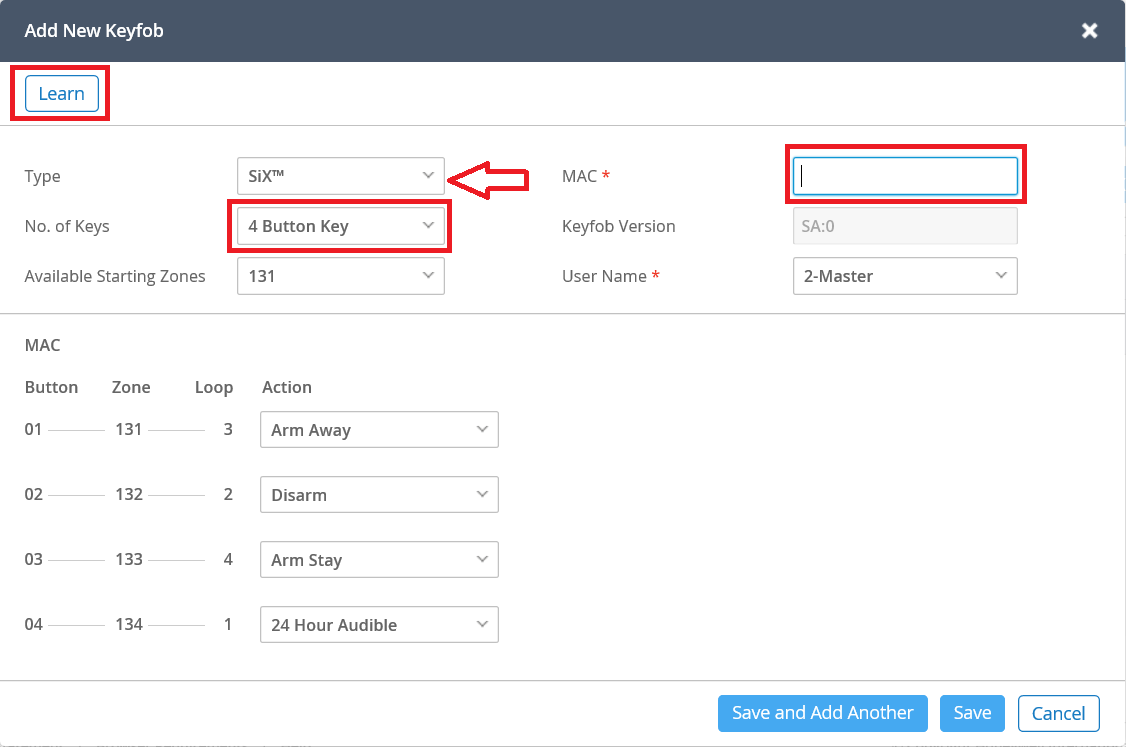
If the end-user plans not to use a panic key, or to use a single button panic, the programming through AlarmNet 360 will look like this:
Because SiX Series devices have to be paired with the Lyric Gateway, it is best to learn in the MAC address as follows. First, press the Learn button in the upper left. You’ll see a series of messages, as shown below.
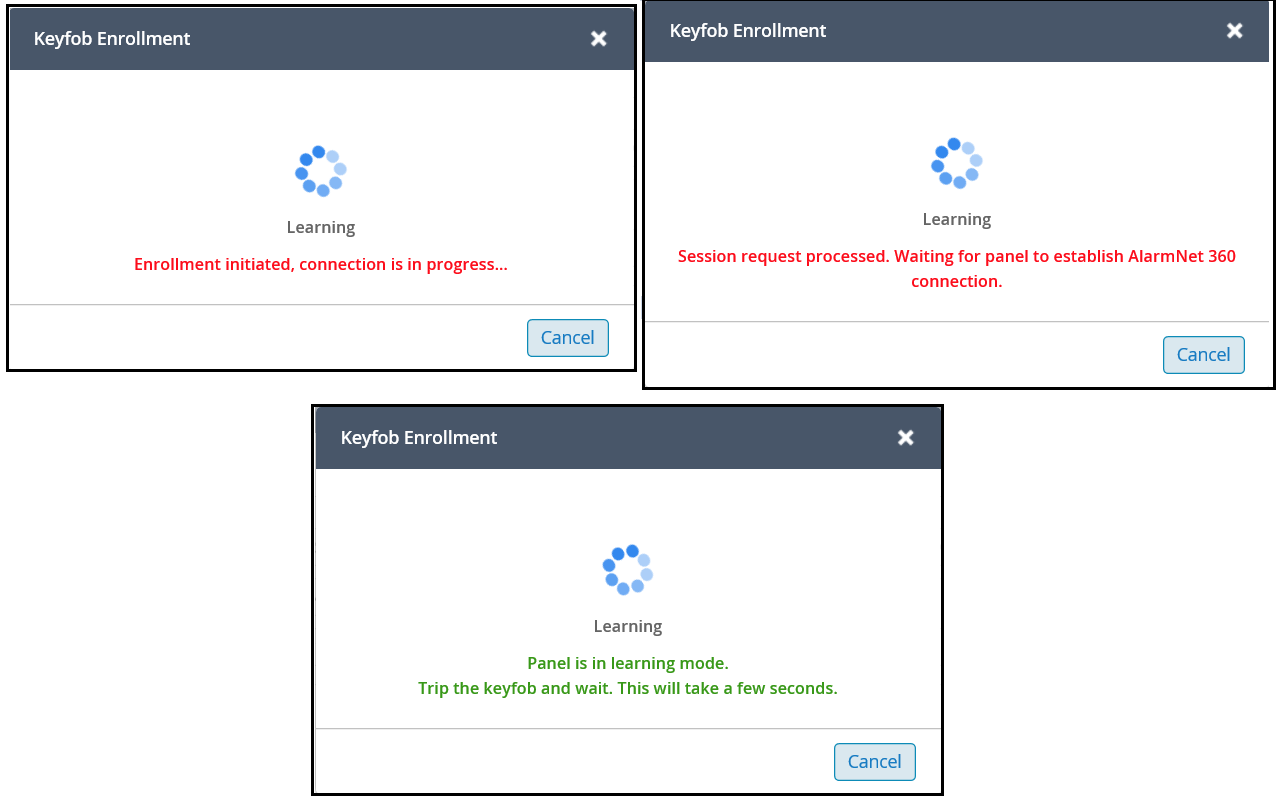
Once AlarmNet 360 shows you that the panel is in Learning mode, press the top two buttons on the SiXFob simultaneously for about 2 seconds. The LED’s at the top of the Fob will flash, and eventually go solid, then go out. Once that happens, you’ll see this in AlarmNet 360:
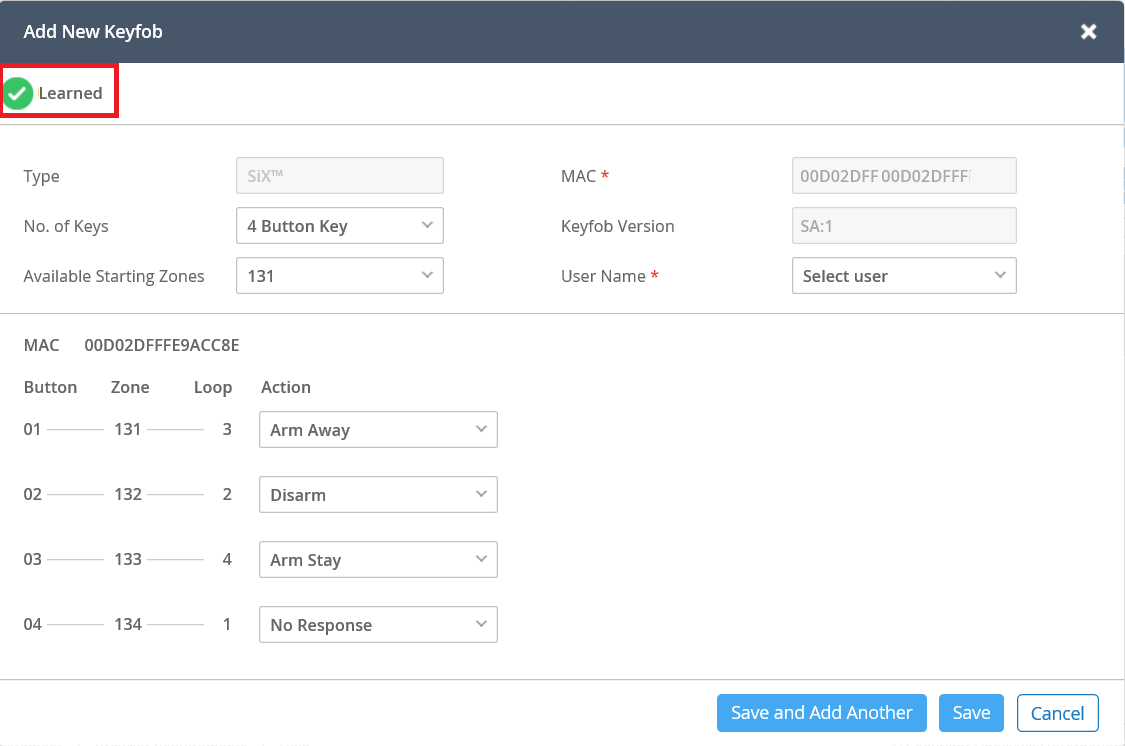
From here, if you don’t intend to use a panic, be sure 4 Button Key is selected, select a valid user in the drop down list, then press Save. If you do intend to use a single button panic, choose the appropriate option for Button 4, Loop 1. Choose 24 Hour Audible, 24 Hour Silent, or 24 Hour Auxiliary (we don't recommend Silent Burg as that only works when the system is armed) and then Save. You’ll see that the SiXFob shows paired with the system. Once the programming information has been synced to the Lyric Gateway, the fob will work as programmed.

If you decide to use a panic, and you either want, or are required to use the 2 button press method for it, you have two options. You can choose to use the SiXFob as an 8 button key, or as a 6 button key. In either case, some zones will be wasted, so if you don’t have any key zones to spare, I would recommend using the 6 button option.
As shown previously, press the Learn button, and when prompted to do so, press the top 2 buttons on the SiXFob. Once the Fob is paired, you’ll see the screen below. Choose 6 Button Key, and choose a User from the drop down list. This is where it gets weird, and this may change with future updates to AlarmNet 360 and the Lyric Gateway, but when you first learn the fob in, Button 5 shows as Loop 7. Go ahead and Save the fob programming. To be sure you’re programming on the correct loop, you need to sync with the panel (be sure Sync Precedence is set to “AlarmNet 360 wins” under Account Overview, then press “Sync” at the top right, then Sync Changes. 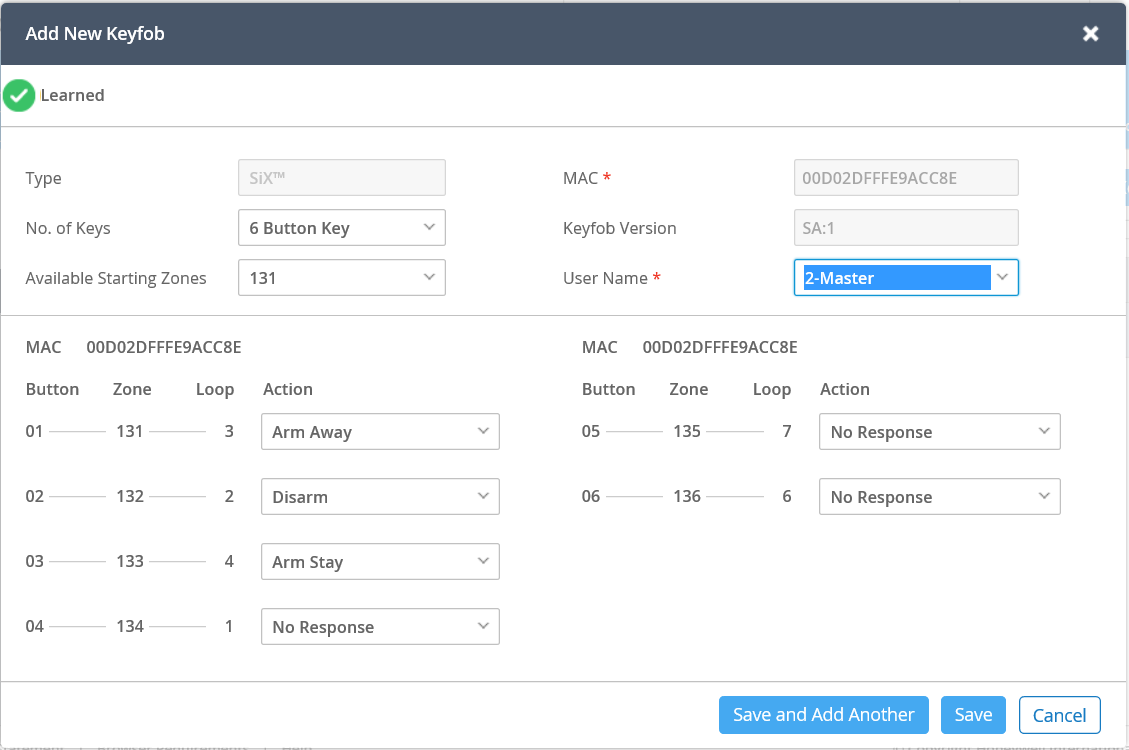
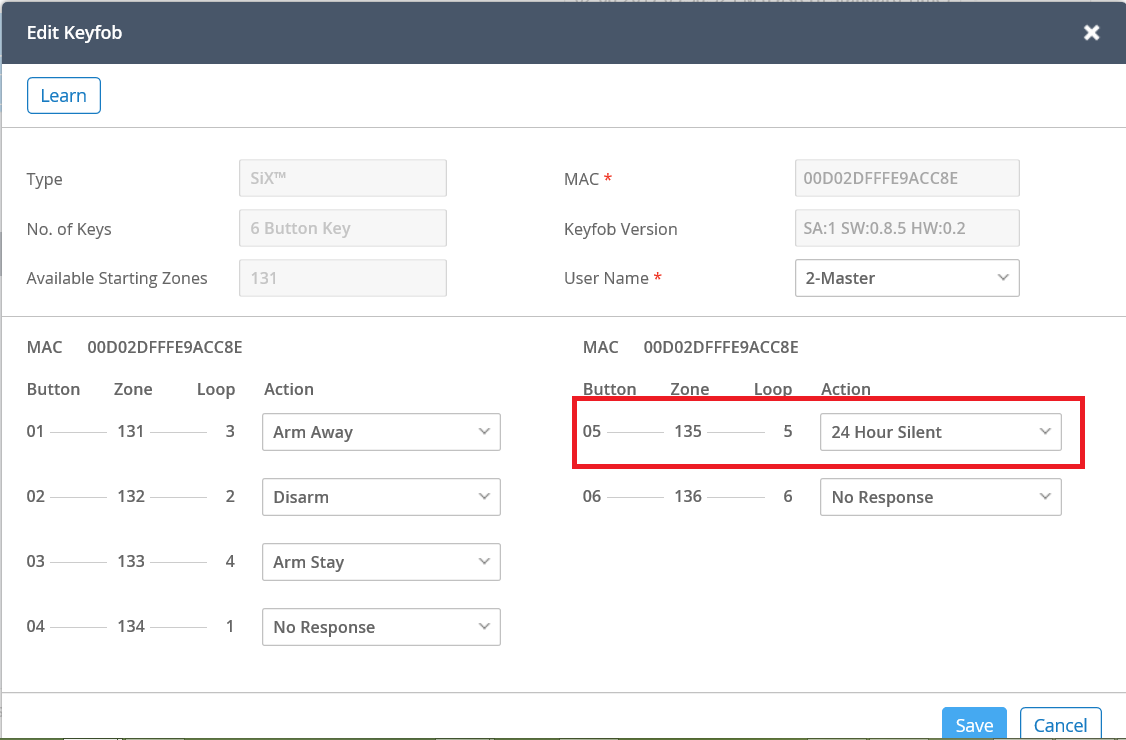
Once the Sync is complete, go back to Keyfobs, and you’ll see the following screen (loop 7 has become loop 5). Choose the appropriate 24 Hour response (24 Hour Silent, 24 Hour Audible, or 24 Hour Auxiliary)
Save, and Sync again, then test keyfob operation.
Did you find this answer useful?
We offer alarm monitoring as low as $10 / month
Click Here to Learn MoreRelated Products
Related Categories
- Wireless Alarm Systems
- Wireless Alarm Systems
- Wireless Alarm Control Panels
- Wireless Alarm Control Panels
- Honeywell SiX Key Fobs
- Answered
- Answered By
- Julia Ross