
How Do I Change the Photo Frame Settings on the IQ Panel 5?
To change the Photo Frame settings on the IQ Panel 5, swipe down from the top of the screen, touch Photo Frame, then Settings. From there you can set the Display Type, adjust the image duration and transition effect, turn shuffle on or off, and set how long the panel waits before it starts.
About the Photo Frame
The IQ Panel 5 (available in AT&T LTE and Verizon LTE) can show digital photos, a weather clock, or a dark screen when it sits idle. This idle display is the Photo Frame. Changing its settings needs no code, and it does not affect how your security system monitors, since the panel keeps watching your sensors while the Photo Frame runs. Any touch wakes it back to the home screen.
Open the Photo Frame Settings
-
Swipe down and touch Photo Frame. Swipe down from the top of the screen to open the Settings Tray, then touch PHOTO FRAME.
 Swipe down from the top of the screen to open the Settings Tray.
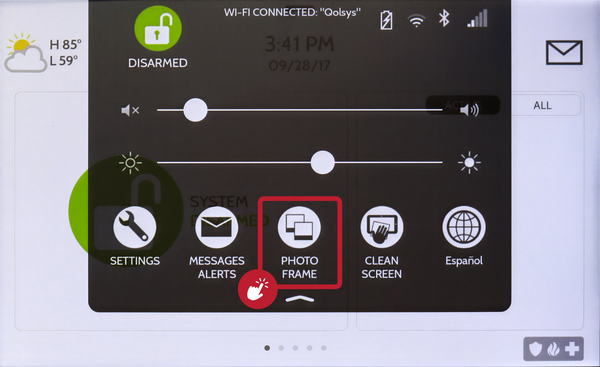 Touch Photo Frame in the Settings Tray.
-
Touch Settings. In the Photo Frame controls, touch SETTINGS to open the settings page.
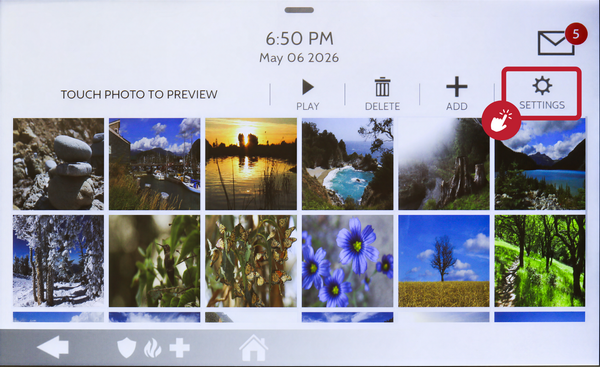 Touch Settings in the Photo Frame controls.
Photo Frame Settings You Can Change
-
Display Type. Touch Display Type and choose what shows when the panel is idle: Photo Frame for your images, Weather Clock for a clock with local weather, or Off for a dark screen.
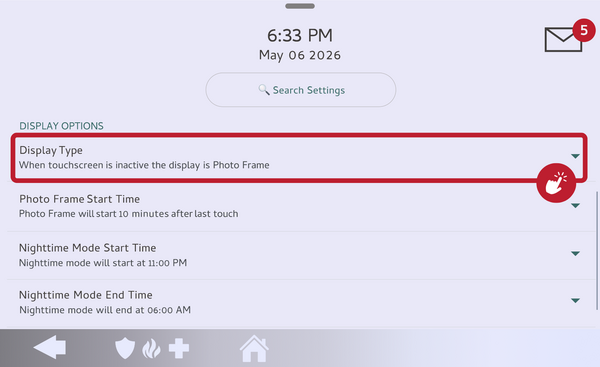 Touch the Display Type row.
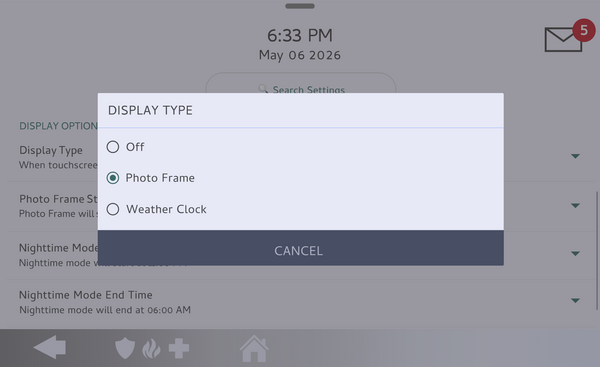 Choose Off, Photo Frame, or Weather Clock.
-
Duration. Touch Duration to set how long each image shows before the next one: 1, 2, or 5 minutes.
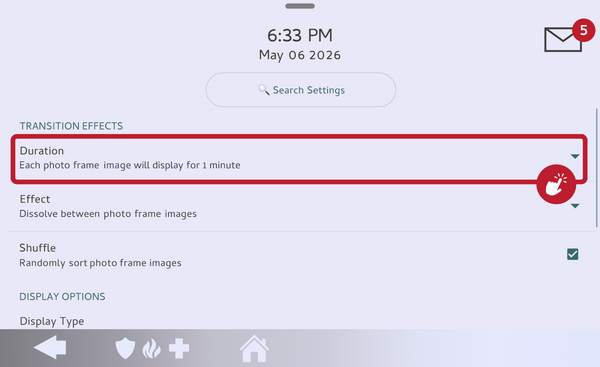 Touch the Duration row.
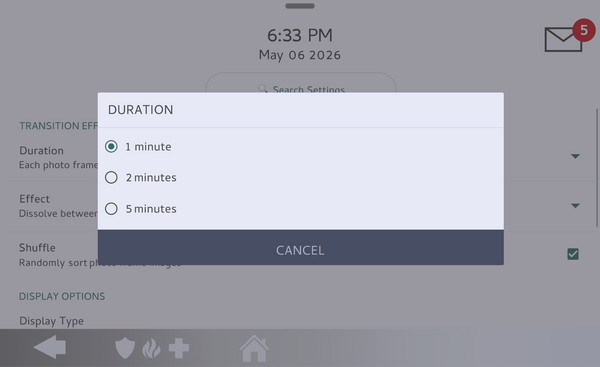 Choose 1, 2, or 5 minutes.
-
Effect. Touch Effect to choose the transition between images: Dissolve for a soft crossfade, or Fade to Black between photos.
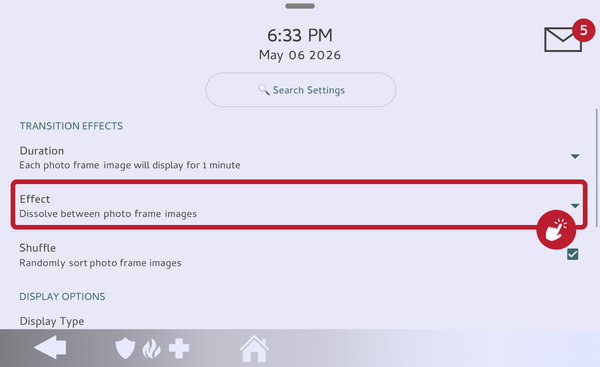 Touch the Effect row.
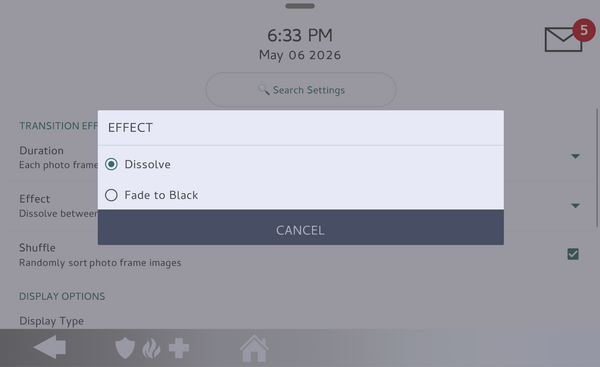 Choose Dissolve or Fade to Black.
-
Shuffle. Check Shuffle to display your images in random order, or uncheck it to show them in sequence.
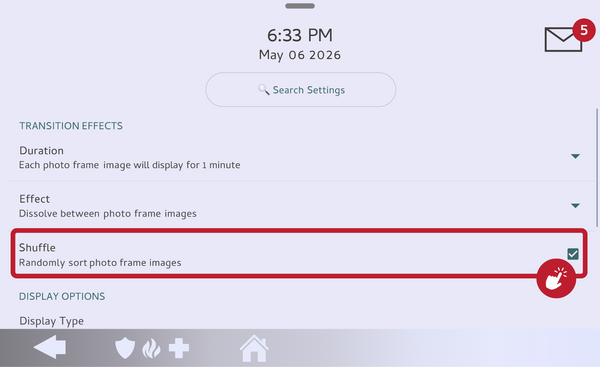 Check Shuffle for random order.
-
Photo Frame Start Time. Touch Photo Frame Start Time to set how long the panel waits after your last touch before the Photo Frame begins, from 1 to 30 minutes.
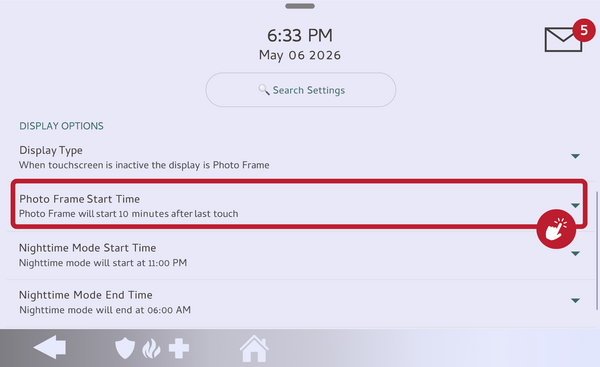 Touch the Photo Frame Start Time row.
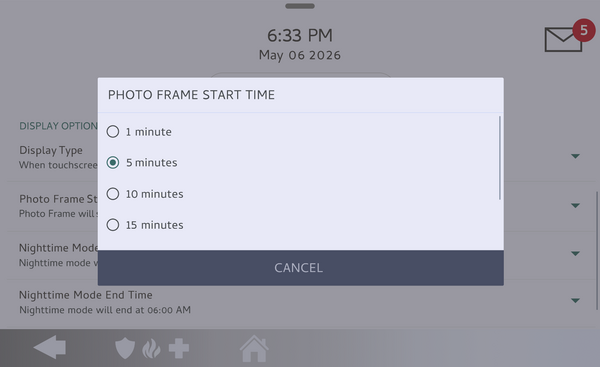 Choose a delay from 1 to 30 minutes.
Set Nighttime Mode
Nighttime Mode is part of the Photo Frame Settings and quiets the panel on a schedule, turning off the items you choose during the hours you set.
-
Nighttime Mode Start Time. Touch Nighttime Mode Start Time and use the clock to set when it begins, such as the default 11:00 PM. Touch OK to save.
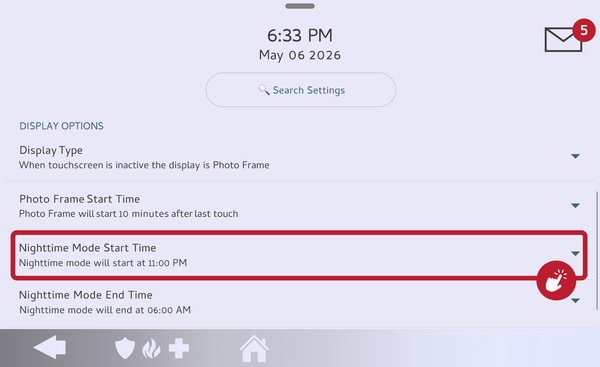 Touch the Nighttime Mode Start Time row.
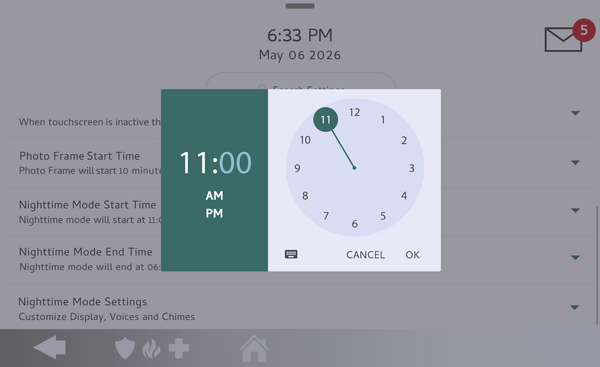 Set the start time, then touch OK.
-
Nighttime Mode End Time. Touch Nighttime Mode End Time and set when it ends, such as the default 6:00 AM. Touch OK to save.
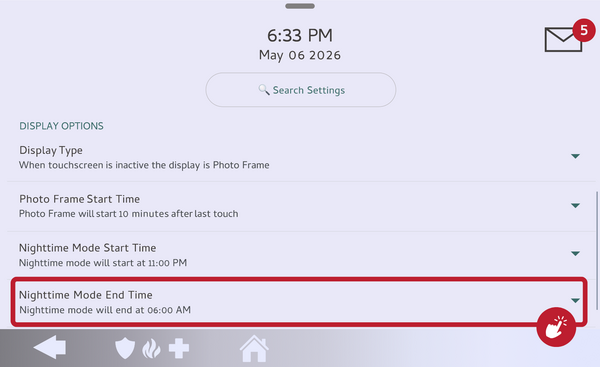 Touch the Nighttime Mode End Time row.
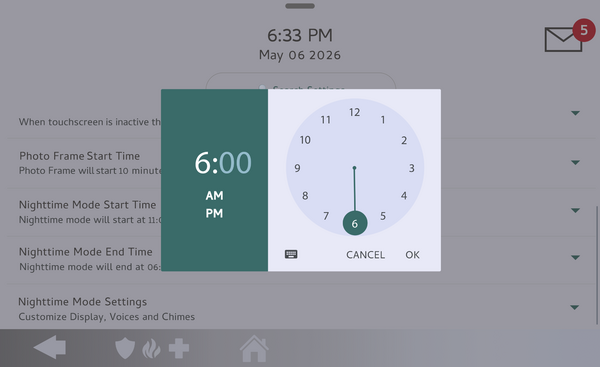 Set the end time, then touch OK.
-
Nighttime Mode Settings. Touch Nighttime Mode Settings and select which items turn off during the scheduled hours: Display, Voices, Chimes, and LEDs. Touch OK to save.
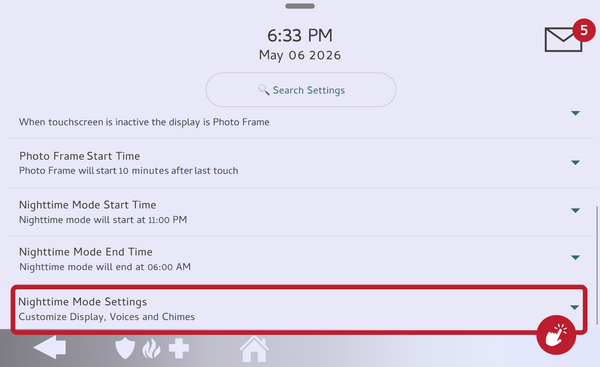 Touch the Nighttime Mode Settings row.
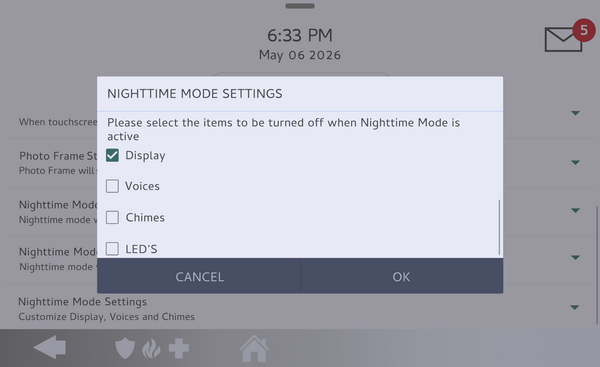 Select which items turn off: Display, Voices, Chimes, LEDs.
Add, Preview, or Remove Photos
To load your own images, use the Add Photos button in the Photo Frame controls. For the full walkthrough, see our guide on how to add photos to the Photo Frame on the IQ Panel 5. Once photos are loaded, the Play button starts the Photo Frame right away so you can preview them, and Remove Photos lets you delete images one at a time or clear them all at once.
Changing the Photo Frame settings on the IQ Panel 5 lets you control exactly what the panel shows while it sits idle. For help with the Photo Frame or other display settings on your IQ Panel 5, contact the Alarm Grid support team. We are here Monday through Friday from 9:00 AM to 8:00 PM Eastern Time. Email us at support@alarmgrid.com, call us at 888-818-7728, or visit our website and chat with a live support agent.
Did you find this answer useful?
We offer alarm monitoring as low as $10 / month
Click Here to Learn MoreRelated Products


Related Categories
- Home Security Systems
- Home Security Systems
- Monitored Home Security Systems
- DIY Wireless Security Systems
- Small Business Security Systems
- Wireless Touchscreen Alarm Panels
- Smart Home Controllers
- Answered