How Do I Check TC2 Server Connections for a Tuxedo Touch Keypad?
You can check TC2 server connections for a Tuxedo Touch Keypad by checking its network connectivity, completing a successful IP sync, confirming its connectivity with the AlarmNet360 Servers, and ensuring that the "Primary RIS Device" option is disabled for the Tuxedo Touch Keypad.

The Tuxedo Touch uses IP connectivity to communicate with the Resideo Total Connect 2.0 Servers for automation control. If the Tuxedo Touch is not properly configured with a network, then remote commands sent from Total Connect 2.0 will not go through properly. Luckily, it is fairly easy to make sure that your Tuxedo Touch is communicating with Total Connect 2.0 properly. It's as simple as going down a list and making sure that everything is working properly.
Complete the following steps to check TC2 server connections for a Tuxedo Touch Keypad:
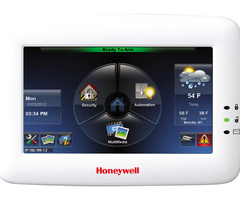
1. Verify network connectivity. The first thing you should do is verify that the Tuxedo Touch is connected with a network. To do this, start by checking the bottom-left corner of the main screen for the displayed IP address. If no IP address is displayed, then you should connect it with a network.

Additionally, confirm that the keypad is connected with the desired network by choosing the settings icon in the bottom-left (the wrench and screwdriver), followed by the IP Settings icon in the upper-right (the two monitors with the wrench and screwdriver). In the upper-left, you should get a message stating that the keypad is "Connected to" the desired network. If you make any changes to your network settings, remember to click the save button (the floppy disc) at the bottom of the screen.

Alternatively, if you have your Tuxedo Touch configured using hardwired ethernet rather than WIFI (LAN ON & WIFI OFF), then a different screen will be displayed other than the WIFI Networks screen. The screen will instead display IP Address, Subnet Mask, Default Gateway, and DNS Server. The fields will be filled in appropriately. We have an example of the screen shown below. Our fields are blank, because we do not have our Tuxedo Touch properly configured for a wired ethernet connection. But if you are using that type of connection, you should expect to see the following screen with the fields appropriately filled out.

2. Perform IP server sync. After confirming network connectivity for the Tuxedo Touch, the next step is to confirm that the device can communicate with an outside network. This is done by performing an IP server sync. From the main screen of the Tuxedo Touch, choose the settings icon in the bottom-left (the wrench and screwdriver), followed by the network information icon in the bottom-left. The network information icon has a lowercase "i" with three (3) monitors. You can see the icon below.

You should access the System Information screen. Make sure that the IP Address, Broadcast Address, and NetMask fields are all appropriately filled out. Then choose the "Sync IP to Server" button at the bottom. You should get an indication that the System IP Sync to Sever is successful.


3. Verify TC2 network connectivity. You should now go through and ensure that connectivity with Total Connect 2.0 is set up properly. From the main screen of the Tuxedo Touch, choose the settings icon in the bottom-left (the wrench and screwdriver). Then choose System on the right-hand side. Select CS Setup at the top. You will then be prompted to enter the Installer Code. Assuming that the Tuxedo Touch Keypad is set up with a Honeywell VISTA System on its default Installer Code, then the code to enter is 4112.
On the left-hand side of the screen, choose the option for "TC Sever Info". Click the blue socket icon in the bottom-left to run a server connection test. A total of three (3) tests will be performed. Assuming all tests pass, you should get a "Diagnostic Test Complete" message.


Also confirm that the Z-Wave Status Field is Enabled. If it is Disabled, choose the TC icon at the bottom of the screen, and ensure that all automation devices are Enabled in TC2.


4. Disable primary RIS device. One last thing you will want to check is that the Tuxedo Touch is not set as the primary RIS device. The term RIS in this context refers to "Remote Interactive Service" device. In this case, the primary RIS device should be the system's AlarmNet Communicator, not the Tuxedo Touch Keypad.
After passing the Diagnostic Tests in Step 3, press the return arrow in the upper-right corner. Then choose the option for ECP Address in the upper-left corner. On the right-hand side of the screen, make sure the field for Primary RIS Device is unchecked. If it is checked, click the box to uncheck it, and then click the Apply button at the bottom of the screen. The Tuxedo Touch will reboot as part of the process. If the box was already unmarked, then press the picture of the house in the upper-left corner to return to the home screen.

Did you find this answer useful?
We offer alarm monitoring as low as $10 / month
Click Here to Learn MoreRelated Products

Related Categories
- Answered