How Do I Create a TC2 Sensor Open/Close or Left Open Notification?
You can create a TC2 Sensor Open/Close or Left Open Notification by accessing your Total Connect 2.0 and completing the steps to build a notification. You must add the appropriate notification group to the notification so that the proper text message and/or email notifications are sent out.
![]()
If you have a Honeywell or Resideo Security System that is set up with Total Connect 2.0, then you may want to get text and/or email alerts when programmed sensors are opened or closed, or when a sensor is left opened for an extended period of time. Really, this type of notification is no different than any other notification you will build in Total Connect 2.0. We strongly recommend reviewing this comprehensive guide for a complete tutorial on constructing notifications in Total Connect 2.0.
As a quick summary, setting up a TC2 text and/or email notification involves creating user profiles, adding phone numbers and emails to the user profiles, building notification groups of user profiles, constructing the notifications, and applying the notification groups to the notifications. This can all be done via the Total Connect 2.0 website or mobile app. Just be aware that the menu layouts may be slightly different depending on the platform you are using. However, the general process is the same across any TC2 platform.
For this FAQ, we are only going to focus on the processes of building a new notification and adding existing notification groups to the newly constructed notification. We will assume that you have already made user profiles, added phone numbers and email addresses, and built notification groups. Again, if you are starting completely from scratch, then we strongly encourage you to check out the guide we linked earlier, as it will cover TC2 notifications in much greater depth.
Also note that we will be referencing the Total Connect 2.0 website for this FAQ. You can also build new notifications using the Total Connect 2.0 Mobile App for Android or iOS if you prefer. The steps are exactly the same regardless. The only difference is that the necessary menu options may be located in different spots. Keep that in mind if you are using the mobile app instead of the website.
Complete the following steps to create a TC2 Sensor Open/Close or Left Open Notification:
1. Login to Total Connect 2.0. Open up a web browser, and access the Total Connect 2.0 website. Login using your username and password. Remember, if you have service with Alarm Grid, then your email address on file will be set as the default username.
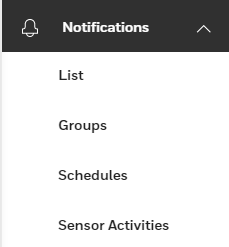
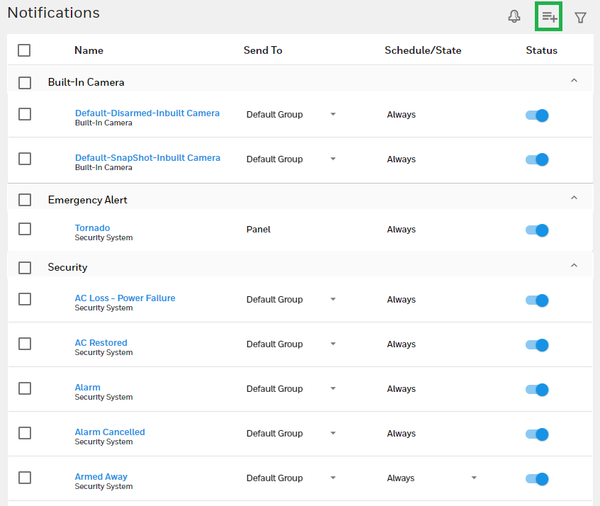
2. Build the notification. Click on Notifications on the left-hand side of the screen. Choose the option List from the dropdown menu. All of the existing notifications you have set up will appear on the screen. Click on the three horizontal bars with the + symbol near the upper-right corner of the screen.
When asked what category of notification you want to create, choose "Security". Then select the option for "Sensor Open/Close". This sub-category also includes Sensor Left Open Notifications.


From there, you should provide a name for the notification. Choose a name that will help you identify what event is happening (e.g. Back Door Left Open, Bedroom Door Closed, etc.). Then you will choose what action(s) will trigger the notification to be sent out. The available options are Sensor Closed, Sensor Open, and Sensor Left Open.
Please note that it is possible to choose BOTH Sensor Closed and Sensor Open if desired. However, if you select Sensor Left Open, then that will be the only selection you can choose. Additionally, if you choose Sensor Left Open, then you will also need to choose the duration of time for the sensor to be left open for the notification to be sent. Options for this selection range from 1 minute to 12 hours. Click the Continue button when finished.

You will then choose which sensor(s) will be used to trigger the notification. You can choose multiple sensors if desired. Click the Continue button after making your selection.

Next you will create a schedule for the notification. This will determine when the notification can be sent out. The options of Always, when Disarmed, when Armed Away, and when Armed Stay are readily available. Multiple arming options can be selected if desired. You can also create a new customized schedule. Click the Continue button after setting the schedule.

Lastly, you must choose which notification group will receive the notification. You can build a new group if needed. Click the Save button when finished. Then choose Yes to finalize the new notification.

3. Logout and test. You can logout of Total Connect 2.0 by choosing the Sign Out option at the bottom of the left-hand side of the screen. It is then a good idea to test the notification to make sure that all of the text messages and/or emails are sent out successfully. Remember to put your system on test mode first if necessary.
Did you find this answer useful?
We offer alarm monitoring as low as $10 / month
Click Here to Learn MoreRelated Products


Related Categories
- Answered