How Do I Enroll a Z-WAVE Lock in a 2GIG GC3?
You can enroll a Z-Wave lock in a 2GIG GC3 by putting the system into enroll mode. In this mode, the system will begin searching for Z-Wave devices. You can then click the function or learn button on the Z-Wave lock to have it automatically recognized and learned by the GC3 system.
It's recommended to enroll the device with the lock as close as possible to the panel. This is because the lock is learned into the controller in low power mode, for security reasons. Many users will bring the lock to the system to enroll it, which is fairly easy, since the lock is battery powered. If the lock has already been installed, the GC3 can be taken off the wall and brought close to the Z-Wave lock for enrollment.
Complete the following steps to enroll a Z-Wave lock with the GC3 system:
- Perform an Exclude function. It's a good idea to exclude the lock prior to attempting to enroll it. Many times, the lock has been enrolled as part of a Quality Control check, and if this is the case, it will not be ready for inclusion in your system. To exclude, be sure the lock has batteries installed, then from the home screen of the GC3 panel, go to System Settings > enter the Installer Code (default is 1561) > Smart Home Settings > Remove Devices. The screen will display "Listening for Devices To Remove" with "Remove devices now." Follow the instructions on the lock for excluding the device from the network. Once completed, press the back arrow and proceed with the "Add Devices" command, shown in Step 2.
-
Enable Z-Wave enrollment mode. From the home screen of the panel, go to System Settings > enter the Installer Code (the default code is 1561) > Smart Home Settings > Add Devices. The GC3 will enter Z-Wave enrollment mode and display “Add Devices Now”.

-
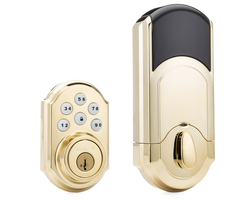
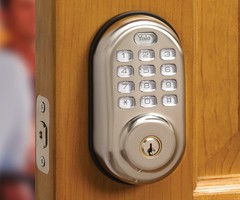
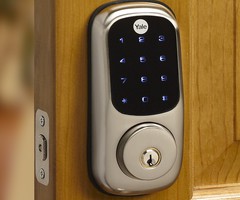
Learn-in the lock. Each Z-Wave lock will include a learn or function button. The installation manual for the device will point out the specific location of the button. Bring the lock as close as possible to the GC3, and then click the function/learn button. If the GC3 recognizes the lock, it will automatically learn into the system, and a message will be displayed on the panel. Be sure to leave the lock and the panel near one another long enough for user information to be transferred from the GC3 to the lock. When prompted, enter a familiar name for the lock, such as "Front Door".
The video below shows you how to add and exclude Z-Wave devices in the 2GIG GC3:
- Test the lock. Press the back arrow in the top left corner of the panel until you return to its home screen. Click “Smart Home Controls” in the bottom left corner, and then select “Locks”. The Z-Wave lock will appear in this menu. Select the lock to interact with it. Clicking the switch to the right will operate the lock. Once the Z-Wave lock has been enrolled into the system, install the lock in a desired location.

Did you find this answer useful?
We offer alarm monitoring as low as $10 / month
Click Here to Learn MoreRelated Products

Related Videos

Related Categories
- Answered
- Answered By
- Joe Gonnella