How Do I Get My ADC-V622 Added to a Network Using WPS?
You can get your ADC-V622 added to a network using WPS by activating the WPS function on both the camera and the WIFI router. The camera's LED should turn solid green to indicate successful connectivity with the wireless WIFI network. You can then pair the camera with an Alarm.com account.

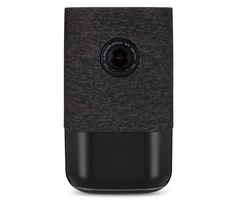
The Alarm.com ADC-V622, also known as the Alarm.com WELLCAM or the ADC-V622-WELL, can use wireless WIFI connectivity or wired ethernet connectivity (with PoE) to get online. If you are getting the camera connected via WIFI Protected Setup (WPS) pairing, then you are configuring for wireless WIFI connectivity. It must be noted that while WPS pairing is very easy, it is also somewhat insecure, especially when compared with AP Mode pairing. We generally recommend AP Mode pairing over WPS pairing, due to the fact that AP Mode pairing does not present the same network vulnerabilities and risks. But you are free to perform WPS pairing anyway if you are willing to accept the associated risks. Please note that both 2.4 GHz and 5 GHz WIFI networks can be used with the ADC-V622.
Complete the following steps to pair your ADC-V622 to a WIFI network using WPS:
1. Power on camera. The ADC-V622 should come with a power adapter. Connect the cable to the back of the camera. Then take the other end, and plug it into a standard outlet. The camera should provide some indication that it is powered on. Wait at least two (2) minutes after powering on the camera before continuing.
2. Activate camera WPS. After the camera has powered on, and you have waited at least two (2) minutes after boot-up, you can then activate WPS mode for the camera. Press the camera's Menu button to access its main menu. Then use the Volume buttons to scroll through the available options, following the voice prompts until you reach WPS. Press the Menu button to activate the camera's WPS option. The LED for the camera will flash blue to indicate that WPS mode has been activated.
3. Activate router WPS. Now you must activate WPS mode for the WIFI router. Go to the router, find its WPS button, and press and hold it until you receive an indication that WPS mode has been activated. Most WIFI routers will also allow you to access a virtual interface through a web browser so that you can enable WPS. Refer to the manual for the WIFI router for more information on how to activate WPS mode. Keep in mind that not every router supports WPS pairing, and some users disable the feature for security purposes. If your router doesn't support WPS, or if you have disabled the feature, then consider using AP Mode pairing instead.
4. Confirm network pairing. With WPS active on both the camera and router, the camera should then join the WIFI network. You can confirm this by checking its LED light. The light should turn solid green to indicate a successful connection. You can now proceed to pair the camera with your Alarm.com account via either their website or the mobile app.
Did you find this answer useful?
We offer alarm monitoring as low as $10 / month
Click Here to Learn MoreRelated Products
- Answered