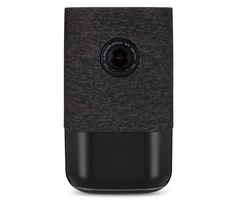
How Do I Get My ADC-V622 Added to My Alarm.com Account Via the Website?
You can get your ADC-V622 added to your Alarm.com account via the website by first getting the camera online and then accessing your Alarm.com account through a compatible web browser so that you can provide the unique MAC Address for the camera and complete the device integration.

For this FAQ, we are assuming that the camera has already been connected to the network. This can be done via AP Mode pairing or WPS pairing for WIFI connectivity, or you can get it online using a hardwired ethernet connection. We will also assume that you already have an Alarm.com account with video services enabled by your monitoring provider. The process for integrating the ADC-V622 with your account can be completed through the website or the Alarm.com Mobile App. This FAQ focuses solely on pairing through the website.
Complete the following steps to pair your ADC-V622 Camera with your Alarm.com account via the website:
1. Access the ADC website. Open a compatible web browser, and go to the Alarm.com website. Then login using your username and password, and complete two-factor authentication (2FA) if it is enabled. If you are having trouble accessing your account, then reach out to your monitoring provider for further help and assistance.
2. Enter Add Video Device. After you have successfully logged into your account, start by choosing Video on the left-hand side. Select Settings on the top bar, followed by Add Video Device. This menu will let you pair a camera.


4. Finish the integration. If your ADC-V622 is online on the same network as the device you are using to access Alarm.com, then it should appear on the screen. Its MAC Address and local IP Address should also be displayed. There will be a Name field where you can provide a name for the camera. We named ours ALARM GRID in the example below. There should also be a blue "Install" or "Upgrade & Install" button, depending on whether or not your camera needs a firmware update. You can click the blue button either way. Just note that the updating process may take upwards of thirty (30) minutes if the camera requires an update.

If you cannot get the camera to automatically appear, then you can try clicking the Refresh Devices button in the upper-right corner. Also try manually entering the camera's unique 12-character MAC Address into the corresponding field and pressing Find to see if you can locate it that way.

Upon adding the camera and it completing the installation process, it should then display a Status of "Ready", and you can then press the blue Configure button to finish setting up the camera. You will be prompted to set up HD enhancement and the camera's call-out function. Follow the on-screen prompts until you returned to the add camera page. The ADC-V622 will then be ready for use!

Did you find this answer useful?
We offer alarm monitoring as low as $10 / month
Click Here to Learn MoreRelated Products
- Answered