How Do I Get My ADC-V723 Added to a Network Using AP Mode?
You can get your ADC-V723 added to a network using AP mode by first pressing and holding the camera's Reset or WPS button until its LED flashes white. Then use a web browser to connect with the camera's Access Point (AP). Scan for networks, choose the desired one, and provide the password.

Access Point (AP) mode pairing is usually seen as a more secure alternative to WPS pairing. Both processes allow you to get the ADC-V723 Camera connected with a WIFI network so that it can be paired with an Alarm.com account. Using AP mode pairing allows you to connect the camera to your network using WPA by selecting your network, then entering your password. As long as your WIFI password is suitably difficult, AP mode will allow you to connect your camera securely to the network. Once the camera is online, you can then pair it with your Alarm.com account using the website or mobile app.
If your WIFI router does not support WPS pairing, you have disabled WPS for security reasons, or if you simply prefer AP mode pairing, then complete the following steps:
1. Power the camera. The ADC-V723 gets its power from a plug-in transformer. Connect the transformer with the camera using the barrel connector. Then plug the transformer into a working outlet. The camera should power on and its LED light should begin flashing.
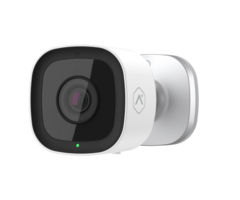
2. Activate camera AP mode. Find the WPS/Reset button on the underside of the ADC-V723. It is located next to two screws. You will also find a QR code, the camera's MAC address, and some other information in this same area. Press and hold the WPS button. You should soon see the LED begin flashing blue. Do not let go of the button, and keep holding it. Then the LED should begin flashing white. Release the button once this happens. This will activate AP mode for the ADC-V723.

3. Connect to the AP. On a computer, tablet, or smartphone, go to WIFI settings and open the list of available WIFI networks. Look for one named ADC-V723 (XX:XX:XX). The six (6) X's represent the final 6 digits of the camera's MAC Address. Connect with this network. A web browser should automatically open. If not, then open a web browser, and enter 192.168.1.1. You should access the camera's Access Point (AP).

4. Connect camera to network. Press the black Scan button. After a brief moment, a list of available WIFI networks should appear. Click on the network you want to use with the ADC-V723. Its SSID should auto-generate in the SSID field to the left. Then enter in the password for the network, and click Submit.

Turn your attention to the ADC-V723. Its LED should turn solid red, then begin blinking green, and then turn solid green. The solid green LED indicates that it is successfully connected to the network. You should then be able to pair the camera with your Alarm.com account using the website or mobile app.
Did you find this answer useful?
We offer alarm monitoring as low as $10 / month
Click Here to Learn MoreRelated Products

Related Categories
- Answered