How Do I Get My ADC-V723 Added to a Network Using WPS?
You can get your ADC-V723 added to a network using WPS by pressing and holding the camera's WPS/Reset button until its LED is blinking blue, and then activating the WPS function on your WIFI router. The LED should cycle and eventually turn solid green to indicate a successful connection.

WPS stands for "WIFI Protected Setup", and it serves as a convenient and somewhat safe method for adding compatible devices to your WIFI network. WPS pairing is the easiest way to get the ADC-V723 Camera connected to a network. However, it is definitely not the most secure method. In addition, not all routers support WPS, and many in the network security field recommend that WPS be disabled at the router. If your router doesn't support WPS, or if you have chosen not to use it, then you will need to pair using the more secure Access Point (AP) mode. Instructions for AP mode pairing can be found in this FAQ. Both methods accomplish the same task of getting the camera online so that you can ultimately pair it with your Alarm.com account, either through the website or the mobile app.
Complete the following steps to add your ADC-V723 Camera to the network through WPS pairing:
1. Power on the camera. First, you must provide power to your ADC-V723. There should be a cable running out of the backside of the ADC-V723. Take this cable, and complete the barrel connection with the camera's power cable. The other end of that cable should be a transformer that you can plug into an outlet. Once you plug it in, you should see the camera's LED light up, indicating that the camera is receiving power.
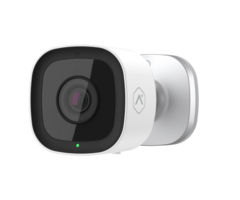
2. Activate camera WPS mode. On the bottom of the ADC-V723 Camera, you should see a QR code, the camera model (ADC-V723), its 12-character MAC Address, two screws, and a small grey circle button in between the screws. That circle button is the WPS/Reset button. You want to press and hold this button until the front LED for the camera begins blinking blue. This activates camera WPS mode.

3. Activate router WPS mode. Next, you will activate the WPS pairing function on your WIFI router. Go to your router, and find its WPS button. Press and hold this button until it provides an indication that WPS mode has been activated. You may also be able to log into the router and activate WPS from the router's web interface. If you are having trouble, refer to the installation manual for your WIFI router.
4. Confirm successful network pairing. With both camera WPS and WIFI router WPS active, the camera should pair with the network. Observe the LED light on the ADC-V723. It should turn red, then begin flashing green, and then turn solid green. A solid green LED means that the ADC-V723 has connected successfully.
Did you find this answer useful?
We offer alarm monitoring as low as $10 / month
Click Here to Learn MoreRelated Products
Related Categories
- Answered