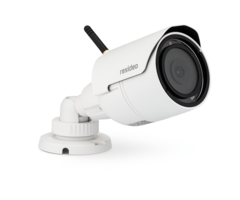
How Do I Install a Resideo IPCAM-WOC2?
The IPCAM-WOC2 can be installed by attaching it directly to a soffit, wall, or back box. Choose a mounting location, and install the back box and cover, if used. Mark locations for mounting screws and secure the camera to the mounting surface. Complete the power wiring from camera to outlet.
The IPCAM-WOC2 is rated for outdoor use, but can be mounted inside if desired. When using any of the Total Connect 2.0 compatible HD cameras, it is recommended that the camera be paired to the network then added to TC2 prior to being mounted permanently. This is to avoid having to climb ladders, or step-stools after the installation is complete. For WIFI cameras, always verify good WIFI reception once the physical installation is complete. It is also best practice to check through TC2 to verify the mounting location and angle once all of these steps have been completed, prior to putting away ladders or step-stools.
Complete the following steps to install a Resideo IPCAM-WOC2:
-
Determine mounting location. It is recommended to use a round or square back box for the IPCAM-WOC2, either one will fit. This is in part because of the wire that comes off the back of the camera. There are several dongles included in the wire loom. One is the reset button, one is the power wiring connector, and one is not used. If a back box is used, then the bulk of these dongles can remain inside the box, while only the connector for power has to run beyond the box. By using a box, the hole that is required in order to run the power wire will be smaller than it would be if it had to accommodate all of the dongles. Once you have determined where and exactly how you will install the camera, either prepare the location for the camera to mount directly to the surface, or mount the back box and prepare the cover to have the camera mounted to it. An added advantage to using a back box is that using the correct type of box and cover will help to keep moisture away from the wiring loom.
Example of a round back box with a blank cover:
-
Mark locations and drill holes. If you will be mounting directly to the wall, soffit, or ceiling, you will need to mark the three (3) holes for the mounting screws, as well as a center hole to route wires through. If you will use a back box, you will also do this, but you'll be making the holes in the box cover. The center hole for power wiring will be drilled into both the back box cover, and the surface that the box is mounted onto. The camera's mounting base will cover the center hole once the camera is completely installed.
You can see in the picture above that there are some additional holes in the sides of the back box shown. Since the reset button is on one of the dongles coming off the back of the IPCAM-WOC2, it may be a good practice to run it so that it is accessible through one of these extra holes so that it doesn't require removal of the camera from the box. This is helpful in the event that you need to reset the camera. A reset is required if the camera needs to be configured for a new SSID, such as when you change network equipment, and/or network providers. Any holes like the ones shown above will have covers. Using glue, tack the reset button in place so that it is just under one of these covers. Then, if you need to reset the camera, remove the appropriate cover and access the button.
This is where previously setting the camera up on the network and TC2 will come in handy. While marking the holes for mounting, make sure that the camera mounting spot and angle are suitable for the area you want it to cover. Mark the locations for the three (3) screws and the center hole for wiring. Drill pilot holes if necessary, and use the drywall anchors if needed. Route the wire through the center hole. If mounting directly to a wall, soffit, or ceiling go ahead and route the wiring through the center hole then install the three (3) drywall anchors and three (3) screws. If using a back box, you may need an extra pair of hands. Route the wire through the center hole in the box cover, then attach the box cover to the box. Finally, push the wire the rest of the way into the hole, then install the three (3) screws for the camera's mounting plate and affix the camera to the box cover. - Verify viewing angle. Before putting all the tools away, after the camera has been installed, the power wiring has been completed and power permanently applied to the camera, take one more look through Total Connect 2.0 to be sure that the camera's mounting location and viewing angle are good. Make any adjustments that may be necessary, then tighten everything down.

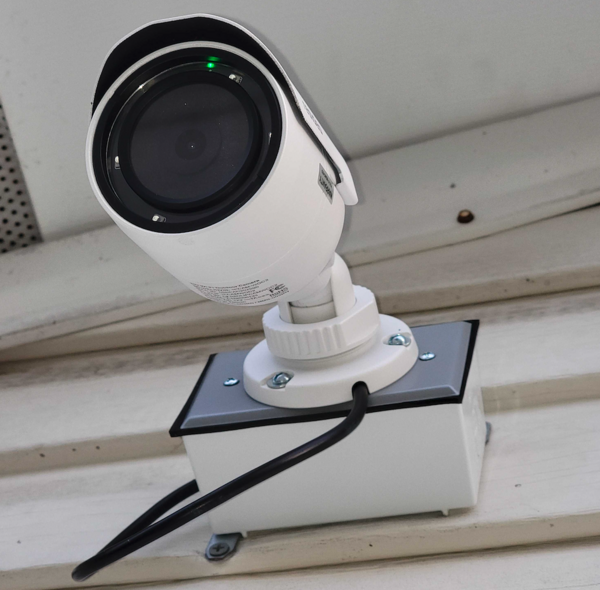
Below, an IPCAM-WOC2 is shown with a square back box installed. In this case, the installer chose to run the wire outside the box with a drip loop to make sure water doesn't follow the wire back inside the box. Once the installation is complete, use silicone to seal any potential sources of water ingress, such as screw holes and areas where one surface joins another:
Did you find this answer useful?
We offer alarm monitoring as low as $10 / month
Click Here to Learn MoreRelated Products
Related Categories
- Security Cameras
- Security Cameras
- Outdoor Cameras
- HD Security Cameras
- HD Security Cameras
- Low-Light Security Cameras
- 1080P Security Cameras
- Wireless Security Cameras
- Answered
- Answered By
- Julia Ross