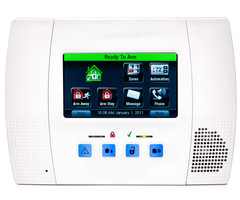
How Do I Program a Window Sensor to a Honeywell L5100?
You can program a window sensor to a Honeywell L5100 through the zone programming menu of the panel. You will need the installer code for the panel to access the programming menu. Once in, you will be able to automatically enroll the sensor into a zone and change any of its settings.
 There are several excellent window sensors that are compatible with Honeywell L5100 security panel. Many users choose the Honeywell 5816 door and window sensor, a great window contact that fits most general needs. Users can also go with the Honeywell 5800MINI, a smaller, more discreet sensor that provides similar performance to the 5816. If a recessed window contact is required, then the Honeywell 5800RPS is a fantastic option. Regardless of which sensor you choose, the process of programming is essentially the same.
- Enter the zone programming menu. From the home screen of the L5100, go to Security > More > Tools > enter the installer code (default is 4112) > Program > Zones. You will now be at the zone programming menu of the panel.
-
Enroll the sensor. Select an available zone. Then choose "Edit", or choose "Add New" at the bottom of the screen. Select "Serial Number" to enter enrollment mode. Fault and restore the window sensor three times to automatically learn it into the panel. You can fault the sensor by placing the sensor against its magnet, and then pulling the 2 apart. If the sensor is already mounted, you can simply open and close the window 3 times. Once the serial number has been learned and confirmed, you will hear 3 beeps, and you will automatically be taken back to the zone programming page. Then, follow the steps below to complete the zone programming:
- Loop Number - Usually 1 or 2. (See the Instructions for your transmitter)
- Zone Description 1 - Optional
- Zone Description 2 - Optional
- Device Type - Window
- Response Type - Perimeter
- Alarm Report - Yes or No
- Chime - Yes or No
- Supervision - Supervised
The video shown below should help you enroll the sensor:
3. Install the sensor. The installation of the sensor should be in a location where the sensor and magnet will be in close proximity when the window is closed. See the installation instructions for your particular sensor to see what the gap rating is. For the installation of a recessed sensor, you must drill a hole into the window frame where the sensor will be positioned. Make sure that the sensor will be closed when the window is closed.
4. Test the sensor. Once installed, open your window to make sure that the action is being recognized by the panel. If successful, the corresponding zone should fault. Now, close the window to be sure the fault clears and the system returns to ready.
Did you find this answer useful?
We offer alarm monitoring as low as $10 / month
Click Here to Learn MoreRelated Products


Related Categories
- Wireless Alarm Systems
- Wireless Alarm Control Panels
- DIY Wireless Security Systems
- Transmitters
- Wireless Door Sensors and Window Alarm Sensors
- Answered