How Do I Program the 2GIG SMKT3-345 to the Lyric Security System?
As of April 15, 2026, Lyric panels can no longer be activated or remotely programmed using AlarmNet360. For full details, please read this notice.
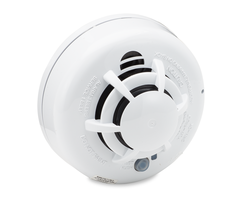
You can program the 2GIG SMKT3-345 to the Lyric Security System by putting the panel in its wireless enrollment mode and then activating the sensor's tamper switch three times to auto-enroll it. Make sure the batteries are inserted when doing this. You must then configure the zone settings.

As a 2GIG 345 MHz Sensor, the 2GIG SMKT3-345 will work with any Lyric System that is running firmware update MR3 or higher. The sensor offers smoke, heat and freeze detection. It uses photoelectric technology to detect smoke, while the heat sensor features both fixed temperature and rate-of-rise detection. The freeze sensor activates at 40 degrees Fahrenheit and lower. The sensor will need three separate zones for smoke, heat and freeze detection.
It's easiest to program the 2GIG SMKT3-345 before actually mounting and installing it. This way, you can easily remove it from its mounting base during enrollment. Complete the following steps to program the 2GIG SMKT3-345 with a Lyric Alarm System:
1. Enter enrollment mode. Start from the main screen of the Lyric with the system disarmed. Choose Security > Tools > Installer Code (default 4112) > Program > Zones > Add New. Then choose the Serial Number field in the upper-left corner. The system will now be in its wireless enrollment mode for learning-in new sensors.
2. Enroll the sensor. Make sure the RF Type in the lower-right corner reads 5800. Take the 2GIG SMKT3-345 and secure it to its mounting base, which might also be identified as the back cover. Push against the mounting base, and twist it counter-clockwise to release it. Then separate the mounting base from the device. This will activate the sensor's tamper switch. The panel should recognize the sensor and beep once. Then reapply the mounting base and remove it a second time. The panel should beep twice, and the sensor's Serial Number will be displayed on the screen. Repeat the process a third time. The panel will beep three times, and you will be taken back to the previous screen. This confirms that the sensor has been enrolled.
3. Adjust the settings. Go through and configure the settings for the zone.
Set the Loop Number to 1 for smoke detection. Set the Loop Number to 2 for heat detection. Set the Loop Number to 3 for freeze detection. Loop Number 4 is associated with the tamper cover, and it is automatically active. You do not need to program a zone for Loop Number 4.
Use the Zone Descriptions to name the sensor. We recommend choosing something easy to remember, like "Basement" or "Master Bedroom".
Set the appropriate Device Type. This will be either Smoke Detector, Heat Sensor or Temperature.
Choose the appropriate Response Type. Smoke and Heat will use one of the fire options, while Freeze will usually use 24 Hour Auxiliary.
Set Alarm Report to Yes.
Set Chime to Disable.
Set Supervision to Supervised.
Press Save in the bottom-right corner when you have finished.
4. Return to main screen. Keep pressing the return arrow in the upper-right corner until you return to the main screen. You can then install the sensor in the appropriate location. It should work with the Lyric properly.
Did you find this answer useful?
We offer alarm monitoring as low as $10 / month
Click Here to Learn MoreRelated Products

- Answered