How Do I Program the Honeywell 5800COMBO to the 2GIG GC2?
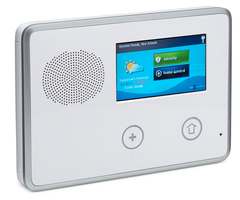
You can program the Honeywell 5800COMBO to the 2GIG GC2 by accessing the System Configuration Menu and then following the steps to enroll a new sensor. For full functionality, the 5800COMBO will use four separate zones on the GC2 System. Each zone will support a different function.
 The four zones that can be used with the 5800COMBO are smoke/heat detection, CO detection, freeze detection and maintenance. A user only needs to program zones for the functions that they want to use with the device. So if a user only wants to use two of these functions, they will only need to program two zones. The function that is used with the zone is determined by the Serial Number and the Loop Number that is programmed. Make sure to provide careful detail when programming each zone.
Complete the following steps to program a Honeywell 5800COMBO with a 2GIG GC2:
1. Enter System Configuration. Begin from the home screen of the 2GIG GC2. Click the 2GIG logo in the lower-right corner of the screen. Then provide the system's Installer Code (default is 1561). Select the System Configuration option to access the System Configuration Menu.
2. Pick a Sensor Number. Choose an available Sensor Number by using the left and right arrows. Press the down arrow when you find a Sensor Number that has not yet been assigned.
3. Configure the settings. Proceed with programming the zone. The left and right arrows will allow you to scroll through the list of available options for the current selection. The down arrow will allow you to move on to the next selection, and the up arrow will take you to the previous selection. Continue until you reach the end of the list. The following selections should be made:
- Sensor Type: This option will depend on what the zone is being used for. For smoke/heat choose either "(09) 24-Hour Fire" or "(16) 24-Hour Fire Verification". The 16 option will require that the sensor is activated a second time after 30 seconds before an alarm will occur, while 09 will trigger an immediate alarm upon initial activation. For CO detection, choose "(14) 24-Hour Carbon Monoxide". For freeze detection, choose "(08) 24-Hour Auxiliary Alarm". For maintenance, choose "(05) Day Zone".
- Equipment Code: The 5800COMBO is not found within the 2GIG programming list. Instead choose the next best option. This will depend on what the zone is being used for. For smoke/heat, freeze or maintenance, choose "0859 - HW Smoke 5808W3". For CO detection, choose "0692 - Existing CO Detector".
- Serial Number: The best way to program the Serial Number is through Auto-Enrollment. Press the "Shift" button, followed by "Learn". The system will begin searching for an RF signal transmission. You will then press and hold one of the test buttons of the 5800COMBO. If programming for smoke/heat, freeze or maintenance, press and hold the Smoke Test button. If programming for CO detection, press the CO Test button. Make sure that batteries have been inserted into the device when doing this. The GC2 should display that the sensor has been successfully recognized.
- Equipment Age: Select (0) for "New" or (1) for "Existing". This will not affect the operation of the sensor.
- Loop Number: For smoke/heat or CO, choose Loop 1. For maintenance, choose Loop 2. For freeze, choose Loop 3.
- Voice Descriptor: The Voice Descriptor is what the panel will speak out when the sensor is activated. We recommend choosing something that is easy to recognize. Some examples could be "Bedroom Smoke", "Basement Freeze", Hallway Carbon Monoxide", etc. Check out pages 38 and 39 of the 2GIG GC2 Programming Guide for more information on setting the voice descriptor.
- Sensor Reports and Sensor Supervision: Set both options to "Enabled".
- Sensor Chime: This is usually disabled, since the system will trigger and alarm upon activation in most cases.
4. Save the changes. From the summary screen, select "Edit Next" to continue enrollment. Or press "Edit Current" to change any of the settings mentioned in Step 3. Then press the "End" button the bottom-right. Another summary screen will be displayed. Ensure that the box next to "Save Changes" is checked. Then press "Exit" in the bottom-right corner. The GC2 System will reboot to complete the process.
Did you find this answer useful?
We offer alarm monitoring as low as $10 / month
Click Here to Learn MoreRelated Products

- Answered
