How Do I Program the Honeywell 5806W3 to the 2GIG GC3?
You can program the Honeywell 5806W3 to the 2GIG GC3 by opening the wireless zones menu for the GC3, putting the system into its learn mode and then activating the device's test switch. The settings for the Honeywell 5806W3 should then be configured so that it functions properly.
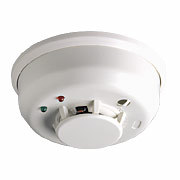 The Honeywell 5806W3 is a wireless smoke detector that uses a photoelectric sensor to detect the presence of smoke. Unlike its big brother, the 5808W3, the 5806W3 does not provide detection for heat or low temperatures.
Complete the following steps to program the Honeywell 5806W3 to the 2GIG GC3:
1. Open wireless zones. Begin from the main screen on the 2GIG GC3 Security Panel. Press the 2GIG logo in the upper-right corner of the screen. Provide the system's Installer Code to continue (the default code is 1561). Choose System Configuration, then Wireless Zones. This will open the Wireless Zones Menu.
2. Choose a zone. Locate an available zone on the left side of the screen. Click on the zone to highlight it. Then click the "Edit Zone" button to configure the settings for that zone. The following menu will allow the user to program and configure the sensor.
3. Program the 5806W3. Choose the following settings for the zone:
- Sensor Type: Set either "09 - 24-Hour Fire" or "16 - 24-Hour Fire Verification". These are the same setting, except 16 will require that the device is activated a second time after 30 seconds have passed before an alarm will occur. The 09 setting will have an immediate alarm occur when the sensor is activated.
- Equipment Code: The 5806W3 is not listed in the 2GIG GC3 Equipment codes. Instead, choose "0859 - HW Smoke 5808W3". This will allow the 5806W3 to function as normal with the 2GIG GC3.
- Serial Number: Click the Learn button in the lower-right corner of the keypad on the screen. Then use a paper clip or other thin object to activate the test button on the 5806W3 Smoke Detector. The GC3 System should recognize the device and enroll it.
- Equipment Age: This has no affect on the operation of the 5806W3. Choose "New" if the device is being used for the first time. Choose "Existing" if the device was previously used with a different alarm system.
- Loop Number: Choose Loop 1.
- Transmission Delay: Set the transmission delay to "Disabled" so that the system sends an alert to Alarm.com immediately after the device has been activated.
- Voice Descriptors: Choose a name that will allow you to quickly identify the 5806W3. Some examples of good names include "Bedroom Smoke", "Hallway Smoke" or "Living Room Smoke".
- Sensor Reports and Supervision: Set these options to "Enabled".
- Sensor Chime. The chime option should be "Disabled", as the alarm will sound once the 5806W3 has been activated.
4. Save the changes. After adjusting the settings, press the "Return to System Configuration" button at the top of the screen. Then press the back arrow on the left, followed by "Save" to confirm all of the changes. The GC3 System will then complete the enrollment process for the 5806W3.
Did you find this answer useful?
We offer alarm monitoring as low as $10 / month
Click Here to Learn MoreRelated Products

- Answered