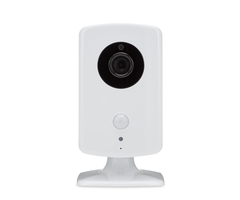
How Do I Set Up My 2GIG HD100 Camera with Alarm.com?
The 2GIG HD100 Camera can connect to the network using WIFI setup via WPS, WIFI setup through the Alarm.com customer website, or with a wired Ethernet connection. Once the camera is connected to the network, it can be configured to work with Alarm.com remotely through the customer's website.

Setting up the 2GIG HD100 camera involves two separate actions. First, the camera must be connected to the customer's network. This can be achieved in a number of different ways. The first of which is via WIFI through WPS.
If your router supports WPS, follow these steps:
1. Begin WPS pairing. With a router that supports WPS (WIFI protected setup), press the WPS button on the router until it goes into its WPS pairing process. This procedure may differ per router. Read the instructions for your router to complete this step successfully.
2. Pair the camera. Press the WPS button on the back of the camera. The camera will begin pairing with the router. While in WPS pairing mode, the camera will display a blinking Yellow LED. Do not touch the camera while in this mode. A successful pairing will be indicated by a solid Green LED.

If your router does not support WPS, and you still wish to use the camera with a WIFI connection, follow these steps:
1. Connect via Ethernet. Temporarily connect the camera to the router with an Ethernet cable.
2. Configure using Alarm.com. Use your Alarm.com credentials to log into the Alarm.com customer website: www.alarm.com/login
A note about the MAC address on the 2GIG HD100: There are two MAC addresses printed on the back of the camera. One marked ETH, and another marked WIFI. Alarm.com uses the ETH MAC when the camera communicates with the customer website regardless of how the camera is connected to the network.

If you need to look in your router's client list to find the camera, it will show the ETH MAC when the camera is connected to the network via an Ethernet cable. It will display the WIFI MAC if the camera is connected to the network via WIFI.
Once you have logged into Alarm.com, go to Video, then Settings, and click on "Add Video Device". The device you use to login to Alarm.com and the HD100 camera should both be connected to the same network for the camera to be found.

The 2GIG HD100 will not show up automatically. You will need to search for it:

Once the camera has been located, give it a name. Then click Install:


Once the initial install has been completed, if you want to set the HD100 up on a WIFI network, select "Set Up Wireless Now":

Choose "Scan for Networks" to have the camera automatically search for your WIFI network's SSID. If your network is set not to broadcast the SSID, you may need to select "Set Up Manually". These steps assume the SSID is being broadcast. The HD100 requires a 2.4 GHz network connection:


After Scanning for networks, a list of available networks will be shown. Choose the correct network. Then click "Next":

From this point, follow the on-screen prompts to enter the password and join the WIFI network. When prompted, remove power cable and ethernet cable. Then re-apply power, and press "Next":


Did you find this answer useful?
We offer alarm monitoring as low as $10 / month
Click Here to Learn MoreRelated Products

Related Categories
- Answered
- Answered By
- Julia Ross
